Are You Wanting To Become a Pilot?
Find Out How to Save Hundreds to Thousands of Dollars When it Comes to Your Flight Training!

Recent Posts

How Long Does it Take to Become a Helicopter Pilot?


The decision to learn to fly a helicopter is one that takes a long time to think about. Part of that thought process is how long it is going to take to complete your training. Every individual is different and there are some factors that will determine how long it will take you.

On average, a helicopter private pilot certificate takes 2 – 4 months of full-time training. A commercial helicopter pilot certificate can then take another 2 – 6 months. For most students, completing a full-flight training program of PPL, CPL, CFI & CFII takes 8 – 12 months.

The first question is part-time, full time or a mixture of both? For me personally, I completed my Private Pilot Certificate part-time while I worked, then I went into full-time training for my commercial and onwards.

The aim of this article is to break down the time it takes ON AVERAGE to get each type of helicopter pilot certificate. This will allow you to see how the timescales would best fit your situation.

How Long To Get a Helicopter Private Pilot Certificate?

The first certificate you will need to obtain to be able to go off on your own and fly without an instructor in a helicopter is the Private Pilot Certificate.

The Robinson R22 is a Great Helicopter for Training & Ownership

This will allow you to rent or own a helicopter providing you pay at least 51% or an equal share of the hourly costs and you are not compensated for doing so, ie: You cannot make money from flying, this requires a Commercial Pilot Certificate!

The FAA requirements to become a RW (Helicopter) Private Pilot are:
14 CFR Part61 Subpart E §61.109(c)

Minimum Age:17
Any Previous License Required:Student Pilot, Sport Pilot or Recreational Pilot
Total Flight Hours Required:40
Dual Hours Required:20
Solo Hours Required:10

These are the bare minimum hourly requirements set by the FAA. I can tell you that I have NEVER seen a student complete their training to a satisfactory proficiency to pass their examinations in these times.

Most students will take between 50 – 80 flying hours to fully complete their flight training syllabus. How often you fly will dictate the duration. As I mentioned earlier, I did my PPL (Private Pilot License/Certificate) part-time and it took me 2.5 years and 67 hours.

The more often you can fly, the sooner you will gain your certificate.
Here is an example, but tailor it to suit your schedule:

Flying Saturday & Sunday Only:

1.5 Hour Flight Every Morning & 1.5 Hour Flight Every Afternoon
= 3 Hours Per Day x 2 Days Per Week
= 6 Hours Per Week


Average Totals:
50 Hours ÷ 6 Hours = 8.5 Weeks To Complete
80 Hours ÷ 6 Hours = 13.5 Weeks To Complete


Flying Full Time

If you were to enroll in a full-time flight training program with enough aircraft and instructors to fly when you wish, these would be some typical scenarios:

Flying Monday – Friday Only:

1.5 Hour Flight Every Morning & 1.5 Hour Flight Every Afternoon
= 3 Hours Per Day x 5 Days Per Week
= 15 Hours Per Week


Average Totals:
50 Hours ÷ 15 Hours = 3.5 Weeks To Complete
80 Hours ÷ 15 Hours = 5.5 Weeks To Complete


Flying 7 Days Per Week:

1.5 Hour Flight Every Morning & 1.5 Hour Flight Every Afternoon
= 3 Hours Per Day x 7 Days Per Week
= 21 Hours Per Week


Average Totals:
50 Hours ÷ 21 Hours = 2.5 Weeks To Complete
80 Hours ÷ 15 Hours = 3.5 Weeks To Complete


No matter how often you fly you will also need to:

  • Schedule in Stage Checks (if applicable), 1, sometimes 2, with a Check Instructor
  • Complete your Ground Theory Study
  • Schedule & Sit your PPL Helicopter Written Theory Examination
  • Schedule your PPL Helicopter Flight Test – Known as a Checkride

Flying twice a day can sometimes become too much for many students as the mental fatigue from flying and studying can really become intense. Weather and aircraft & instructor availability also play a large role in the duration as it is always best to stick with the same instructor for continuity.

On Average, Most Full-Time Flight Students Will Complete Their Helicopter Private Pilot Certificate in Around 2 – 4 Months

Learn More
Try These Articles:
* How Much Does it Cost to Become a Helicopter Pilot?
* Learning To Fly Helicopters – Is it really that hard?

How Long To Get a Helicopter Instrument Rating?

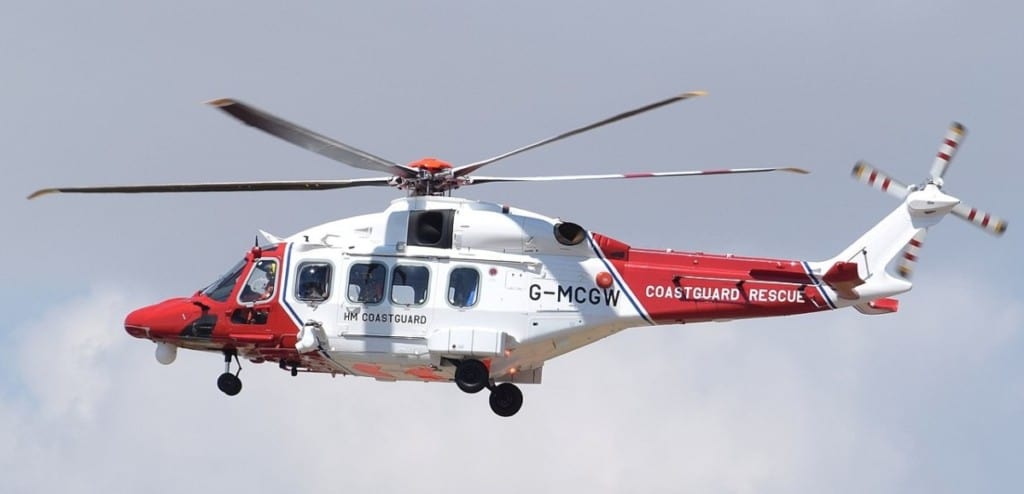
If you wish to be able to fly in poor weather in a helicopter then an Instrument Rating is the option for you. Maybe you are looking to purchase your own Twin-Engine, Single-Pilot IFR capable helicopter like a Leonardo AW109, for example.

My Time In Full Motion Simulators Are Great Fun!

The instrument rating not only opens up far more opportunities to fly, but it also makes you a safer pilot because you will have the skills and knowledge to be able to get yourself out of an ‘Inadvertent Entry Into IMC’ situation if it ever occurred.

The Instrument Rating can take a lot of work to understand how the IFR (Instrument Flight Rules) system operates and learning to fly by sole reference to the aircraft’s instruments takes a little practice. Some of the flight time may be completed in a simulator and depending on the sophistication of the simulator, that could be as much as 20 hours or as little as 10 hours.

The FAA requirements to obtain a RW (Helicopter) Instrument Rating are:
14 CFR §61.65(a,b,c & e)

Any Previous License Required:Private Pilot
Total Flight Hours Required:40
Dual Hours Required:15

Most students will gain their instrument rating in 40-45 hours of training.

Flying 7 Days Per Week:

1.5 Hour Flight Every Morning & 1.5 Hour Flight Every Afternoon
= 3 Hours Per Day x 7 Days Per Week
= 21 Hours Per Week


Average Totals:
40 Hours ÷ 21 Hours = 2 Weeks To Complete
45 Hours ÷ 21 Hours = 2.5 Weeks To Complete


Just like the Private Pilot Certificate, you will also need to:

  • Schedule in Stage Checks (if applicable) 1, sometimes 2 with a Check Instructor
  • Complete your Instrument (IFR) Ground Theory Study
  • Schedule & Sit your IFR Helicopter Written Theory Examination
  • Schedule your IFR Helicopter Flight Test

The one thing you have to remember here is that the flight school’s amount of IFR-capable helicopters and simulators may be very limited and you may only be able to fly only once per day, or even less because of availability.

Getting your IFR rating in 2-3 weeks will take a real alignment of the stars and a tremendous amount of home study on your part. Changing your brain’s way of thinking from all that you know about aviation flying under VFR (Visual Flight Rules), to now flying IFR takes some time for the ‘Penny To Drop’.

On Average, Most Full-Time Flight Students Will Complete Their Helicopter Instrument Rating in Around 1-2 Months


Join My Newsletter & Get Great Tips, Information and Experiences To Help You Become a Superb Pilot!

* indicates required
Your Interest: *

How Long To Get a Helicopter Commercial Pilot Certificate?

If you wish to be a pilot for a career then a Commercial Pilot Certificate is what you will need to be compensated for your time, skill, and work. The training involved to become a commercial helicopter pilot builds on the skills and experiences you learned during your Private Pilot Certificate and refine them.

Commercial Flying Operations is Fun & Challenging Flying

The FAA provides students with two paths they can follow to obtain their Commercial Pilot License – CPL, (License & Certificate are the same thing).

The first path is using the Part 61 regulations and this allows for unaccredited schools and freelance flight instructors to train you in a more flexible and relaxed program.
To be able to apply for the Part 61 Commercial Helicopter Checkride you will need to have 150 HOURS of flight time and cover the requirements set out in 14 CFR Part 61 Subpart F.

The second path is using the Part 141 regulations and this allows for accredited schools and their flight instructors to train you in a rigid, approved training program. The part 141 program allows for lower hours to be flown because the school’s program is accredited by the FAA.
To be able to apply for the Part 141 Commercial Helicopter Checkride you will need to have 115 HOURS of flight time and cover the requirements set out in 14 CFR Part 141 Appendix D.

Only certain flight schools are accredited for the Part 141 program so you will have to research the schools where you wish to fly if you want to take that route. Outside of that, any instructor can teach you under Part 61. This is especially helpful if you have your own helicopter and wish them to train you on it.

Those accredited schools can also teach under Part 61 so may swap back and forth between 61 & 141 for which path best suits the individual student.

So let’s look at how you get to 150 hours and 115 hours:

Part 61 – 150 Hours

14 CFR Part 61 Subpart F requires you to have the following before applying for the CPL Checkride:

Minimum Age:18
Any Previous License Required:Private Pilot
Total Flight Hours Required:150
Dual Hours Required:20
Solo Hours Required:10

You will need to take your hours you finished your PPL at and then see how many more hours you need to fly to ‘Build The Time’. This is a typical path for students in a ‘Professional Pilot Program’ as it allows them to complete their Instrument Rating during their ‘Hour Building’.

For Example:
Completed PPL at 70 Hours = 150 – 70 = 80 hours left to fly before applying for the CPL Checkride. Within that 80 hours, you will need to complete all the requirements set out in Part 61 Subpart F.

Many students will use that 80 hours to include their Instrument Rating as all that time (40-45 hours) counts toward the 150. In effect, it’s like getting the Instrument rating for free as you have to fly those hours anyway. This was the route I personally took, and most students do too.

Most students are ready for their CPL Checkride at 150 hours, so let’s look at the minimum and average timescales:

Flying 7 Days Per Week:

1.5 Hour Flight Every Morning & 1.5 Hour Flight Every Afternoon
= 3 Hours Per Day x 7 Days Per Week
= 21 Hours Per Week

Time to complete 80 hours = 4 weeks

I can tell you from experience that no one I have ever known has trained for an entire PPL & CPL 7 days a week. It is just too much! 5 days per week is a typical routine – provided the instructor and flight school is able to accomplish 2 flights per day.

Flying 5 Days Per Week:

1.5 Hour Flight Every Morning & 1.5 Hour Flight Every Afternoon
= 3 Hours Per Day x 5 Days Per Week
= 15 Hours Per Week

Time to complete 80 hours = 5.5 weeks

Even flying 2x per day, 5 days a week while studying can be tough! Many students will do 1 flight and 1 ground school lesson each day with their instructor, then go home to absorb the flight lesson and continue studying their theory material.

On Average, Most Full-Time Flight Students Will Complete Their Part 61 Helicopter Commercial Certificate in Around 3-4 Months

Part 141 – 115 Hours

14 CFR Part141 Appendix D requires you to have the following before applying for the CPL Checkride:

Minimum Age:18
Any Previous License Required:Private Pilot
Total Flight Hours Required:115
Dual Hours Required:30
Solo Hours Required:10
Ground Hours Required:30

Again, we will base this timescale on you completing your PPL in 70 hours, but notice how this route has a mandatory 30 hours of ground school applied to it. Depending on the school this could be done as classroom-based training which you would have to work into your flight training schedule.

For Example:
Completed PPL at 70 Hours = 115-70 = 45 hours left to fly before applying for the Checkride. Within that 45 hours, you will need to complete all the requirements set out in 14 CFR Part141 Appendix D.

As this is a set syllabus students will only train for their commercial certificate. They will not be able to complete their Instrument Rating like they could if they took the Part 61 path. The Instrument Rating will have to be completed after the Commercial Certificate has been gained.

Flying 5 Days Per Week:

1.5 Hour Flight Every Morning & 1.5 Hour Flight Every Afternoon
= 3 Hours Per Day x 5 Days Per Week
= 15 Hours Per Week

Time to complete 45 hours = 3 weeks

Again, remember you have to fit in 30 hours of mandatory Ground School into this timescale too, and all the flight training, stage checks, the written test, and flight test! Getting all that done in 3 weeks never happens! Your brain would melt and the school scheduler would require a serious bottle of wine or Scotch from you!

On Average, Most Full-Time Flight Students Will Complete Their Part 141 Helicopter Commercial Certificate in Around 1-3 Months with NO Instrument Rating

Where Are We Up To Realistically?

So let’s do a small recap of where you could be if you wanted to become a Helicopter Pilot:

Average time to get a Private Pilot Certificate training full-time:
2 – 4 Months

Average time to get a Part 61 Commercial Pilot Certificate training full-time:
3 – 4 Months

Average time to get a Part 61 Commercial Pilot Certificate WITH an Instrument Rating training full-time:
3 – 4 Months

Average time to get a Part 141 Commercial Pilot Certificate with NO Instrument Rating training full-time:
1 – 3 Months


To go from zero experience to walking out of flight school ready for work with a Commercial Helicopter Pilot Certificate takes roughly:

PPL & CPL with No Instrument Rating = 3 – 7 Months

PPL & CPL with an Instrument Rating = 5 – 8 Months

Even at this rate, you will have to be a very disciplined studier, come to lessons prepared for every flight knowing what you are going to be doing, having the weather on your side, maintenance on your side, and still, it will be one of the hardest years of your life, but man, is it worth it.


Now I am not going to lie, it is going to be hard to find a job straight out of flight school. The hardest part of all your journey so far could be getting that first job! To help you increase your chances of gaining employment, becoming a flying instructor is one of the options the FAA allows you to do and most flight schools look to hire their own students.

Yes, it is crazy having someone who has just left flight school begin teaching people how to fly, but if done with the right attitude it can be done safely, efficiently, and can be some of the most memorable years of your life.

This was the route that I took and I loved it!

Students Can Become Great Friends!

When you wish to reach this far into your training I highly recommend you read these next!

To Finish

Learning to fly is one of the best decisions you will ever make but it is not something that you can rush. You may think you are a great student, but your body may tell you otherwise! I completely hit a plateau during my Flight Instructor training and I was a wreck for two whole weeks. No idea what happened – I just never progressed one inch!

We are not invincible and rushing only leads to frustration. Take your time to absorb all the flight instruction, ground instruction, and have fun while learning to fly!

Every student is different so use this article to give yourself a rough timeline of the training you wish to do and allow yourself plenty of extra time. You will get there eventually, so you might as well take your time and enjoy the journey!

I still miss my flight school days even 15 years later!

Oh, and you might find this interesting too:

Can Helicopters Take Off & Land On Runways?


We all know that helicopters can lift straight up and take off, so why is it we sometimes see helicopters taking off and landing on a runway? It’s only airplanes that use the runways, right?

Runways provide clear areas for safe acceleration & deceleration of helicopters to avoid hazardous flight parameters. Dust & debris is regularly cleared from runways preventing rotorwash damaging other aircraft & property. In low visibility conditions, the runway lighting system helps pilots see.

As a pilot, it all comes down to operational choice when deciding to use a runway or not. There are many factors that affect that decision and these factors can change on an hourly basis making the use of the runway preferable or not.

Here are some of the main reasons why you will see a helicopter using a runway to land and takeoff.

Recommended Flight Profiles

Every helicopter with only a single engine will have a chart published by the manufacturer called its ‘Height/Velocity Diagram’ – Also known as the ‘Dead Man’s Curve’. Each manufacturer’s diagram is slightly different in terms of its values, but they all look very similar to this.

The areas in red are the areas to avoid flying in because if the engine were to stop when the aircraft is in one of these red areas, a safe autorotational landing may not be achievable. A helicopter’s best friends are Height & Airspeed. If you don’t have one, try and get the other. If you don’t have either and the engine stops, then you need luck on your side!

As a pilot, if you want to be in a high, zero-airspeed hover, try and be above 800ft above the ground if flying a helicopter for which this diagram applies to. This gives the pilot time to drop the nose and accelerate to perform a safe autorotational landing.

If you want to be low & fast, try flying above 15ft above the ground. This will allow the pilot to balloon the aircraft up into the air and gain height to perform an autorotational landing if the engine stops.

For Example:
When taking off, the chart tells the pilot to remain around 5ft above the ground until accelerating to 50kt, then begin the climb out.

This gives you speed when you don’t have height.

If the pilot were to take off vertically to 100ft before accelerating away and the engine quit before the aircraft reached around 54kts, the chance of a safe autorotational landing is slim.

This is the main reason why a runway is used by helicopters with only one engine. To provide enough room to accelerate to 50 kts before climbing away.

Helicopters with two or more engines are not generally bound by the same diagram as they usually have the capability to fly away on just a single engine, if one were to fail.

Obstruction Avoidance

This one may seem obvious and it is. Runways are generally clear of obstacles that can be hit by a helicopter. I say generally because there are times when the runway is occupied by other aircraft, vehicles, and wildlife.

If a pilot taxis to and departs from a runway they will be guaranteed not to hit anything, providing the runway is clear. This is especially important when operating in low visibility conditions or at night.

Airports Are Full of Weather Sensor Antennas – Source: Eric Phelps

When I was instructing, one night I saw a helicopter approaching to land and come frighteningly close to hitting a small radio antenna in one of the grassy areas. If the pilot had made their approach to the runway this near-miss would never have happened!

FOD – Foreign Object Debris

Helicopters create their own windstorms from the rotorwash and an item caught by this wind can create anything from a minor irritation to millions of dollars in damage.

FOD can be anything from dust, sand, garbage, washers, nuts, wigs, hats, or anything that can be moved by the wind created from an aircraft. I had to be so careful of this when flying the air ambulance and landing at patients’ properties, plastic lawn chairs and tarps were the usual FOD culprits!

Airports have very strict apron, taxiway, and runway cleaning policies to ensure that FOD is not present to cause damage. Wheeled helicopters can ground taxi using far less rotorwash than air taxiing. When there are multi-million dollar aircraft parked close by, ground taxiing to the runway and departing will prevent less dust and debris from peppering those aircraft compared to a vertical take-off straight from the hanger.

If a helicopter does not have wheels, a vertical takeoff from the hanger may be preferred, but this would then put the helicopter into the H/V diagram. This is where an operational decision would be made by the pilot.


Join My Newsletter & Get Great Tips, Information and Experiences To Help You Become a Superb Pilot!

* indicates required
Your Interest: *

Air Traffic Control

At busy airports, air traffic control (ATC) may require the pilot of the helicopter to taxi and takeoff from the active runway to help with traffic separation. All airplanes landing and taking off follow a set flow into and out of the airport.

For a helicopter to then go screaming through that flow in a totally opposite direction could create additional work for the air traffic controller at a very inopportune time.

Many a time I have been cleared to leave only from the runway and fly the runway heading before ATC has given me permission to turn on course. This doesn’t happen too often, but it is a common reason why helicopters may use a runway to takeoff.

Low Visibility Conditions

Being able to see when landing and taking off is quite an important factor I feel. I know I rely on my sight during those times, however, mother nature can create conditions that turn a perfectly clear day into zero visibility in the blink of an eye.

Weather

Heavy rain, fog, very low cloud, mist, and smoke from wildfires can drop the forward visibility to nothing. To help guide the helicopter around the airport and onto the runway pilots will use the airport lighting systems to help them see and navigate.

Offshore helicopters can take off in as little as 1/8sm visibility. They will begin accelerating and takeoff to around 5-10ft while continuing to accelerate to around 60 knots, at which point the pilots will climb away into the murkiness of the day.

Lifting from a helipad and flying away requires far more visibility and cloud height, usually at least 1/2 to 1 mile. By using the runway, commercial helicopters can depart when the weather is much worse.

Snow & Dust

Areas of snowfall and sandy, dusty areas will be turned into zero visibility the second they get picked up and blown around by a helicopter rotorwash.
Watch this video of a CH53 doing just that:

To help prevent this, especially when taking off or landing on dusty runways, helicopters with wheels can do a running takeoff or running landing which keeps the dustball behind the cockpit, allowing the pilot to see.

For helicopters with skids, this proves more difficult as they have to lift into a hover to move the aircraft, however, the helicopters with skids are smaller and tend to not create as much of a whiteout/brownout as their larger and heavier counterparts.

Why Do Helicopters Use Helipads?

Helicopters use helipads as they provide a clear area for approach, landing, and departure. Most helipads are surveyed to ensure the areas around the pad are cleared of obstacles and obstructions or those obstructions are lit with lights or marked for pilots to see. Helipads are also kept free of debris.

Think of helipads like a miniature runway. They provide the pilot an aiming point to land that is clear of obstructions, debris, and people. When a helipad is designed it also has approach and departure corridors designed to allow the safe ingress and egress for the helicopter both day and night. These corridors can be published so the pilots have a clear understanding of the safest routes in and out.

Helipads are most commonly found at hospitals, building rooftops, city heliports, and luxury premises. Having a designated area for helicopters to operate to and from keeps the risk associated with helicopters to a minimum.

To Finish

Helicopters will mainly use the runway to provide a safe area for departing and landing to give the pilot the greatest chance of success if an emergency occurred. Keeping dust and debris from creating problems for the pilot, other aircraft, property owners, or bystanders is solved by also using the runway.

A runway is not always the best option for a pilot but generally, if it’s available it makes good sense to use it.

Further Reading

If you found the article helpful, you may also like these:

Why are New Aircraft Green or Yellow?


This week we got a photo from Airbus of our new H125 helicopter under production and while showing the photograph to my son he asked why it was green and yellow and not painted properly.

During manufacture, aircraft parts are coated with yellow anti-corrosion Zinc-Chromate primer paint. This coating protects the aluminum skin from corrosion by oils, grease, and moisture. Paint is added on top of the Primer. The different shades are parts from different factories.

We have all seen these patchwork aircraft and there is a reason for them being like this, so let’s have a look and see whey they do it.

What is a Green Aircraft?

A green aircraft is a nickname given to an aircraft that is under manufacture because of the color of its components. One of the biggest enemies of an aircraft over its lifetime is corrosion from the elements.

Corrosion can cause the weakening of a component that can lead to premature failure, and in the wrong component, this could be enough to cause catastrophic damage.

One of the major reasons why aircraft are so thoroughly inspected is to look for corrosion, even to the point where components are completely stripped of paint, inspected, and repainted several times throughout the aircraft’s life.

To help overcome corrosion, all aircraft components that are susceptible to corrosion are coated with a special anti-corrosion solution. Some of the main industry names for this chemical conversion coating are called Alodine,  Iridite, and Chromate.

When it was first used in the 1930s, Zinc-Chromate was a salt that was composed into a liquid solution that was easily brushed and sprayed to cover a fuselage panel or component in a weather-proof skin.

However, it was found that it was highly toxic and also a carcinogen! – See the Medical Paper Here. Since then, chemical manufacturers have been able to produce a modern version that is a lot nicer to use!

The way that the Alodine coating works is by chemically bonding to the upper surface layer of an aluminum component or panel, providing protection and giving a perfect surface for the paint to adhere to, hence why it is also used as the aircraft’s primer coat.

Why are Aircraft Covered in Different Shades of Primer?

Green Aircraft can look like a real patchwork of greens, yellows, and every shade in between, but why is that? The main reason is that many components for an aircraft are manufactured, either by different factories of the same manufacturer or by completely different manufacturers altogether.

Each facility may use a different brand or series of Zinc-Chromate primer which differs in their shade. When all the components arrive at the assembly line this is when it’s very noticeable.

The main reason why the shades can differ is by adding a paste called Lamp Black which helps to protect the Zinc-Chromate from UV damage. Raw Zinc-Chromate is unprotected from ultra-violet radiation so each coating manufacturer has its own blend of ingredients that go into its mix. The more paste they add to the Zinc-Chromate, the greener the shades become.


Join My Newsletter & Get Great Tips, Information and Experiences To Help You Become a Superb Pilot!

* indicates required
Your Interest: *

If you take a look at the internal fuselages of many WWII-era aircraft you will see they are a dark green compared to today’s yellow-based components. This is because more Lamp Black paste was used in the primers back then.

Today, evolution in Zinc-Chromate coatings has mostly eliminated the need for large amounts of Lamp Black in the formulations. However small amounts are still used, hence the differences in color and shade.

Learn More
Try These Articles:
* Helicopter Maintenance – How Often Do Helicopters Need Looking At?
* Can Anyone Build a Helicopter? Top 5 Kits

Why Do Some Aircraft Look Like They Are Covered In Green Plastic?

Many large airliners like those from Boeing, Airbus, and Bombardier, can be seen to be covered in what looks like a green plastic wrap. The main reason for this is to protect the Zinc-Chromate finish on the fuselage panels during assembly.

A Covered Boeing 747 Freighter Awaiting Paint – Source: Cory Barnes

As workers assemble the aircraft, the anti-corrosion coating can be scratched or dented by tools, rings, watches, or assembly jigs which would then leave an opening in the protective layer. Left unnoticed, this area would then have to be touched up by the aircraft painters, giving them more work. If it was not touched up, that scratch/dent could then be prone to corrosion over the life of the aircraft.

The green sheeting is applied to the aircraft just like a vinyl wrap is done to a vehicle. This gives it a second skin to help protect the corrosion coating. Once fully assembled the aircraft is then flown or driven to the paint facility where this protective sheeting is stripped off and the surfaces are cleaned and prepared for painting.

Do All Aircraft Start Off Yellow or Green?

The short answer is No. Modern aircraft like the Boeing 787 Dreamliner are comprised almost entirely of carbon composite. Carbon is not susceptible to corrosion, therefore it does not require the yellow Zinc-Chromate anti-corrosion primer.

For all other aircraft that are aluminum, the need for corrosion protection is required, usually in the form of Alodine.

So then, how come American Airlines have run their aircraft with their fuselage panels as polished aluminum? Surely they must have some kind of corrosion protection on them?

The way that polished aircraft are protected from corrosion is the polishing itself. About 3x each year a polished aircraft is brought into a hanger, thoroughly washed, and waxed with mechanical buffing machines. This layer of wax protects the fuselages and unpainted components but must be done regularly to provide protection.

Normally an aircraft is repainted every 4 years, but a polished aircraft can save on those costs, let alone the weight of the paint added to it.

To Finish

The many shades of yellow and green you see on new aircraft are the corrosion protection system used to prolong the life of the panel and components that make up aircraft. As most aircraft can spend the majority of their life outside in the elements they need to be able to last to ensure they are worth the huge amounts of money it cost to purchase and maintain them.

The ratio of Zinc Chromate with Lamp Black paste is what causes the different shades and depending on the facility that applies the protective coating, will dictate the shade in which that component appears.

How Do Helicopter Engines Work? The Pilot Explains


There is no doubt that helicopters are an incredible piece of engineering, but without their engines, they would be useless. Providing an engine that is lightweight, powerful, fuel-efficient, and reliable is paramount for it to work successfully in a helicopter.

Helicopter engines can be either piston or gas turbine turboshaft. Air is drawn in, compressed, mixed with fuel, ignited, then the rapid expansion of the gas is harnessed to turn a drive shaft which is fed to the main transmission. The engines use gasoline (Avgas) or Kerosine (Jet A1) to power them.

The size of the helicopter will dictate which type of engine and how many of those engines are used. There are pros and cons to each type of engine, but both types are highly engineered and well-tested to ensure they meet the highest quality standards – If they didn’t, there is no way I would strap my butt to one!

Let’s take a look at these different types of helicopter powerplants…

Types of Helicopter Engine

As briefly mentioned, there are two types of helicopter engines:

  1. Piston or Reciprocating Engine
  2. Gas Turbine Turboshaft Engine

This article will break down each engine type, how it works, the components that make it work, and how it drives the helicopter.

Piston Helicopter Engines:

The Cabri by Guimbal is a Popular Piston-Powered Training Helicopter – Source: James

Piston helicopter engines are used mainly in today’s smaller, modern helicopters up to around 5 seats and weighing no more than around 2500 lbs (1135 kg). Before the advancement in gas turbine technology, piston engines were used in bigger helicopters like the early model Westland Whirlwind HAR.5s of the 1950s.

Today’s helicopter piston engines are normally 4 or 6 cylinders, horizontally opposed designs running on aviation gasoline, more commonly known as Avgas. They are incredibly reliable, but heavy compared to the power they create. For this reason, they are limited to the smaller helicopters.

How Do Piston Helicopter Engines Work?

The piston engine on a helicopter is very similar to the engine in your car. Air is sucked into the engine through a carburetor or an air intake for the models that are fuel injected. This type of engine is a 4 stroke engine, which has 4 stages of operation.

Once the engine has started:

  1. Intake Stage – As each piston in its respective cylinder is drawn downwards by the crankshaft, a valve (Intake Valve) at the top of the cylinder is opened and air is sucked into the cylinder along with atomized fuel – Both are measured to provide the optimal ratio of fuel to air.
  2. Compression Stage – Once the piston reaches the bottom of the cylinder it then begins to rise back up the cylinder. At this point, the intake valve closes and seals the cylinder. This causes the fuel/air mixture to become increasingly compressed as the piston rises.
  3. Power Stage – Just as the piston reaches the top of its travel a spark plug fires and ignites the explosive fuel/air mixture. This causes the gas to rapidly expand and dramatically increase its pressure, forcing the piston back down the cylinder.
  4. Exhaust Stage – The piston reaches the bottom and momentum and the other cylinders firing cause the crankshaft to continue rotating and the piston begins rising back up its cylinder. At this point, another valve (Exhaust Valve) opens to allow the spent gas to exit the cylinder. As the piston reaches the top of its travel, the exhaust valve closes and the cylinder is ready for the next cycle.
Animation By Zephyris

The animation you see is just one of the 4 or 6 cylinders that make up a typical helicopter engine. The other difference is that the cylinders lie horizontal with the crankshaft running through the middle of the engine block. This allows the engine to be compact and cooled easily because the tops of the cylinders can be placed into airflow more easily by the helicopter designer.

Robinson R22 Engine Detail – Source: Hengist

In this image, you can see the 2 right-hand cylinder covers (Bronze Colored Squares) of this 180hp, derated to 145hp Lycoming O-360 engine. To create enough cooling airflow, Frank Robinson (The original designer of this helicopter) created this fan shroud that pulls in air from the large round air inlet, goes through an engine-driven, squirrel-cage fan, and then blows across the cylinders to keep them cool, especially when the helicopter is hovering and there is no airflow from forward flight.

The crankshaft from the four pistons then connects to the drive system to power the helicopter.

How Does a Piston Helicopter Engine Drive The Transmission?

Once the engine starts, its driveshaft begins to immediately start rotating. The main problem here is that to get the main rotor system turning as soon as the engine starts would be too much drag on the engine and it would not start.

So, to allow the engine to easily start the helicopter’s main drive system is disconnected from the engine until the pilot activates the drive-engagement system.

The main way that a piston helicopter connects to the drive system of the helicopter is by a belt drive.

A grooved pulley is connected to the engine and a second grooved pulley is connected to the input driveshaft for the transmission. When the helicopter starts, the v-belts are loose, allowing the engine pulley to rotate without driving the v-belts.

Robinson R22 Drivetrain & Clutch – Source: ATSB

Once the engine has started, the pilot activates the ‘Drive-Engagement’ system via a switch on the instrument panel. There are a few different belt tensioning systems on piston helicopters but they all do the same job.

The system will then begin to tighten the v-belts, either by activating a motor and gearbox to push the two pulleys away from each other, thus tightening the v-belts, or by an electric linear actuator that moves an idler pulley and pulls the v-belts tight.

Tensioning Idler Pulley on Schweizer 269 Helicopter

Once activated, the system will stay locked to keep the correct tension on the belts. Some systems, like those on the Robinson helicopters, monitor the belt tension and will automatically adjust the pulleys when in flight to maintain proper tension.

After the pilot has landed at the end of the flight, they will de-activate the tension system via the switch, and the motor will remove the tension from the v-belts, thus allowing the engine to be shut down while the main rotor is still spooling down.


Join My Newsletter & Get Great Tips, Information and Experiences To Help You Become a Superb Pilot!

* indicates required
Your Interest: *

Components of a Piston Helicopter Engine

Many of the piston engines used in today’s helicopters are very similar in design. They come in either carburated or fuel-injected models depending on the helicopter model.

Here are the main components of a typical helicopter piston engine:

Engine Block

Comprising of 4 or 6 cylinders, depending on the model, mounted flat at 180° to one another, known as ‘Horizontally Opposed’.

In the image you see here is a Lycoming O-360 reciprocating aircraft engine. This one is mounted to a Piper PA-28 airplane, but it is the same that powers the Robinson R22 Beta II series of helicopters. This image gives a great view of its layout.

Lycoming O-360 Series Aircraft Engine

The crankshaft runs through the middle of the engine block, the same as the camshafts that operate the intake & exhaust valves. Instead of where the propeller connects to the shaft, a vee pulley is connected in the helicopters. The two tubes running to each cylinder are the pushrods that open and close the intake and exhaust valves, and the fins you see near the ends of the cylinders are to give each cylinder maximum surface area for cooling.

Starter Motor

Does exactly what it sounds like. When the pilot turns the ignition key to ‘Start’ or presses the ‘Start Button’ the starter motor extends a toothed gear and starts it rotating under very high torque.

On the image above you can see the teeth surrounding the edge of the large flywheel. It’s these teeth that the starter motor engages with and beings to turn the engine over. The starter motor is hidden from view on the far right side of the engine.

Once the engine fires up, the button or key is released by the pilot, and the starter motor retracts its gear from the flywheel and stops rotating. The starter motor is no longer required for the remainder of the flight.

Alternator

The alternator is driven by a small v-belt off the main crankshaft. You can see the alternator just to the bottom left of the propeller in the photo above. The job of the alternator is to produce DC electrical power as soon as the engine crankshaft starts rotating.

The electrical power it generates is used to power all the aircraft lights, radios, GPS, instrumentation, and any electrical systems like the Drive-Engagement System, also referred to as the ‘Clutch’.

The second job the alternator has is to charge the battery. After every engine start the battery voltage becomes lower. To prevent the battery from becoming discharged over time and to be able to start the helicopter every time, the alternator recharges the battery during flight.

Magnetos

Magnetos are an engine-driven, electrical power-producing devices used to provide energy to the spark plugs to make them spark. There are two magnetos on the helicopter engine and each one operates independently of the other.

There are two spark plugs in each cylinder. One magneto supplies energy to one spark plug in each cylinder and the second magneto supplies energy to the other spark plug in the cylinders. Think of it as a set of upper spark plugs and a set of lower spark plugs. One magneto supplies the upper plugs, the other supplies the lower plugs.

Lycoming 6 Cylinder Aircraft Engine – Original Source: Triple-Green

Having the two independent systems allows for redundancy. If one fails, the other system can keep the engine running, albeit not as efficiently, but enough to get the helicopter home at slightly reduced power.

The nice things about the magnetos are that as long as the engine is turning, they will be producing the spark energy. They do not require any other outside influence which makes them great devices as they will still continue to operate if the aircraft has a total electrical failure.

Carburetor Heat

For the normally aspirated helicopter engines, they use a carburetor to mix the fuel and air to the correct ratio before it gets sent to the cylinders for combustion. When the helicopter requires more power, the carburetor’s butterfly valve opens and the suction from the intake stroke of the cylinders pulls in more air, by doing so, the venturi effect on the fuel line, pulls more fuel in too.

More Air and Fuel = Bigger Bang = More Power

When the air passes through the carburetor it naturally cools as part of the venturi process and it can cool by as much as 20°C. The problem with aircraft is that when they climb in altitude the ambient air temperature becomes colder. Once the aircraft begins to ingest cold, moist air ice can begin to form in the carburetor. Left to build, the ice will begin to close the gap used to ingest air and starve the engine of air and shut it down – Not good!

Robinson R22 Carb Heat Detail – Original Source: Hengist

To overcome this, a simple scoop collects hot air from around the engine exhaust and directs it to the air intake of the carburetor. This increases the temperature of the air going into the carb and can either prevent the ice build-up or help melt the ice.

The carb heat system is monitored by the pilot via a temperature gauge. The yellow arc dictates when temperatures are prime for carb icing.

The system is activated by pulling a lever in the cockpit to direct the warm air into the carb.

The carb air heat system is used before any reduction in power changes are made as the warmer air going into the engine reduces the power it produces.

1 minute – 30 seconds before reducing power, the flight manual recommends activating the system to melt any ice before the butterfly valve begins to close as the pilot reduces power. If ice is present, the gap between the butterfly valve and the wall of the carb can be completely closed off as the valve closes – This will cause the engine to stop.

A simple system that works well WHEN used correctly by the pilot. Many pilots have been killed due to carb icing when they forgot to activate the system before reducing power and their engine quit from air starvation.

Fuel Injection System

For increased engine performance many helicopter engines come with a fuel injection system rather than a carburetor system. One of the main benefits of a fuel injection system is that it helps eliminate any icing problems of the carb because there is no carb!

Fuel injection is exactly what it sounds like – It’s a system that injects fuel directly into each cylinder. The fuel is metered and injected at the correct time in the 4 stroke cycle via a fuel nozzle that atomizes the fuel as it dispenses.

The system uses a fuel pump to pressurize the fuel coming from the tank. It then goes through a valve that is also linked to the air intake valve, so when the pilot requires more power, it opens both the air intake and fuel flow valves to allow more air and fuel to pass into the engine.

The fuel is then sent to a distribution unit that directs it to the right cylinder at the right time. The air still goes to each cylinder via the air intake valve. Instead of mixing the air and fuel in the carburetor, the mixture is now mixed directly in the cylinder.

Because the fuel is metered and dispensed, increased performance and efficiency can be achieved using electronic systems to monitor and control the fuel flow to each cylinder.


Gas Turbine Helicopter Engines

The Leonardo AW101 Has 3 Gas Turbine Engines – Source: Mark Harkin

The gas turbine engine is the powerhouse of helicopter propulsion. The lightweight, compact design and high power output make them perfect for installation in a helicopter – But they are not cheap! Even the small ones start at the same price as an entire piston-powered helicopter!

The type of gas turbine engine used in helicopters is called a ‘Turboshaft’ gas turbine and this means that it harnesses the engine’s power and then sends that power to a drive shaft which the helicopter can then use to drive the transmission system.

Helicopters can have 1, 2, or even 3 gas turbine engines installed depending on their weight and design. Let’s go take a look…

How Do Gas Turbine Helicopter Engines Work?

There are two types of gas turbine engine designs used in helicopters.

1. The first is the Allison series which uses a kind of reversing airflow design:

Air is pulled in from the front, sent to the back of the engine then moved through the middle of the engine, and then exhausted out of the top. This type of engine is very common on Bell helicopters.

Bell 206 Jet Ranger With a Reverse Flow Engine – Source: James

2. The second kind of gas turbine is more of a straight-through airflow design and is more widely used:

Air enters through the intake and moves directly though the engine before exiting out the back.

Leonardo AW189 has Through-Type Engines – Source: Adrian Pingstone

Both engines use the same operating principle but differ in how their components are laid out physically.

Gas turbine engines work by pulling air into the front of the engine by a compressor. Most turboshaft helicopter engines have a two-stage compressor. This compresses the air, heats it, and increases its velocity.

The compressed air is then sent into the combustion chamber where it is mixed with atomized jet fuel and ignited. Once the engine is running the fireball keeps the engine self-sustaining providing the fuel keeps coming.

The gas rapidly expands and is pushed through the gas generator turbine/s. These turn in the airflow and connect to the compressor on the front of the engine. This keeps the compressor turning to bring in more air to keep the engine running.

After passing through the gas generator turbine, the gasses pass through the power turbine/s. The power turbines are not connected to anything in the engine except a gearbox that feeds a drive shaft that is used to drive the helicopter transmission. This is where the power is harnessed.

After passing through the power turbine/s the gas exits the exhaust of the helicopter.

Arriel 1D1 Turboshaft Engine From an Airbus AS350 Astar

Providing fuel is constantly added the engine feeds itself and stays running in an endless cycle. If more power is required, more fuel is added which makes a bigger bang, which spins the gas producer turbine faster, which spins the compressor faster, pulling in more air to mix with the increased fuel.

More Air and Fuel = Bigger Bang = More Power

How Does a Gas Turbine Helicopter Engine Drive The Transmission?

Depending on the design of the engine will depend on how the power is harnessed from the engine. Some turboshaft engines will have the power turbine connected to a gearbox that drives a drive shaft, or some can send a driveshaft out of the front or back of the centerline of the engine which can then be inserted into a gearbox mounted on the engine.

In the diagram below, the power turbine connects to the reduction gearbox right behind the power turbine. Drive (Orange) can be accessed from both the front and rear of this engine.

In the diagram below, the power turbines send a driveshaft through the center of the engine, and the reduction gearbox is located at the front of the engine. Drive (Orange) can only be accessed at the front of the engine:

Once the drive of the engine is accessed it is then just a matter of mounting a drive shaft between the engine and main transmission of the helicopter. When two engines are used they are mounted side by side and each driveshaft feeds into either side of the main transmission.

Unlike piston-powered helicopters, helicopters with a gas turbine engine do not need a clutch system to separate the engine from the transmission. Gas turbines allow the engine to start and begin rotating without turning the main rotor system because the Power Turbine/s are known as free turbines.

Even though the rest of the engine components are turning, the power turbine/s are only connected directly to the main transmission and will only turn when the gas flow through them is powerful enough to overcome the drag of the transmission. When the engine first starts, the flow of gas through the power turbine/s is low in volume, the air just passes through the power turbine blades without imparting any force onto them.

As the engine rpm increases during start, the volume of air passing through the power turbine increases, and at around 25% engine rotational speed, the gas flow will be strong enough to begin rotating the power turbine, which then drives the transmission, which in turn drives the main & tail rotors.

Components of a Gas Turbine Helicopter Engine

Although gas turbine engines look complex, their operation is quite simple. The components that make up a gas turbine engine are engineered to very tight tolerances to be able to handle the immense speeds and temperatures these things operate at.

For this explanation, we will look at the Arriel 1D1 engine that powers the AS350 B2 Astar. This is the one I’m currently flying and have lots of pictures of to help explain. Let’s start at the front of the engine and work our way through:

Compressors

Most gas turbine helicopter engines consist of a pair of compressors at the very front of the engine. The first compressor is an Axial Compressor. This compressor’s job is to suck in the air and begin to increase its pressure and velocity. It also smooths out the airflow ready for it to enter the second compressor – The Centrifugal Compressor.

The centrifugal compressor then increases the air pressure again and raises its temperature before it enters the combustion chamber.

Both compressors are mounted to the same shaft and spin together as one unit. Their speed is controlled by the Gas Generator Turbine (More on this later).

Bleed Valve

The bleed valve is located on top of the engine between the axial and centrifugal compressors.

The compressors of the engine are designed to work at maximum efficiency when at high RPM. During start and low power settings, the air flowing through the compressors is very slow and can cause the rotor blades of the compressors to aerodynamically stall.

To prevent the stall the bleed valve is held open by a spring to unload the compressor at engine start, acceleration, and low power settings. By doing this the compressor senses less restriction and runs more efficiently. As the engine rpm increases the valve is closed using air pressure generated by the engine. It’s a fully automatic system and works very well.

Combustion Chamber

Once the air has been prepared by the compressors it enters the combustion chamber where atomized jet fuel is metered into the chamber from two fuel nozzles.

During engine start, the fuel and air mixture is ignited by two spark plugs. Once the engine reaches around 45% of its operating rpm the fireball in the combustion chamber is self-sustaining. At this point, the spark plugs are turned off for the remainder of the flight. Providing fuel keeps entering the combustion chamber the fireball will stay lit.

As the fuel/air mixture is ignited it rapidly increases its volume and the only way for it to escape is towards the back of the engine.

Fuel Control Unit

The fuel control unit sits on the front, lower part of the engine and is driven off the engine’s Accessory Gearbox. Fuel enters the control unit from boost pumps located in the helicopter fuel tank. The fuel control unit itself is a complex heart of the engine, but ill try and keep it simple to understand!

The fuel control unit is operated by two requirements:

  1. The Fuel Control Lever (Upper Linkage) – This is used for starting and accelerating the engine up to flight RPM. Once at flight RPM, the lever stays in that position for the remainder of the flight.
  2. The Collective is what the pilot uses to climb and descend the helicopter. As the blade pitch increases on the main rotor blades they create more drag. To keep the main rotor spinning at its optimal rpm of 390 rpm more power is required. The collective lever is connected to the flight controls and the fuel control unit (Lower Linkage) to request more fuel for more power and less fuel for less power.

As the fuel is metered it is delivered under pressure to the two fuel nozzles mounted on the sides of the combustion chamber.

Gas Generator

The gas generator turbine or turbines, depending on the engine model are mounted directly after the combustion chamber. As the rapidly expanding gas is trying to exit the engine it passes through the blades of this turbine.

As the air forces its way through the turbine it rotates it. The job of the gas generator is to bring in the required amount of air into the engine to match the amount of fuel requested and delivered by the fuel control unit.

The gas generator turbine/s is also mounted on the same shaft as the two compressors, so as more fuel is added and the bang gets bigger, more air passes through the gas generator, spinning it faster, thus turning the compressors faster to suck in more air. This is what keeps the engine self-sustaining and is a constant cycle rather than a 4 step cycle of the piston engine.

Power Turbine

This is where the power of the engine is harnessed to drive the main transmission of the helicopter.

The power turbine is not connected to the engine components before it. It is what is known as a ‘Free Turbine’. Just like the operating principle of the gas generator, it uses the airflow forcing its way through it to rotate it. Some gas turbine engines can have just a single power turbine, while other engine designs can have multiple turbines.

At low engine rpm, the gas flow is not enough to rotate the power turbine. This allows the engine to start freely without driving the main transmission connected to the engine. As airflow reaches around 25% of its operating rpm the airflow through the power turbine is enough to overcome the friction and drag of the transmission and main rotor blades and begins to turn.

As the power turbine begins to rotate it connects to a shaft that enters the Reduction Gearbox. The gas then exits the engine and is vented to the atmosphere.

Reduction Gearbox

The main job of the reduction gearbox is in its name. The RPM of the power turbine is up around 46,000 rpm and that needs to be reduced tremendously to create the 732shp delivered to the main transmission.

As the reduction gearbox alters the rpm of the output of the engine it connects to the main output driveshaft of the engine at a more respectable rpm of 6000!

The main output driveshaft on this engine runs under the rest of the engine where it also runs through an accessory gearbox mounted between the two compressors. Once it leaves the front of the accessory gearbox it connects to the main transmission via a flexible driveshaft mounted within a ‘Torque Tube’ to allow the engine and transmission to move and vibrate as one unit.

Accessory Gearbox

The accessory gearbox is driven off the shaft between the two compressors. Its job is to run all the ancillary equipment required to keep the engine running. The oil pump, fuel control unit, and starter/generator are just some of the typical devices mounted and driven by the accessory gearbox.


If you would prefer a more visual tour of how this engine work please watch the video I created for you:


To Finish

No matter the size, cost, and complexity of a helicopter engine its purpose is to provide reliable power to ensure the helicopter remains capable and safe.

Piston-powered helicopter engines are great for smaller helicopters and being cheaper to buy and run their cost is perfect for training helicopters or private owners.

Once the helicopters begin to get bigger the power required to operate them increases dramatically. This is when the high power-to-weight ratio of the gas turbine engine comes in but at a price.

Having flown both types of engines I can tell you that when the engine delivers lots of extra power then things you can do and the heights and speeds you can reach in a helicopter really make the flights incredible.

Piston or turbine, the choice really depends on the helicopter it’s going into.

Further Reading

If you found this article interesting and would like to keep reading, I highly recommend the following articles from my blog:

Airplane Touch & Go’s – Why Do Pilots Do Them?


If you have a keen eye you may have noticed planes coming into land on a runway but then take off again moments later! Small planes, larger airliners, and military aircraft all seem to do this from time to time so what is the point of it? This maneuver is called a ‘Touch and Go’ and it has many uses in aviation.

Airplane touch and go’s are primarily used for increasing the number of practice flights a pilot can accomplish in a given amount of time. Without a touch & go, a pilot would have to land, taxi back to the start of the runway, and take off again. This wastes valuable training time.

This reason is just a small number of what these non-stop landing and takeoffs are done for. If you wish to know more about why this maneuver is so commonly used, keep reading!

Are Touch & Go’s Used For Pilot Training?

By far the most common reason why you will see an airplane doing a touch-and-go maneuver is for pilot training.

When an aircraft lands it must slow to a speed to allow it to safely taxi off the runway and head to its parking area. This slowing down increases the time it takes to land and vacate the runway and it also increases the distance needed behind the aircraft for a following aircraft to safely land.

Instead of landing, taxiing clear of the runway, taxiing back to the start of the runway, and then taking off again, pilots will land the airplane, quickly reconfigure it for takeoff while rolling, then take off again in one fluid movement.

For Example:

Stop & Go:
Standing start to take off, 1 circuit around the airport and a landing to a full stop, taxi off runway, taxi back to the start of the runway and be ready for takeoff again = 12 minutes per circuit
5 circuits can be accomplished during 1 hour of flight training.

Touch & Go:
Standing start to take off, 1 circuit around the airport and a touch and go = 6 minutes per circuit
10 circuits can be accomplished during 1 hour of flight training.

By doing this, it allows for many more flight maneuvers to be accomplished during a given time period and because the aircraft keeps moving, air traffic control can bunch together more aircraft on approach because they know the aircraft currently on the runway will soon be clear once it lifts off again.

By increasing the number of flight maneuvers that can be accomplished it makes it really nice for instructors to allow their students to practice various profiles of the same maneuver in a short space of time which leads to faster proficiency progression.

For Instance:

  • Practicing how to configure the aircraft for different approach profiles
  • Practicing steeper, shallower, slipped, engine failure profiles
  • Practice aiming for different touchdown points on the runways
  • Practice muscle memory for initiating Go-Arounds
  • Getting new pilots to an aircraft familiar with its ‘Feel’ and flight characteristics

Another part of Touch and Go’s is that they are frequently used to train pilots in a maneuver called a ‘Go-Around’. The go-around is essentially an aborted landing and can be initiated at any time during the approach and landing by either the pilot or at the request of air traffic control.

The Go-Around, also known as a missed approach procedure requires the aircraft to be quickly configured from a landing configuration to a takeoff configuration with minimal effort and distraction by the pilot. This is where practicing it as a touch-and-go can be a simple start for a new pilot.

Go-Arounds can be initiated for a few reasons:

  • An aircraft or vehicle accidentally enters a runway when an airplane is about to land
  • Crosswinds or wind shear can cause a pilot to initiate a go-around
  • Air traffic control can order an aircraft to go around because of operational or safety needs at their discretion
  • Pilot overshoots the landing spot and not enough runway left to land
  • Animals and wildlife could be on the runway and seen at the last minute by a landing pilot

On the wall of a local fixed-wing air ambulance hanger near me is a taxidermied head of a beautiful 10-point Whitetail Buck that was hit by one of their pilots during a night landing at the airport. The buck just darted across the runway and was struck on the hind by the landing gear. The pilots had no time to initiate a go around!


No matter how experienced a pilot is, practicing touch-and-go’s allows each pilot to keep their skills refined by utilizing this time-saving maneuver no matter which aircraft they fly.

Many airline pilots also fly small aircraft in their free time and just heading over to the flying club to practice some real ‘Hands-On’ flying is just pure fun, and the practice is never wasted!


Join My Newsletter & Get Great Tips, Information and Experiences To Help You Become a Superb Pilot!

* indicates required
Your Interest: *

Are Touch & Go’s Used For Airplane Maintenance?

When an airplane has come out of maintenance there may be a test flight required before it can be ‘Returned To Service’. Depending on the items that were maintained, adjusted, or removed during maintenance there may be a requirement to test them.

There can be a many number of things that a series of touch-and-go’s will provide the most testing for the given flight time:

  • Landing gear cycling & loading
  • Brake tests
  • Flaps, spoilers, and airbrakes tests
  • Instrumentation tests and calibration

The quickest way for the pilots and aircraft engineers to get multiple tests done, especially for things that require a landing is to use the touch-and-go.

Are Touch & Go’s Used For Pilot Recurrency?

To be able to fly passengers in an aircraft both day and night the PIC – Pilot In Command has to be current in their flying skills to ensure safety. This is a regulation that is non-negotiable, however, if no passengers are to be carried the regulation does not apply.

The FAA dictates in 14 CFR 61.57 Recent Flight Experience: Pilot in Command that:

Within the preceding 90 days to when the passenger/s are supposed to be flown the PIC must have completed 3 takeoffs and landings within the same category and class of aircraft to be flown with passengers.

The same also needs to be completed if flying at night, except the 3 takeoffs and landings must be done at night too.

This re-currency training or flight can be easily done within an hour because of using a series of touch-and-go’s. The only time the PIC must come to a full stop on the runway after each landing is when flying in a tail-wheeled aircraft.

Tail Draggers Must Come To A Full Stop

To Finish

When airplanes are observed landing and taking off again it is just the pilot utilizing the time available to get as much flight training, testing, or experience out of the aircraft in the allotted flight time.

This efficient use of both the aircraft and the runway allows for more aircraft to be using the airports’ traffic pattern thus improving the flying time benefits for all those flying in and out of the airport.

If you begin flight training you will soon become familiar with touch and go’s and you will soon appreciate their efficiency, especially when you are paying the rental bill!

Further Reading

If you would like more information on articles related to flight training, please take a read of the ones listed here:

Can You Legally Fly Without a License? A Pilot Tells How!


So many people look towards the sky dreaming of being able to fly and if you have ever looked into becoming a pilot you know the cost of doing so can be astronomical, or does it!

You do not need a pilot’s license to fly an aircraft under the FAA’s 14 CFR Part 103 Ultra Light Category. Helicopters, planes & gliders are available with no license required however, you will need flight training to operate safely. All larger aircraft will need a pilot’s license to fly.

Many pilots fly aircraft in the ultralight category and have no pilots license but how come those aircraft do not require a license but all the other ones do?

Let’s have a look at what the FAA dictates is an Ultralight aircraft and then how you can fly one without a license vs what you need when you start looking at larger aircraft.

How Can You Fly With No Pilot License?

The FAA allows any person to fly an aircraft with no license under the following conditions:-

14 CFR §103.1 states the aircraft:

  • Is used or intended to be used for manned operation in the air by a Single Person – Only one seat allowed!
  • Is used or intended to be used for recreation or sport purposes only
  • Does not have any U.S. or foreign airworthiness certificate
  • If unpowered, weighs less than 155 pounds
  • If powered, weighs less than 254 pounds empty weight, excluding floats and safety devices which are intended for deployment in a potentially catastrophic situation
  • Has a fuel capacity not exceeding 5 U.S. gallons
  • Is not capable of more than 55 knots calibrated airspeed at full power in level flight
  • Has a power-off stall speed which does not exceed 24 knots calibrated airspeed

So the main points most potential buyers are needing to keep an eye on are the basic empty weight, fuel capacity, and speeds. This type of aircraft falls in the Ultralight Category of aircraft of which there are many, many great aircraft for buyers to pick from.

Potential buyers need to be aware of these requirements because manufacturers may claim their aircraft is Part 103 compliant when it is not. The responsibility falls on the owner to ensure the aircraft complies. Getting a surprise inspection by an FAA inspector and found to be non-compliant can have very hefty consequences.

Learn More
Try These Articles:
* Benefits of Joining a Flying Club: Fly For Less!
* People With Disabilities – Can They Become a Pilot?

When Do You Need a License To Fly an Aircraft?

Once an aircraft exceeds any one of those specifications laid out in 14 CFR §103.1, the pilot will then need a license to operate it. When a person wishes to take passengers, get a bigger aircraft or an aircraft that can fly faster or further will require a little more work to be able to fly.

This does not mean they have to go out and get a Privates Pilot Certificate or License, as the FAA has a series of licenses (known as Certificates) aimed at people who wish to get flying but with a minimal amount of red tape.

The applicable certificates are quite easy to get starting with the most basic certificate:

Sport Pilot Certificate

14 CFR Part61 Subpart J

A Sport Pilot Certificate allows you to fly an aircraft in the Light Sport Category. It allows you to carry one passenger during daylight hours only, no higher than 2000ft AGL, and have greater than 3sm visibility.

A Light Sport aircraft must:

  • Weigh less than 1,320 pounds
  • Have a top speed of no more than 120 knots
  • Have no more than two seats

It will require some flight and ground school training and you can fly without a medical certificate providing you have a valid U.S. driver’s license.

For the Sport Pilot Certificate the FAA minimums require:

  • 20 hours of flight, of that
  • 15 hours flight must be with a qualified instructor, and
  • 5 hours of solo flight
  • Ground school can be completed with an instructor or via any learning material
  • Completion of a Written Examination
  • Completion of a Practical Flight Examination

My recommendation for any pilot starting out, no matter which aircraft they are looking to fly is The Pilot Starter Bundle from Rod Machado. This will give you all the knowledge to safely fly and understand what you can and cannot do as a pilot.

Although this series goes up to the Private Pilot Certificate, it will cover everything you need to know to prepare you for your Sport Pilot or Recreational Pilot Written examinations.

You can find Rod’s Bundle Kit Here at RodMachado.com

The FAA minimum will cost around $3,800 depending on instructor & aircraft rental costs however, most people will need more than the minimum required flight hours and thus usually budget for around $5,000-$5,500 to obtain a Sport Pilot Certificate.

Pilots can easily obtain more training to upgrade their certificate to a Recreational or Private Pilot Certificate if they wish to fly bigger aircraft and more passengers.


Join My Newsletter & Get Great Tips, Information and Experiences To Help You Become a Superb Pilot!

* indicates required
Your Interest: *

Recreational Pilot Certificate

14 CFR Part61 Subpart D

A Recreational Pilot Certificate allows you to fly an aircraft with up to four seats with a maximum engine power of 180hp. Even though the aircraft may have four seats you can still only carry one passenger during daylight hours, no higher than 2000ft AGL, and have greater than 3sm visibility.

Just like the Sport Pilot Certificate, It will require some flight and ground school training but you must gain at least a Third Class Medical Certificate to obtain this pilot certificate.

For the Recreational Pilot Certificate, the FAA minimums require:

  • 30 hours of flight, of that
  • 15 hours flight must be with a qualified instructor, and
  • 3 hours of solo flight
  • Ground school can be completed with an instructor or via any learning material – See Rod’s Bundle above
  • Completion of a Written Examination
  • Completion of a Practical Flight Examination
  • 3rd Class Medical Certificate

The FAA minimum will cost around $5,000 depending on instructor & aircraft rental costs however, most people will need more than the minimum required flight hours and thus usually budget for around $5,500-$6,500 to obtain a Recreational Pilot Certificate.

Learn More
Try These Articles:
* Can Anyone Build a Helicopter? Top 5 Kits
* Pilot Medical Exam – What You Need To Pass Each Class

What Aircraft Can I Fly Without a Pilots License?

Based on the criteria laid out in 14 CFR §103.1 there are a few aircraft that can be brought in both kit form and ready-built to allow you to go and fly without a license. But, because the FAA does not require a license I highly recommend you get some flight and ground training first to ensure you know what you’re doing, especially in a helicopter!

Learning to hover usually takes around 10 hours and without an instructor next to you the helicopter will crash! Trust me 😉

Here are a couple of examples of aircraft that you can buy and fly license-free:

Aerolite 103

Source: FlugKerl2

This single-seat UltraLite is a great way to get up in the air. Fully Part 103 compliant, it weighs in at 235lbs, has a 5gal fuel tank, and an endurance of 2 hours!

Available as a kit from around $18,000 or ready-built from $20,000!

You can find more information on the Aerolite 103 Here at the manufacturer’s website

Mosquito XEL

Source: FlugKerl2

The only single-seat helicopter you can fly without a license! The Mosquito XEL from Composite FX is a fully Part 103-compliant helicopter.

Weighing in at 312lbs with its floats, a 5 gal fuel tank, and a 1 hour flight time this little bird will bring you hours of fun!

Available as a kit from around $41,000 or ready-built from $52,000!

You can find more information on the Mosquito XEL Here at the manufacturer’s website

To Finish

Being able to fly is a feeling like no other and if you have a dream to take flight in your own machine then I highly recommend you get in touch with your nearest Ultra Light flying club and go and see them!

Flying without a license is a great start to aviation but I still highly recommend you get some training because once the bug gets you that training will start to become more frequent until you reach the point of a Sport Pilot, Recreational Pilot, or Private Pilot Certificate so you can take someone else up to enjoy the freedom!

Be safe, research, and get some flight training and enjoy this fantastic world of aviation!

Learn More
Try These Articles:
* Skills Needed To Become a Pilot? – A Flight Instructors’ Perspective
* Can Pilots Wear Glasses? Is This A Dream Destroyer?