
In the very, very small chance that a helicopter engine fails, a helicopter does not plummet to the ground and explode in a fiery crash like Hollywood has made it out to be. A controlled flight maneuver called an autorotation uses gravity and potential energy to allow the helicopter to descend under control. The tricky part is finding a clear area to touch down!
When a helicopter engine fails, the pilot begins a maneuver called an autorotation. As the helicopter glides during descent, upflowing air keeps the main rotor turning and storing potential energy. To land, the pilot converts that energy into Lift to cushion the landing for a smooth touchdown.
Having taught hundreds, if not thousands of practice engine failures during my time as an instructor I want to explain what actually goes on because after reading the posts on the first page of Google, I can tell that none of those writers have ever flown a helicopter, let alone seen or completed an autorotation!
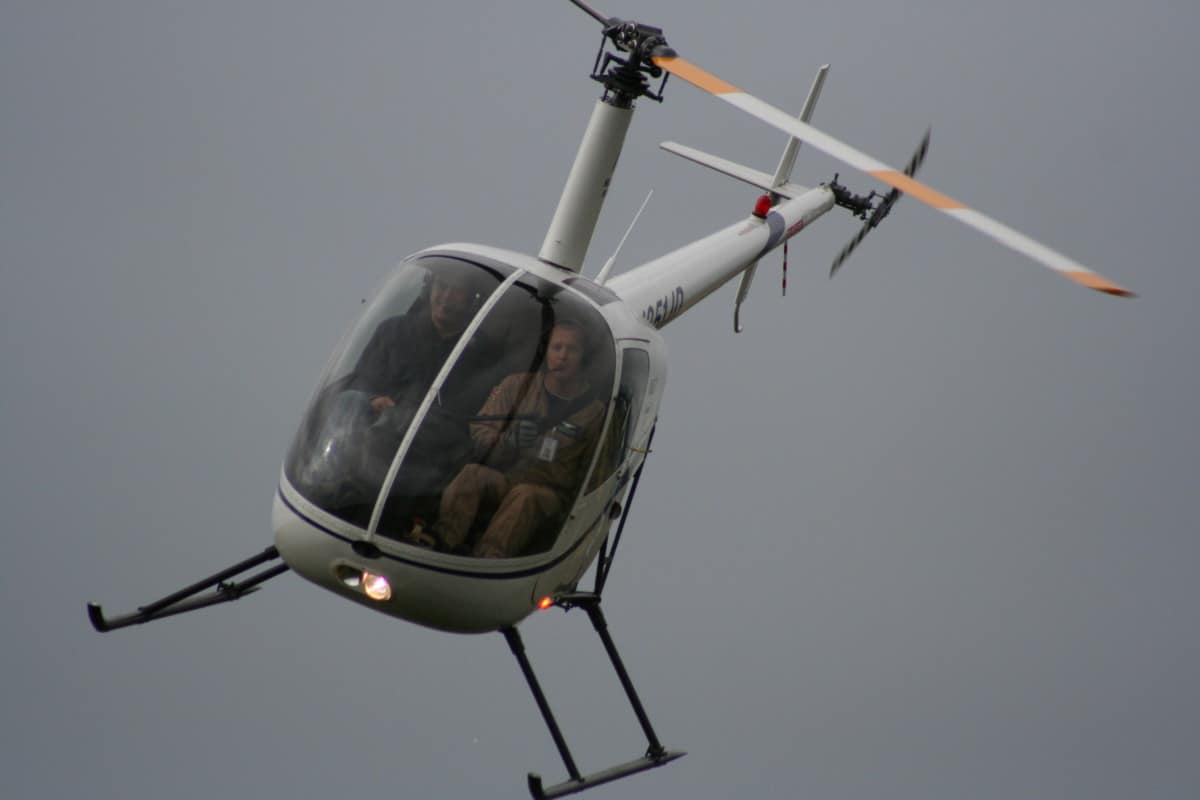
That’s me on the right in the photo above. If you want the real answer please read on…
What Happens When a Helicopter Engine Stops During Flight?
When a helicopter engine stops in flight the situation will vary depending on the kind of helicopter. For helicopters with a single engine, the event needs immediate action to prevent a fatality, for helicopters with two or three engines, the situation can be a none event if the engines are powerful.
Twin-Engine Helicopters
To increase safety, some helicopters are fitted with two, or sometimes 3 identical engines in very large helicopters. Modern twins (Twin-Engined Helicopters) can easily fly on a single-engine without too much of an issue – These are known as Category A helicopters.
Providing the pilot is flying the helicopter to the take-off and landing profiles recommended by the manufacturer a Cat A helicopter will be able to safely return back to the helipad, fly away or maintain cruise altitude depending on when an engine fails.
Most Cat A helicopters can be found in Offshore Operations, EMS, Police, VIP, and Search & Rescue.

For older helicopters that use engines with less power, an engine failure may mean the helicopter is unable to fly away or maintain level cruise flight. These are known as Cat B helicopters. A Cat B helicopter can act very much like a single-engine helicopter in that it will be heading to the ground, albeit at a much slower rate. This allows for more options for making it to a clear touchdown area.
The old 1980s Sikorsky S76A that I used to fly as an Air Ambulance was a Cat B aircraft and when it was hot in the middle of summer there was not a chance that thing would fly away on a single engine! It was so underpowered! When it was replaced with the AW139 that really changed the operation!
That A model had 2x 650Hp engines lifting a 10,500lb airframe, compared to the latest S76D that has 2x 1,050Hp engines lifting an 11,700lb helicopter! Evolution is a beautiful thing!
Single Engine Helicopters
Well, this is where the action happens! When you only have one power plant (also commonly referred to as a ‘Donkey’) keeping the helicopter airborne and it stops, there is only one direction you are heading, and that is down!
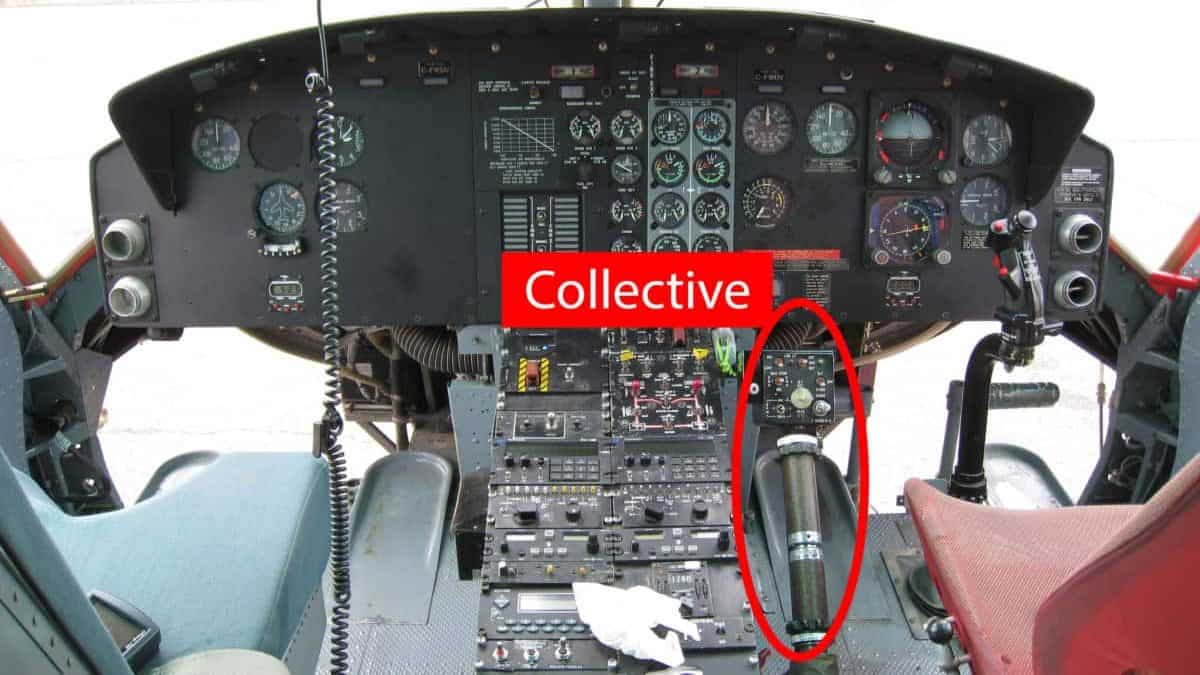
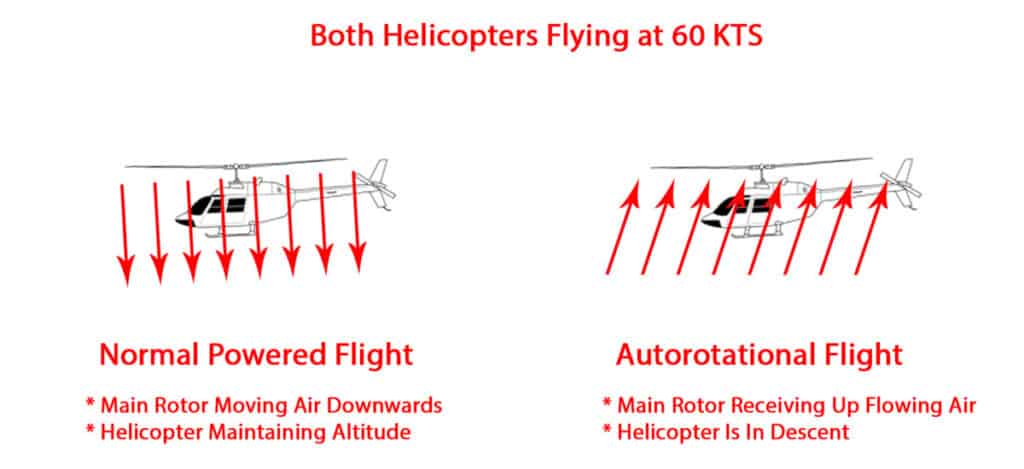
During Normal, Powered Flight, the engine is driving the main transmission. The transmission rotates the main and tail rotor systems via driveshafts. To lift the helicopter off the ground the pilot increases the pitch angle on all the main rotor blades at the same time using a control lever called the Collective. This increase in Pitch on the main rotor blades forces air downwards to lift the helicopter off the ground.
Once the Lift being produced by the main rotor system is greater than the weight of the aircraft, the helicopter will begin to ascend. However, as the blade pitch increases on each main rotor blade, the Drag each blade creates also increases.
Think of it like sticking your hand out of a moving car window when driving down the highway. When your palm is parallel to the ground your hand stays put. As you turn your palm upwards, the air being deflected by your hand pushes your arm upwards, also the Drag created by your palm now wants to pull your arm rearwards.
To overcome this Drag on the main rotor system of the helicopter, the engine automatically increases power to maintain the rotor system turning at the same RPM as the Collective is raised by the pilot. If the engine didn’t increase power to overcome the Drag, the Drag would begin to slow the RPM of the main rotor – Not good!
During Non-Powered Flight, the helicopter will begin to descend due to gravity because the Lift being produced is less than the Weight of the helicopter. The engine is no longer turning the main transmission and the only way to maintain the main rotor system RPM is to use airflow.
It is the main rotor system turning as a whole that acts like a wing to keep the helicopter airborne.
This is where the ‘hand out of the car window’ analogy kicks in.
As the helicopter begins to descend, it has air flowing up from below (Wind in your face while on a bike). It is this airflow that is used to turn each main rotorblade. This is known as Autorotation.
What is Autorotation?
Autorotation uses the up-flowing air created by the descending helicopter to apply a force to each main rotor blade to keep the main rotor system turning and storing potential energy (Think wind turbine). To land, this stored energy is used to increase the main rotor RPM to create enough lift at touchdown to cushion the landing.
All helicopters are equipped with a device called a Freewheel Unit. This acts like a one-way bearing. When the helicopter is being powered by the engine the freewheeling unit transfers the power from the engine to the transmission.
When the engine stops, this one-way bearing automatically disengages the engine from the transmission to allow the main rotor system to turn freely – hence ‘Freewheel Unit’. Without this device, a helicopter would become a rock and plummet to the ground.
Join My Newsletter & Get Great Tips, Information and Experiences To Help You Become a Superb Pilot!
To complete a successful landing when a helicopter engine fails there are a series of steps that have to begin the second an engine fails in a single-engine helicopter:
Step 1: Enter Autorotation
When the engine fails the pilot will be alerted by:
- A sudden decrease in engine noise
- Yaw of the aircraft nose – Direction will depend on which way the main rotor turns
- A drop of the nose of the helicopter
- Warning lights for loss of Engine Oil Pressure and loss of Electrical Generator
- Drop in readings on gauges for engine power/temperature/speed/oil pressure/voltage – Aircraft specific
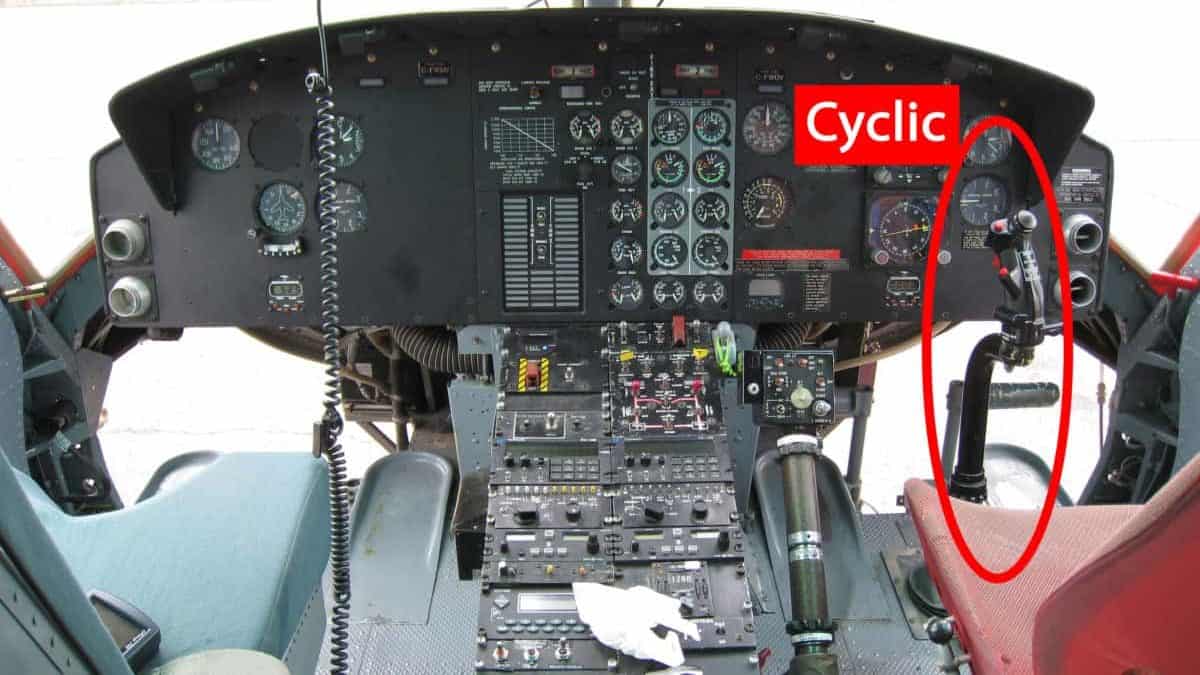
To enter autorotation the pilot will:
- Control yaw with the Pedals
- Pull aft on the Cyclic to set the helicopter’s attitude for autorotation airspeed – Usually around 50-70 knots
- Lower the Collective to reduce the Pitch on all the main rotor blades
By reducing the Pitch on the main rotor blades this reduces the Drag each one creates. Remember from earlier, the engine power is needed to overcome the Drag. Now that there is no engine powering the main rotor system, if the pilot does not remove the Drag by lowering the Collective, thus reducing the Pitch Angle of each main rotor blade the main rotor system RPM would rapidly fall, and the remaining lift being produced would decay, turning to the helicopter into a rock.
Step 2: Establish Flight Safety
All of the above happens within the first 1-3 seconds of the helicopter’s engine failing. At this point, the pilot is fine-tuning the helicopter into a steady flight regime:
- Main Rotor RPM is in the Green tolerance band of the Gauge
- Aircraft speed is coming into the set range recommended by the manufacturer
- Attitude and Roll of the aircraft are as required.
Step 3: Turn Into Wind
To aid in the landing, a helicopter performs best when its nose is pointing into the wind. This is the time when the pilot will use the Cyclic control to bank the helicopter and get the aircraft pointing into the wind.
Being into wind will allow the wind to help impart energy into the main rotor during the flare phase of the landing and will also help to slow the helicopter’s forward speed.
Step 4: Select the Landing Spot
This is the one time you need a bit of luck on your side. The higher above the surface the helicopter is, the further it will be able to glide during autorotation. This height may allow the pilot to maneuver the helicopter enough to make it to the only clear spot around.
During takeoff, final approach, or low flight the helicopter may just have to crash into trees or whatever is directly in front of it. For this reason, it is why pilots should always be prepared and TRY and have a clear spot within gliding distance at all times.
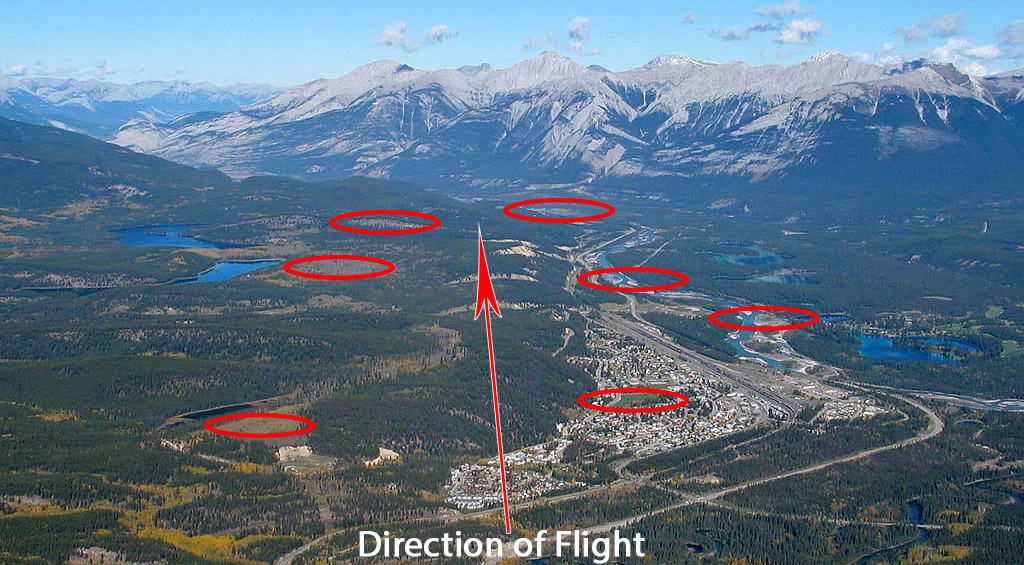
In the real world, this does not always happen. I can be flying around at 3000ft above the ground and still have no clear area to land in the heavily forested areas I operate over.
If a landing spot is available, then the pilot will begin to maneuver the helicopter to hopefully ensure the aircraft makes it there! If not, then pick the softest obstacles! Thin trees break easier than solid, mature trees!
Step 5: Mayday Call
Flying an aircraft has 3 parts:
- Aviate
- Navigate
- Communicate
- in that order…
Providing there is time, this is when the pilot will put out a Mayday call over the radio. This call will identify the aircraft call sign, where they are, and what is happening if there is still time – how many souls are on board.
Hopefully, this will be heard by air traffic control or another aircraft in the area and help can begin to be dispatched to begin the search & rescue. Going down in an urban environment is very different from being hundreds of miles in the middle of nowhere!
Step 6: Brief Passengers
The last part of ‘Communicate’ is to let your passengers know what’s going on – again if there is time.
Ensuring seatbelts are snug, removing glasses and sunglasses to protect eyes from broken lenses, familiarizing with the nearest emergency exit, securing any loose items in the cabin that could become a projectile etc.
It is going to be a frightening time for the passengers so any communication from a calm and confident pilot will help reassure them!
Step 7: Enter the Flare
Once the helicopter has been maneuvered to line up with the (hopefully) clear landing spot it’s time for the pilot to begin slowing the descent rate and forward speed of the helicopter.
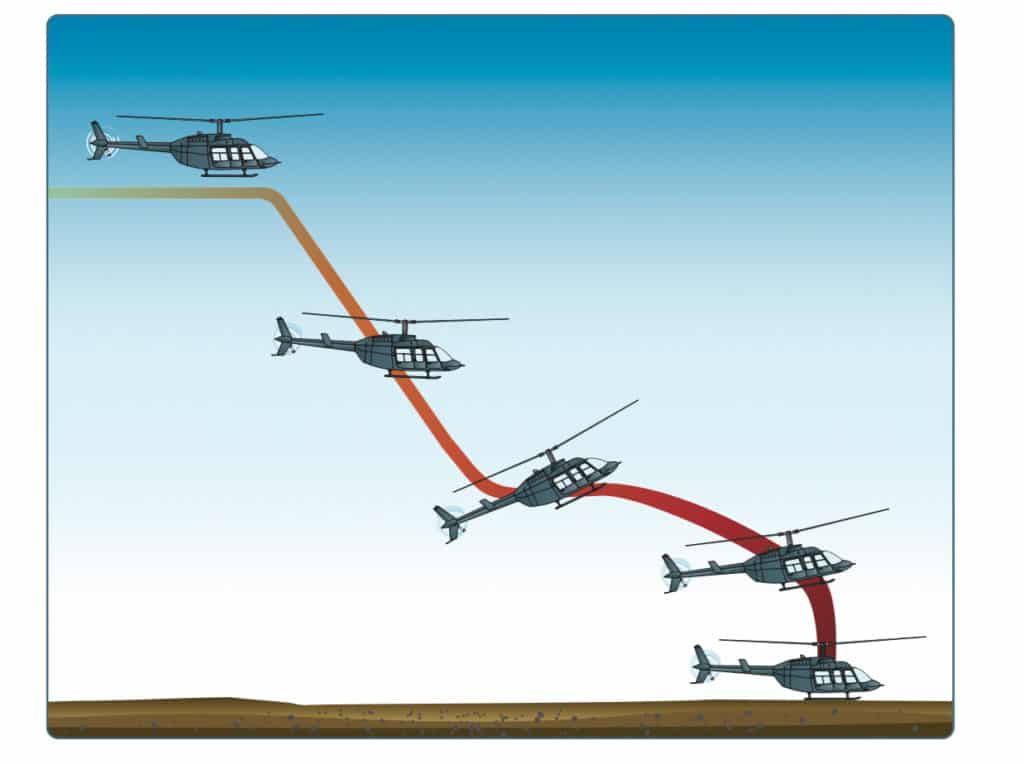
Depending on the size of the helicopter, but somewhere between 40ft and 200ft above the ground, the pilot will pull aft on the Cyclic to raise the nose of the helicopter. This will do several things:
- Increase the main rotor rpm as the force of the airflow going up through the main rotor system increases as the mass of the helicopter is trying to push its way through the flare
- Slow the forward speed of the aircraft as the underside of both the aircraft belly and main rotor system gets presented to the wind and acts like a sail
- Alters the trajectory of the helicopter from a downward vector to a horizontal vector slowing the rate of descent
The duration and aggressiveness of the flare is controlled by the pilot to ‘Float’ the aircraft to an area above the touchdown spot and hopefully bleed off as much forward airspeed as possible.
The pilot has to be careful while doing this as the helicopter can easily overspeed the main rotor system during the flare, but honestly, the integrity of the aircraft is second to human safety, but the pilot should manage the rotor rpm within limits by increasing the Collective slightly to increase the drag on the main rotor blades to keep the main rotor rpm at the top of the green tolerance band on the gauge.
The more important thing the pilot has to be aware of is the height of their tail rotor above the ground during the flare. An aggressive flare can put the tail rotor very close to the ground and as the helicopter slows, the aircraft will begin to sink.
If not controlled by the pilot, the helicopter can sink onto its tail rotor causing it to collide with the ground, and then directional control of the helicopter will be lost, possibly leading to a rollover as the helicopter could turn sideways just at the point of touchdown.
Step 8: Level The Helicopter
Now the helicopter has arrested its high rate of descent and as much of the forward speed has been bled off, it’s time for the pilot to push forward on the Cyclic and level the helicopter before the tail rotor hits the ground.
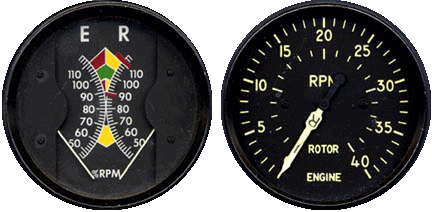
At this point, the main rotor rpm should be at the top of the green band on its gauge and the pilot has to be patient in preparation for the next step – Cushion.
Step 9: Cushion The Touchdown
The helicopter is now hopefully almost in a hover, level over the ground and a clear touchdown zone is right below it. The pilot needs to now let the helicopter begin to sink and then around 5ft-70ft, depending on the helicopter, begin to raise the Collective.
By raising the Collective, the pilot is now increasing the Pitch on all the main rotor blades to create Lift to slow the sink rate of the descending helicopter and cushion the landing.
Remember as the Pitch increases on each rotor blade, so does the Drag. The whole aim of the helicopter’s descent was to maneuver to a clear touchdown area and to store potential energy in each main rotor blade so that it spins for as long as possible when the Drag begins to increase.
The more energy stored in the main rotor system, the more Lift it will create before it slows down. Hopefully, the helicopter is on the ground with a nice soft, cushioned touchdown before the main rotor rpm has slowed to a speed where it no longer produces Lift.
No Stored Energy = No Lift = Hard Landing
Step 10: Secure The Aircraft
Once the aircraft is (hopefully) safe on the ground, the pilot can cancel the Mayday, let everyone know they are safe, and give an updated GPS position for Search & Rescue to find them. Then they will begin to shut down the electrical system/s and stop the main rotor system before any passengers decide to make a run for it and get hit by a rotating blade – It has happened!
At this point, the pilot can begin to assess their location, situation, and passengers and decide if survival techniques will be required to ensure everyone is comfortable until help arrives.
This video from Micha at BC Helicopters perfectly demonstrates what a real-world autorotation would look like:
Can a Helicopter Recover From Engine Failure?
Helicopters can recover from an engine failure providing there is enough time/height to restart the engine and the engine failure was not due to fuel exhaustion or a mechanical issue with the engine itself. Once the engine is started normal flight can be resumed.
It takes time to restart an engine while in flight. If the engine is in a twin-engine helicopter, it is just a matter of establishing safe and level flight on the remaining engine, then when it is safe to do so, restart the failed engine.
This is a simple task to do when flying in a two-engine, two-pilot helicopter. The flying pilot establishes a safe single-engine flight, while the non-flying pilot investigates the failure and then restarts the failed engine if able.
If the engine is the only one in the helicopter then the pilot must establish autorotation and get a landing spot selected, then only if there is height and time can the pilot decide whether it is beneficial to try and restart the engine.
There are things to consider before restarting a failed engine:
- Why did the engine quit? – Did the fuel run out? Did the engine have a mechanical failure? Is the failure unknown?
- If there is a good place to complete an autorotation to, is it worth trying to start the engine, then have it fail again if you select not to make the emergency landing?
- If the time required to restart the engine is tight, is the distraction worth it, better to just complete an autorotation?
These are just some of the questions a pilot has to ask themself within the space of a few seconds. Most helicopters generally fly too low to allow enough time to complete an engine restart, and unless it is very obvious what caused the engine to quit, you could put the helicopter in a worse situation trying to start it.
What Causes Helicopter Engine Failure?
Helicopter engines are incredibly reliable and the statistics of an engine failure compared to the global hours flown in helicopters are minuscule. The majority of the time a helicopter engine stops working is because of human error.
Here are Some of the Most Common Causes of Helicopter Engine Failure:
- Fuel Contamination
- Fuel Starvation
- Snow Ingestion
- Blocked Air Intake Filter
- Loss of Engine Oil
- Mechanical Failure
By far the most common cause of an engine failure is caused by fuel starvation because the pilot misjudged their fuel requirement and tried to ‘Squeek it Home’, or slightly less common is they had a sticking fuel quantity gauge and were not doing the mental math to calculate the fuel consumed and the helicopter ran out of fuel.
‘Touch Wood,’ in all my flying career I’ve never known a pilot to have an engine flame out on them. I’ve heard stories from the ‘old salt’ pilots of engine failures, but they were usually from a fuel contamination issue or an engine that was not maintained properly or built to the standards of today’s precision engines!
To Finish
Providing there is enough time and a suitable, clear area to land a helicopter can safely and easily complete an unpowered landing. Pilots go through a lot of practice autorotations as part of the training and must demonstrate to the examiner on every flight test that they can successfully complete both an autorotation straight ahead and one while turning 180°.
The only major issues arise if a helicopter with only one engine fails when the helicopter is low to the ground like on approach and takeoff. In these situations, the helicopter is going to be landing pretty much straight ahead and if there are obstacles there, then the helicopter is going into them. For this reason, it’s always best to fly in and out of a location using as many cleared spaces as possible, and having a second engine of sufficient power to allow the aircraft to fly away!
Further Reading
If you found this article helpful here are a few more you may enjoy reading:
- How Do Helicopter Engines Work? Your Ultimate Guide
- Twin Engine Helicopters: Can They Fly With Only One Engine?
- Helicopter Crash Survival – Is It Possible?
- Do Helicopters Take Off & Land On Runways?
- Can Helicopters Fly In Snow & Ice? This May Surprise You!