Are You Wanting To Become a Pilot?
Find Out How to Save Hundreds to Thousands of Dollars When it Comes to Your Flight Training!

Recent Posts

Do Helicopters Get Too Hot or Too Cold? A Pilot Explains


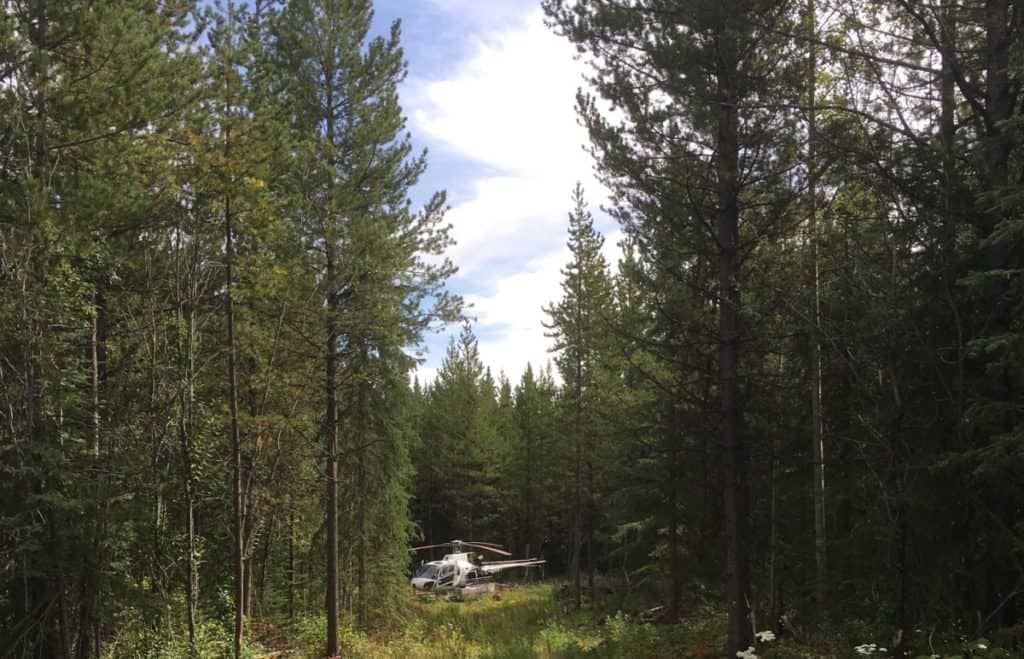
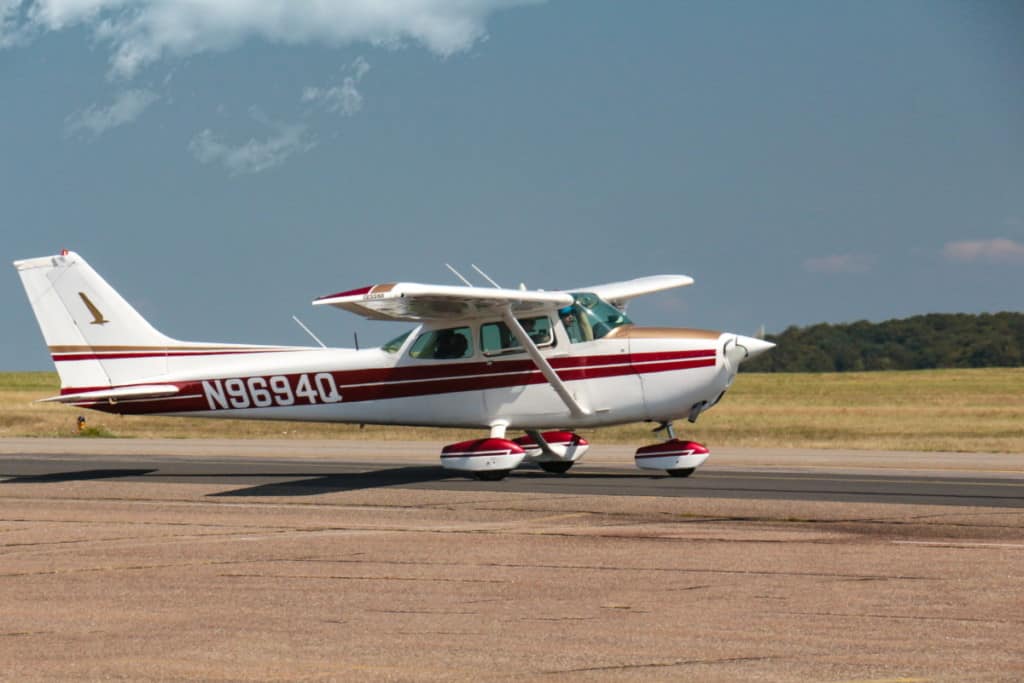
A question I often get asked by passengers who have never ridden in a helicopter before is if the ride will be too hot or too cold. A helicopter is just like a car when it comes to its temperature control. Some luxury cars have both a heater and air conditioning and some cheaper cars only have heaters. The same is true for helicopters.

If you are planning to take your first helicopter ride then this article will hopefully answer some of the questions you may have about the temperature of the helicopter during your flight.

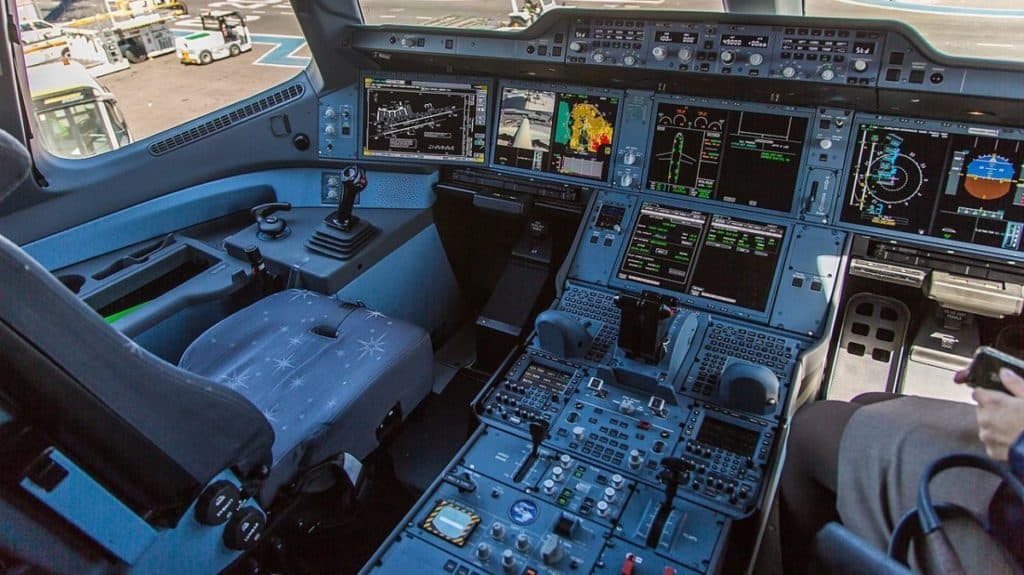
Helicopters come equipped with heaters that pull air from around the engine and feed it into the cabin to provide heat. This heat can be controlled by the pilot or a thermostat. Larger helicopters can come equipped with air conditioning to help regulate the cabin temperature on hot days.

Being able to regulate the temperature in a helicopter is pretty easy once in flight but there are times when it can be super hot or very cold in the cabin which does provide some discomfort, but usually only for a short period of time.
To find out more about this please read on!

Do Helicopters Have Heaters?

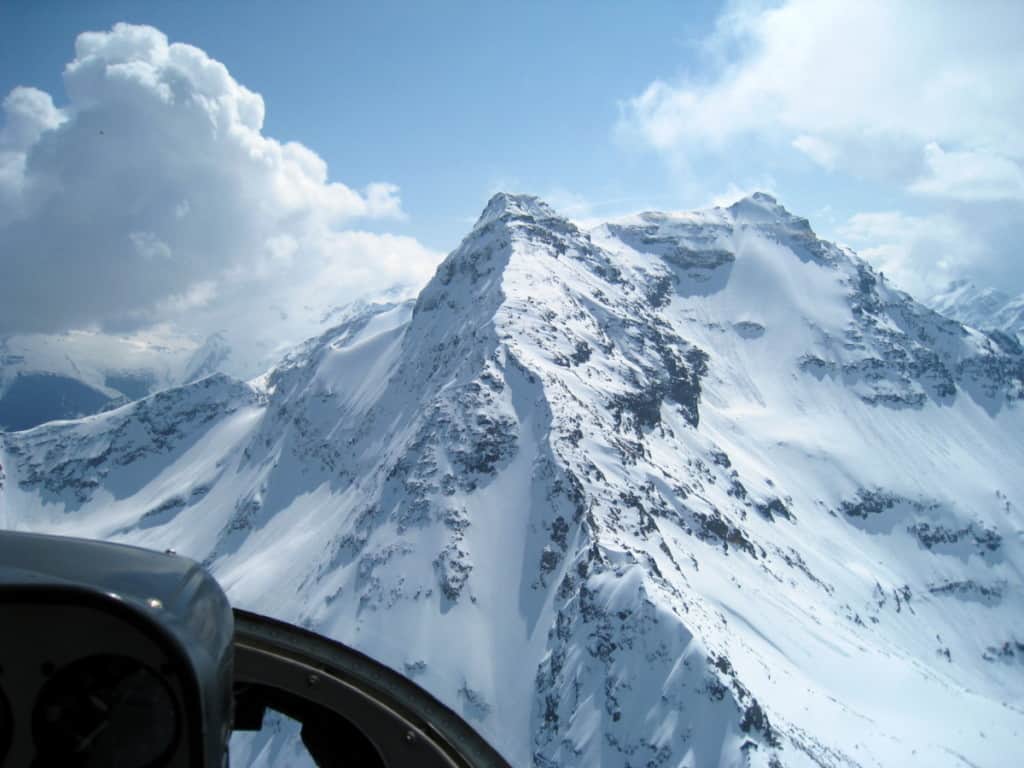
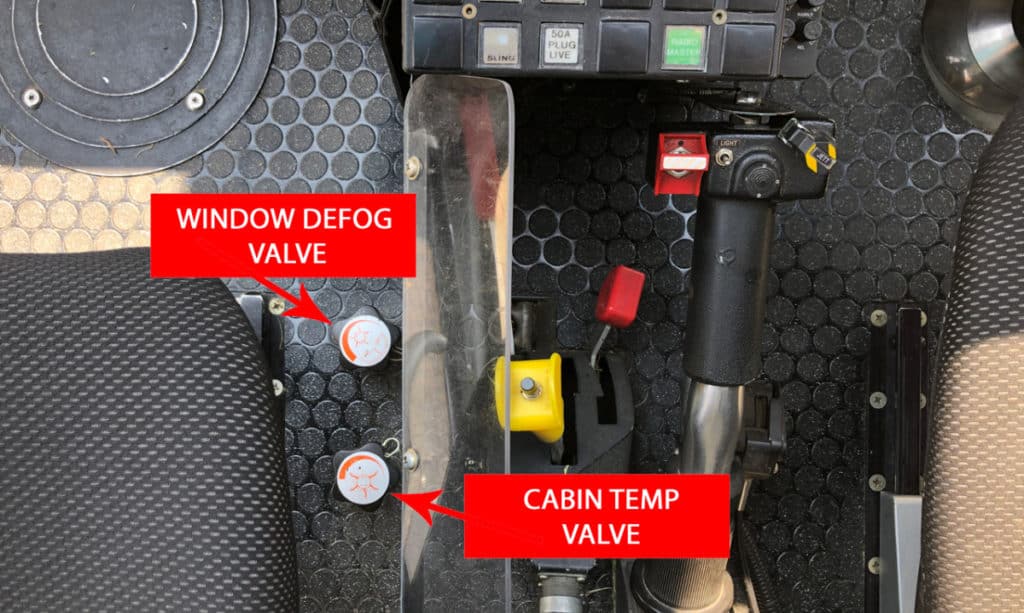
You may be astonished to know that helicopters can fly in temperatures as low as -40°F so they best have a darn heater! In fact, when flying in conditions at these temperatures part of my pre-takeoff check is to ensure the heating system works, not only for passenger comfort and safety but it is also part of the window defogging system. If a pilot cannot see out of their windows then the flight is not going to happen!

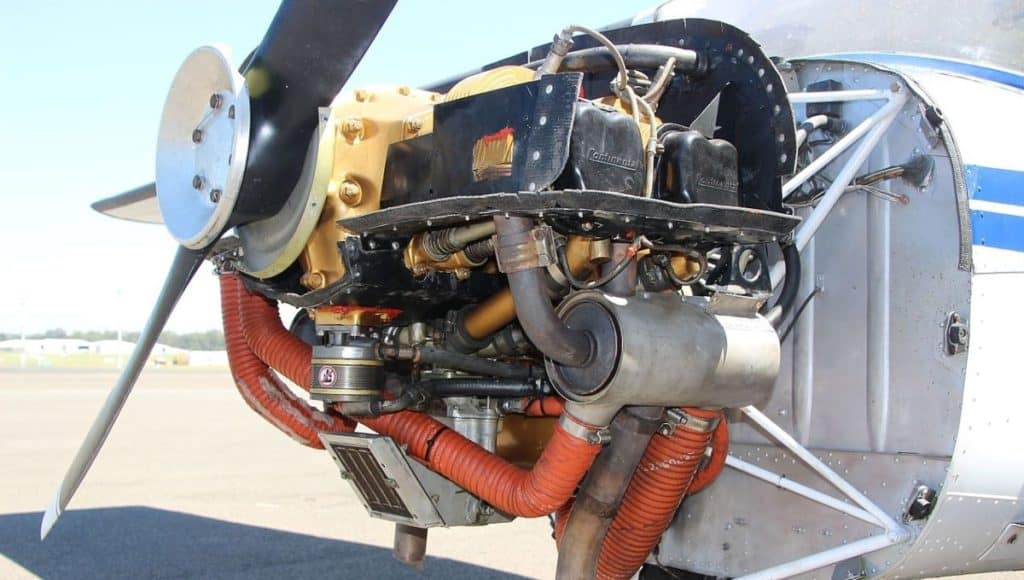
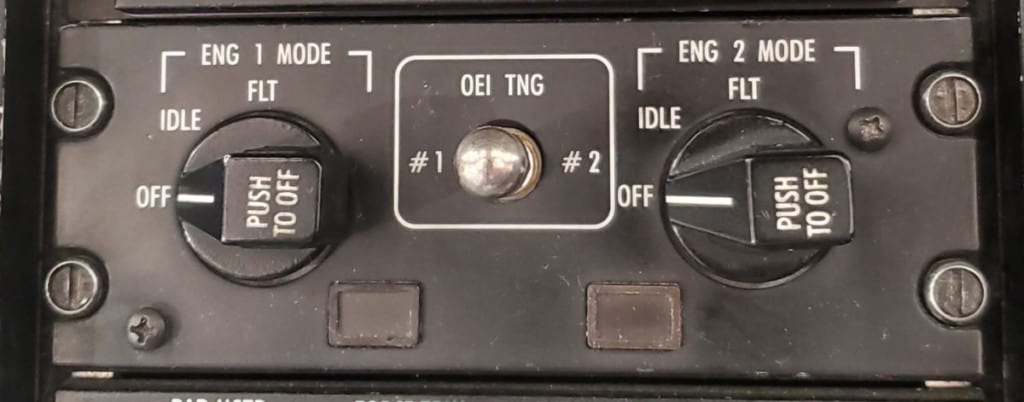
Most helicopters use a duct to extract heat from around or from inside the engine to provide cabin heat. Because helicopter engines are hot, the air from the engine is mixed with the cool air from outside and piped into the cabin. A pilot-controlled valve or thermostat regulates the temperature.

The Heat Control Valves in my Astar Helicopter

As part of my pre-flight briefing, I always tell my passengers to let me know if they are too hot or too cold and I can easily adjust the temperature to suit their comfort. Just like a car, it can take several minutes for the heat off the engine to begin warming the cabin and bring it up to a comfortable temperature. At the start of the flight, I usually crank the heat to get it warmed up faster and then turn it down as it warms up.

When I can, I always try and get everyone to be wearing the same amount and type of layers so one person is not cooking! For example, if most of my passengers are wearing big jackets I’ll ask them to take them off so we are all in sweaters etc. I hate flying in large, puffy jackets as it impedes my movements on the flight controls, so if I‘m in a sweater and everyone else is in a jacket they will get hot when I am comfortable.

Do Helicopters Have Air Conditioning?

Air conditioning can be fitted into helicopters when it is built or added in later as a kit. By using a pilot-controlled thermostat the cabin temperature can be cooled when the helicopter is running as most air conditioning units are driven off the main transmission.

I have flown in helicopters with air conditioning and I can tell you that it is pure bliss when the helicopter is started in the middle of a hot summer and the cool breeze begins to emerge from the air vents, much the same as your car. The problem with air conditioning units in a helicopter is that they increase weight, are expensive, and draw power from the transmission to drive them.

Depending on the type of operation the helicopter primarily flies, the aircon unit may not be fitted or be removed altogether, like the helicopter I’m currently sitting in while writing this article. It was originally used in South America and had air conditioning. Now it is used as a utility helicopter the weight saving was required far more than the comfort factor, so it was removed!

The most common areas where you will find air conditioning in a helicopter are in the VIP and MedEvac helicopter sectors as this is a must-have. Depending on the company you may also find tour helicopters fitted with air conditioning.

A Sikorsky S76C Corporate VIP With Air Conditioning – Source: Blue tooth7

Just the same as a heater, it takes time for the air conditioning system to cool down the cabin, for this reason, most VIP helicopters are either started by the pilots several minutes before their passengers show up or in the case of large helicopters, they can be fitted with an APU.

An APU is an Auxiliary Power Unit and it is basically a small engine that the pilots fire up so that the avionics and HVAC systems can be brought online to set the helicopter cabin to temperature.

The advantage of an APU is that it does not power the main rotor system so the passengers can embark without the hazard and noise of the main rotor blades turning overhead. The disadvantages are that they are heavy, expensive, and take up room. This is why they are generally only found on the largest helicopters.


Join My Newsletter & Get Great Tips, Information and Experiences To Help You Become a Superb Pilot!

* indicates required
Your Interest: *

Are Helicopter Rides Hot?

Helicopters are the hottest when it is sitting on the ground during the engine start or when flying directly into the sun. During this time the cabin is hot from the ambient air and it takes time for the air conditioning or airflow from forward flight to cool the cabin to a comfortable temperature.

Helicopters can also become very warm when flying directly into the sun or when the sun is on your side of the aircraft. Summer months and long flight durations are the hottest and for this reason, if a helicopter is not equipped with air conditioning, the only way to cool the cabin is to open the window vents however, this may not be enough to cool down all the passengers, especially when the ambient air outside is also hot!

To help keep helicopters as cool as possible, pilots will often install a sunshade into the cabin to help reflect a good portion of the heat away from the cabin while the helicopter is parked. This helps tremendously but it can still get warm for the first few minutes of the flight until the airflow or AC has started to cool the cabin.

Open Windows & a Sunshade is all I Can Do!

Just a few months ago it was April and I was on my way back to base from a mining camp wearing a black hoodie. It got so hot that I had to land and take it off. It was cold on the ground but the radiant heat from the sun being absorbed by my black hoodie started to overheat me!


A great tip for passengers, especially those going on their first helicopter flight is to wear layers. This is the best way to combat the heat and removing any thick jackets or heavy sweaters before the flight will help. It is always a lot easier to heat up a helicopter than it is to cool it down! You can easily sit with the jacket or sweater folded on your lap and then you have it to wear at the end of the flight.

Are Helicopter Rides Cold?

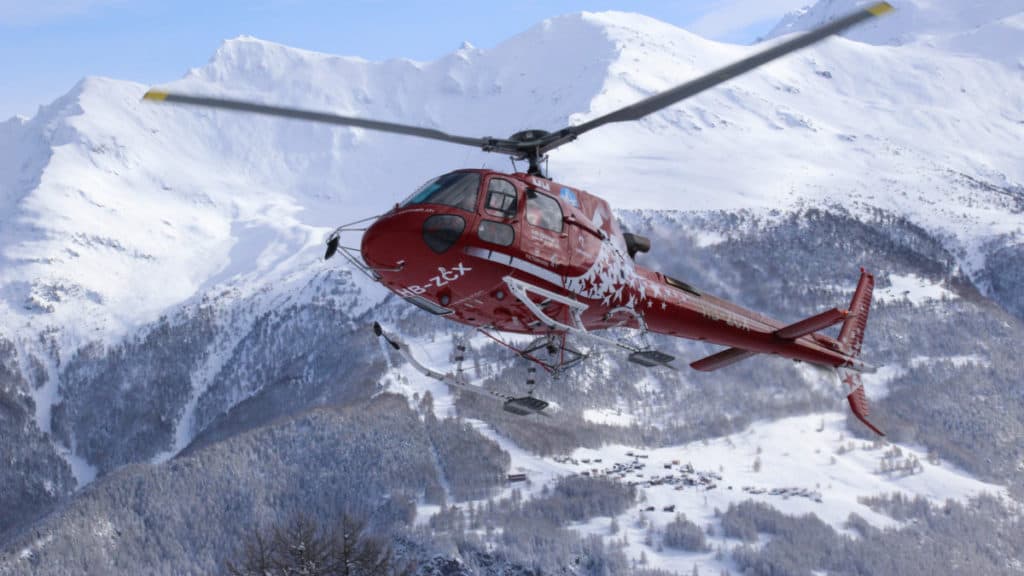
When the ambient air temperature drops below 0°F helicopter heaters may struggle to heat the cabin sufficiently. Wearing layers of clothes, hats, and gloves can ensure passengers can remain warm if the heating system is unable to produce enough heat during the flight.

If you wish to take a helicopter ride during the winter then it’s advisable to dress in clothing that you could spend hours outside wearing. As safe as helicopters are, there can be a time when an emergency landing has to be made and any passengers not dressed for the ambient conditions can quickly become exposed and risk hypothermia during the wait to be picked up.

If you are looking to take a helicopter flight in the spring and fall then warm, waterproof layers are a great option. My first flight was in April around Manhattan and although the weather was not hot, I still needed a sweater. This was fine during the 15 minute flight, but dress for being outside, and you will be fine.


This is a video of myself flying some water sampling technicians around for an environmental agency and as you can see in the video, there is ice on the inside windows of the helicopter from our breath. The heater in the helicopter worked adequately enough while in flight, but not long after shutting down the helicopter was back to the -30°F ambient temperature:


What Do You Wear For a Helicopter Ride?

When taking a helicopter tour flight dress as if you are going to be walking around that area sightseeing. If it’s hot, have light, loose-fitting clothes. If it’s cold, have a good jacket, a hat, and gloves. Wearing layers allows you to add or remove items of clothing.

Most helicopters can regulate the cabin temperature between 50-80°F when in flight.

The T-shirt I was Walking around New York In was Fine For My First Helicopter Flight!

Most reputable helicopter tour operators will have a section on their website about what they recommend passengers wear for their location and time of year if you are still unsure. I always ensure my passengers are dressed for the current climatic conditions just in case we have to land and spend an amount of time waiting to be picked up or help to arrive.


If you are wearing clothes that are comfortable while out on the street, then you will be comfortable in the helicopter.


If you are planning on taking a flight where the cabin doors are going to be removed or open, then ensure you wear clothing that cannot be easily removed, I.e. sandals, hats, and gloves, as you will most likely not be permitted to fly wearing these garments. Loose items can come off in flight and pose problems to helicopter safety or bystanders on the ground below.

If you are going to be taking photos and videos make sure your camera is attached to you by a neck or wrist strap as it will soon be ripped from your hands if you point it too far out of the cabin! Airflow may not seem to be there and 70-100mph may not seem to be evident when you are up in the air! Even though I tell my passengers often you would be surprised how many still stick their hand out of the window to get a clearer shot and whoosh, the camera is gone!


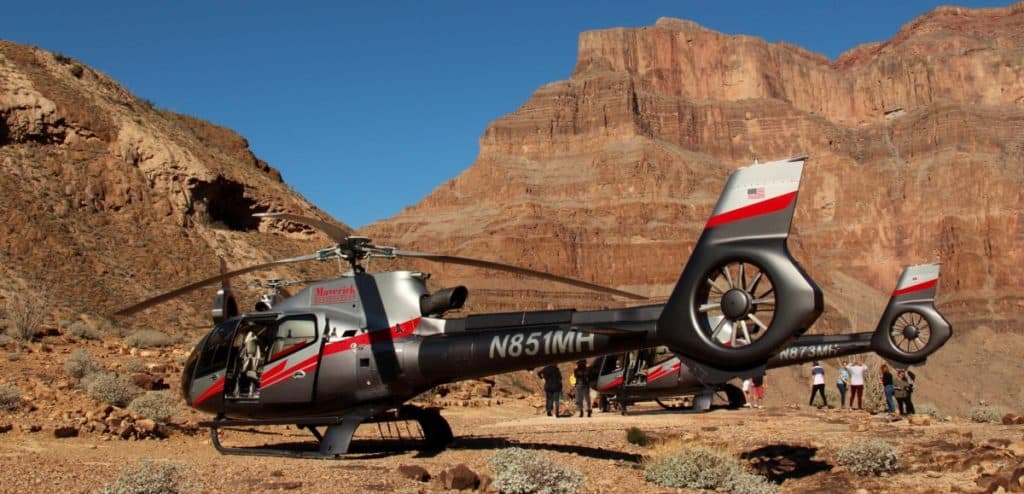
If you are looking to take a tour in a helicopter then I highly recommend Maverick Helicopters. I have several friends that have been pilots for them and they are a great tour company. They operate tour flights in Las Vegas, The Grand Canyon, and Hawaii and have really great deals! Taking a ride in a helicopter is a ‘Bucket List’ item and you never know, you may just get the flying bug as I did!

You can find out more information on their tour packages here:

Helicopter Tours of the Grand Canyon and Las Vegas - Click Here
Come Experience Hawaii The Maverick Way! - Click Here

To Finish

Helicopters can be kept at a fairly comfortable temperature once the engine/s are running or when in flight. The most uncomfortable time is when the helicopter has been sitting outside for a long period of time and the engine is just started. It is this time when most VIP helicopters are already running or the APU is on to allow the cabin to be brought up or down to the required comfort level.

For the more basic helicopters, the heat from the engine or airflow from air vents is all that is available to control the cabin temperature. For these aircraft, wearing layers of clothing that can be easily added or removed is the best option for keeping you comfortable. Just be glad you can adjust your layers! For us pilots, we have to make the decision before we go flying as once we are airborne we are unable to adjust our clothing! (Unless we find a place and land!)

Further Reading:

If you found this article helpful, here are a few more I recommend for you:

How Does a Helicopter Land With and Without Engine Power?


Helicopters are a truly remarkable piece of engineering and how they are able to land in almost any location is incredible. Many people always ask me why they saw a helicopter landing a certain way and why it seemed different to the usual way a helicopter lands. There are in fact many ways that a helicopter can make an approach to a landing site, and also several ways in which it can touch down, both with its engine/s running and without!

A helicopter can make shallow, regular, and steep approaches to a landing spot depending on the type of obstacles on the approach path and then touch down to the ground using a hover landing, no hover landing, vertical descent, or running landing. The pilot selects each for every landing location.

I too was under the impression that all helicopters landed the same way until I became a helicopter pilot and soon learned there are a whole plethora of landing techniques used to get the helicopter safely on the ground. I use all of the techniques as required in my day job piloting a utility helicopter, so if you wish to know more about the techniques I use please read on.

Are There Different Types of Helicopter Landing Approaches?

Helicopters are able to land in so many locations not available to any other aircraft, because of this each landing spot is completely different and requires a little bit of planning to ensure the helicopter can make it into the spot safely. As I write this I’m sat on a road in a forest logging area that has just been consumed by a wildfire.

The road is dusty which makes visibility poor when my rotor wash hits the road, there are logs and stumps lying all over the place. To also make it more challenging the forestry company has to leave random trees to allow for birds to use which creates hazards that can be hard to see during the approach.

Sand & Ash are Horrible To Land On!

To land at this location I opted to pick a steep approach with a no hover landing (more on these later). Now, if I go to pick up the forestry workers that are located down in a hole within the forest, that requires a completely different approach into the landing spot, again all decided during my overhead recce of the spot before commencing the approach.

Because there are so many ways a helicopter needs to get into a landing spot, there need to be many ways in which to safely fly the aircraft into them. Here are some of the most common approach techniques used by helicopter pilots all over the world:

Normal Approach

This is by far the most common approach helicopter pilots train for and use in normal flying tasks. The approach is used into a landing spot that is in the open and has very minimal obstacles around it. The pilot will set up the approach with roughly a 20°- 30° descent angle and what appears to be a walking pace over the ground when at height.

As the helicopter descends down this imaginary approach path the pilot is slowly reducing airspeed to maintain this walking pace over the ground. As the aircraft gets closer to the ground its speed over the ground will appear to get faster if the same airspeed is maintained. By maintaining a walking pace over the ground, the helicopter is constantly slowing down as it descends.

If the pilot has executed the technique correctly the helicopter will arrive at a 5-10ft hover over the landing site with zero airspeed. This is a typical or normal approach for a helicopter when landing at an airport or dedicated helipad.

Steep Approach

The steep approach is used when there are obstacles on the approach path to the landing spot. Buildings, trees, powerlines, towers, livestock, and hillsides are some of the most common things that need to be flown over at a higher altitude before making it into that landing spot. Because of these obstacles, a higher descent angle is required to ensure the helicopter does not hit them on the approach in.

The steep approach can be any angle from a regular approach up to around 70°. The steepness of the approach will be dictated by the height of the obstacles on the approach path. The taller the obstacles, the steeper the approach needs to be. Just like a regular approach, the pilot sets up the helicopter at a walking pace over the ground, but then the walking speed will become much slower as the helicopter begins to descend because the helicopter needs to descend more than it moves forward.

The pilot will draw an imaginary line to the landing spot in their mind and then fly the helicopter down that line, adjusting as they go to compensate for wind. As the helicopter approaches each obstacle the pilot will be looking all around to ensure the tail rotor and main rotors are clearing the obstacles by a healthy distance as the helicopter continues its approach.

The pilot will then fly the helicopter either to a 5-10ft hover to assess the landing location for the best place to set the helicopter down (for example, an unprepared landing spot of the edge of a swamp or in a clearing) or fly it all the way to the ground to a prepared helipad.

The steep approach is used primarily when operating out in the wilderness to unprepared landing spots, like the logging road I’m sitting on right now.


Join My Newsletter & Get Great Tips, Information and Experiences To Help You Become a Superb Pilot!

* indicates required
Your Interest: *

Confined Area Approach

A confined area approach is used when the landing spot is in a very tight location and usually consists of a two-stage approach. For example, a MedEvac helicopter landing at a crossroads in the middle of a city, or a helicopter descending into trees to pick up crews. If you are old enough to remember Airwolf, its lair was in a mountain where the helicopter had to descend vertically inside. This is a confined area.

Depending on the type of terrain and obstacles around the landing spot the helicopter will make a normal or steep approach to the top of the confined area, then descend vertically down onto the landing spot. This is why it is sometimes referred to as a two-stage approach.

I Had To Descend Vertically To Land In Here

This photo above was when I had to land in a clearing within 50ft tall trees to take water samples as part of an environmental survey of the groundwater surrounding a coal mine. Most of the landing spots were like this and because the treetops were all of a similar height, a normal approach to the top of the trees was performed before descending down into the hole.

Because I had not landed at these sites before, I brought the helicopter to a hover above the trees but adjacent to the ‘Hole’. Then I could look down into the clearing and see what obstacles would face me on the way down and where I needed to park the helicopter once at the bottom.

Once I was happy, I could then move over the hole and descend down. From that point on I was able to complete a normal approach to the opening and then descend straight down. The first time always requires a visual recce before committing.

Confined area approaches can be some of the most challenging to execute because of the number of obstacles and the limited amount of vision the pilot has of the area below the helicopter. A few passengers or crew members in the helicopter really help get more eyeballs looking around for potential hazards that could present a problem to the helicopter. By having open communication, the pilot is able to make safe descents providing the hole is big enough to fit the helicopter!

Shallow Approach

Shallow approaches are used by many pilots when flying in the mountains as it uses less power to arrest the helicopter’s rate of descent at the bottom of the approach. When a helicopter gets higher in altitude, the amount of air molecules in the atmosphere reduces due to the reduction in air pressure with altitude.

The reduction of air molecules provides fewer molecules for the rotor blades to work on and produce lift and the engine to mix with fuel and burn. Because of this, power from the helicopter engine and lift reduces with altitude, and that power/lift is required by the pilot to slow the helicopter’s descent, especially if coming in steep and ‘Hot’.

For this reason, when a helicopter approach is flown shallow in the mountains, the power required for the approach stays pretty much the same all the way to the landing spot on the mountainside. If the pilot is able to begin the approach and is not running out of power or lift then a safe, stable approach should be able to be made all the way to the landing spot. If at any time the approach becomes unsafe the pilot can dive the helicopter away from the mountain and reject the landing.

If a steep or normal approach is made and the pilot then beings to pull in power just before landing it may not be available. This results in the descent of the helicopter not being reduced and a hard landing, or worse ensues.

Moutain Approach
A Shallow Approach During My Mountain Flying Course

The second time a shallow approach is used is during emergencies when the helicopter has to make a running landing. A running landing is discussed in the next chapter but a shallow approach allows the aircraft to be using minimal power on approach and allows the pilot to get the aircraft low to the ground and gradually slow it down so that if anything bad were to happen the helicopter can be quickly placed onto the ground with as soft a touch down as possible.

Weather-Cocked Approach

The weather-cocked approach is very common and you will see helicopter pilots doing this using any of the above approach profiles. As a helicopter slows down its nose begins to rise upwards. As this happens, the instrument panel begins to block the view of the landing spot. To overcome this blockage pilots will point the nose of the helicopter to the left and fly the approach at an angle so they can put the landing spot in view to the right of the instrument panel.

WeatherCocked-Approach
Straight-In Approach vs Weather-Cocked Approach

By doing this the entire approach path and landing spot remain in view to aid the pilot in flying the helicopter down the set approach path and keeping an eye out for obstacles at all times while on the descent. If the pilot is good they will orientate the helicopter so it is pointing into the wind but will be flying over the ground at an angle so they can see.

Are There Different Types of Helicopter Landings?

Once a helicopter has completed its approach to the selected landing spot it can touch down using 3 techniques. Hover then land, a no-hover landing or a running landing are the most common. Each touchdown technique will be selected by the pilot to meet performance or situational circumstances.

Hover & Land

This is by far the most common touch-down technique used by helicopter pilots. The helicopter is slowed during the approach to enter into a stable hover over or next to the landing spot and between 5-10ft high. This technique allows the pilot to inspect the landing spot to ensure it is free from obstacles that could puncture the belly of the helicopter and asses for sloping ground.

By coming to a hover it gives the pilot time to select the exact spot the helicopter needs to be over before committing to setting the aircraft down. This is especially important when landing in unprepared areas like the bush.

The Astar Has a Really Low Tail Rotor

The Astar that I fly has a very low tail rotor so I use this technique lots to ensure my tail rotor will be in a clear area away from small samplings, tall grass, bushes, or rising ground. The mirrors by my feet help me to see the rear and underside of the helicopter to pick the perfect touch-down spot.

No Hover Landings

No hover landings are just as they sound. The helicopter is slowed during the approach but instead of terminating to a hover and then setting down, the approach is flown all the way to the ground in one smooth motion. This technique is mainly used when power is limited or when the helicopter is operating in areas of dust and snow.

Helicopters use the most power when in a hover. The power being produced by the engine/s also reduces as air temperature increases, humidity increases or the helicopter is landing at a high altitude. If the pilot tries to hover and there is not enough power available to the helicopter it can land hard.

To overcome this, the pilot picks the landing spot and flies the helicopter all the way to the spot with no pause for hovering. The pilot has to be careful and still monitor their power and approach speed to ensure this type of landing is completed safely, but it is a way to land the helicopter using minimal power. This technique is used lots when landing in the snow on mountains, like heliskiing for example.

Another reason a no hover landing would be completed is when a helicopter with skids (No Wheels) is landing in a dusty or snowy environment. As the helicopter slows and gets close to the ground at the end of the approach, the rotor wash will stir up dust and snow to create a snowball/duststorm that can completely reduce the pilots’ visibility. This is when a lot of accidents happen.

To help minimize this reduced visibility the pilots reduce the amount of time spent in the reducing visibility by picking an object right next to the landing spot and flying a no hover landing right to that object. By doing this, the snowball/dustball stays behind the helicopter for as long as possible, and then the pilot has a close visual reference to stay focused on just as the dust/snow begins to reduce visibility.

Running Landing

Running landings are mainly used in normal everyday operations for helicopters equipped with wheels. It is the larger helicopters that are usually equipped with wheels and because of their size, they create a lot of rotor wash! This rotor wash picks up sand and debris and hurls it at great speed. Not good for other aircraft parked nearby!

I used to fly this approach all the time in the ambulance when landing at the airport. It is a normal approach and then touch the wheels down with about 20kts of airspeed. Once set down the helicopter can then ground taxi to their parking spot using far less power, thus creating far less rotor wash that stirs up the debris.

The second reason is just like the no hover landing and it’s to help keep the dustball behind the helicopter when landing on a dirt airstrip or somewhere similar. Keeping a little forward airspeed when landing allows the dirt to stay behind the cockpit allowing the pilot/s to see. Of course, this technique can only be used to runways or large open areas where there is lots of room for the helicopter to ‘Run-On’.

A Pilot Keeping the Dustball Behind Them

For helicopters with skids, a running landing is mainly used when dealing with an emergency situation. Failures like the loss of flight control hydraulics make moving the flight controls very heavy and trying to hover a helicopter without hydraulics (If it’s supposed to have hydraulics) is going to end up in a crash.

A small amount of forward speed helps to keep the helicopter more controllable and running on the helicopter greatly improves the chances of a successful emergency landing. There are lots more emergency situations where running on is favorable but you get the idea.

How Does A Helicopter Land When The Engine Stops?

In normal flight, the engine/s produce power which is fed into the main transmission which turns both the main rotor and the tail rotor systems. When the engine/s stop producing power in a helicopter the rotor systems must then find an alternate method to be powered. To find this alternate method the pilot puts the helicopter into an Autorotation.

As a helicopter enters an autorotation it begins to descend. The up-flowing air from the descent keeps the main rotor system turning and storing energy. Just before landing, the pilot will use this energy to arrest the rate of descent while slowing the helicopter to make a smooth landing.

Pilots Practicing an Autorotation With the Engine at Idle

What is an Autorotation?

During pilot training, every pilot must learn and be able to successfully complete a landing without the helicopter engine being used to power it. Practicing this flight maneuver is probably one of the most practiced maneuvers in the pilots’ complete training syllabus – and rightly so, it’s the one maneuver that will save their life if the engine were to ever stop.

The flight maneuver is called an Autorotation and its name says it all! It is a way to automatically keep the main rotor system rotating should the engine be unable to do so.

When in normal flight, the helicopter engine is turning the main rotor system. To fly and maneuver the helicopter each main rotor blade varies its pitch angle as it rotates around the main rotor mast. The pitch on each blade creates drag as it rotates through the air.

The more pitch that the pilot places on each rotor blade, the more drag it creates, and the more power is required from the engine to overcome this drag and maintain the entire rotor system RPM within set limits.

https://youtu.be/Pu48f7s5Ru8
The Pitch Angle of a Main Rotor Blade During Each Orbit

When a helicopter engine stops, the power overcoming this drag is gone so the first thing the pilot has to do to prevent the drag from reducing the RPM of the main rotor system is to remove it. They do this by lowering the collective control, which reduces the pitch on all of the main rotor blades.

If the pilot does not do this within the first second or two following a loss of power the main rotor RPM will decay and the helicopter will become unrecoverable leading to a fatal descent of the aircraft. As the pilot is reducing the collective they will also be altering the airspeed of the helicopter to around 60-70knots to put the helicopter into the configuration for autorotation.

Once the helicopter is established in autorotation (blade pitch is flat and airspeed is set) the next part of the maneuver will become the next important step as the helicopter descends – Upward Airflow

What is Helicopter Upward Airflow?

As a helicopter descends without its engine power the airflow meeting the rotor system is coming upwards from below. The up-flowing air is what keeps the main rotor system turning like a windmill and storing energy ready for the pilot to use to arrest the rate of descent at the bottom of the autorotation.

The main rotor system has now changed from being the wing that keeps the helicopter airborne to now being a wing that is storing energy during the helicopter’s descent. The up-flowing air is enough to maintain the RPM of the main rotor system providing the pilot monitors the RPM gauge and adjusts the collective control to keep the main rotor RPM in the green band.

By keeping the main rotor rpm in the green the energy from being turned by the airflow is being stored ready for the landing.

How Do Helicopters Land After an Autorotation?

The helicopter is in its autorotational descent, the main rotor system is storing energy and the helicopter is flying forward at 60-70 kts. As the ground approaches and at around 50 feet the pilot will begin to flare the helicopter using the cyclic control to reduce its forward airspeed.

As the helicopter’s airspeed begins to decay it will want to drop out of the air. At this point, the pilot levels the helicopter and waits until the helicopter is roughly 5-10ft above the ground (larger helicopters start the flare and level at higher altitudes). At this point, the pilot will raise the collective control all the way in a smooth motion to use that stored energy to provide a last moment of lift to cushion the touchdown.

If the pilot has done the maneuver correctly the helicopter will touch down smoothly with very minimal forward speed.

What Are Helicopter Elephant Foot Prints?

Having the engine fail on a helicopter is not really a big problem if the pilot is flying over an airport or large flat open space, but what happens if they are over a city or forest. Well, this is where a bit of luck comes in! There are certain times when a helicopter will only be able to land dead ahead and that is on takeoff or late on an approach. If there are obstacles in the way then that’s just bad luck.

As pilots, we are always trying to fly in and out using the path with as few obstacles as we can, but sometimes there is no way of flying without them in our path. When in cruise flight it is a little different as this is where we look for Elephants Footprints.

When elephants walk they make big holes on the ground – it is this same thing we look for as we fly – Big holes to land in as we cruise along. The higher the helicopter the more holes become reachable to glide into.

This is a trick that is taught in flight school and when flying along the pilot should always be looking for the next emergency landing spot. With time, the pilot does this without even realizing it and if they are good they will remember the ones they have just flown over in case they need to turn around to get the helicopter into the wind for the autorotation.

The fewer places there are to land, the higher the helicopter should be to allow the pilot time to get that helicopter into that one emergency landing spot. Height and airspeed are your friends in a helicopter but sometimes there are no clear, open areas available, and that just bad luck if the donkey stops working!

Further Reading

If you found this article helpful may I suggest a few more for you:

Helicopter Inspections – How Often Do Helicopters Need Looking At?


Every helicopter should have had some form of inspection before it gets airborne. This can be something as simple as a quick walk around with a visual inspection, all the way to a complete overhaul of the entire aircraft. The question is how often do inspections need to happen and how do the owners and mechanics/engineers know when to do them?

Daily, every 25, 50, 100, 150, 600 hours & annual inspections are common maintenance schedules a helicopter can be flown between each maintenance inspection. The manufacturer and the FAA stipulate how often and how in-depth a helicopter needs to be inspected by qualified helicopter engineers.

As part of my pre and post-flight routine, I have to visually inspect certain parts of the helicopter to ensure it is safe to fly. To further increase safety, the helicopter is required to be inspected by certified helicopter mechanics at varying intervals of its life to ensure components and the aircraft structure are still airworthy and in good condition. Similar to taking your car in for an oil change, a helicopter is no different, although the price tag of a helicopter service has a few more zero’s after them!

To find out more about when a helicopter gets maintenance read on…

What is a Helicopter Daily Inspection?

This is a visual inspection of the helicopter completed by a pilot or mechanic before it flies for the day. This inspection can be completed during that day before it flies, or after the last landing of the day so it is ready for the next flight. This ensures it is safe for its next flight.

The most common inspection on a helicopter is the Daily or Pre-Flight Inspection.

When helicopters fly out of the hangar or are out in the field a dedicated mechanic/engineer may be assigned to the company’s helicopter/s to complete the maintenance inspections after the pilot/s have finished flying for the day. For those of us pilots that don’t have the luxury of a dedicated maintenance engineer, we have to complete the visual inspection ourselves. Depending on the timeframe I usually complete the visual inspection the night before or before the flight depending on which suits me better. To be able to complete a visual inspection as a pilot I have to be trained and signed off as competent.

To help pilots complete a thorough visual inspection of the aircraft the manufacturers create a checklist of items to look at as you walk around the aircraft in a logical manner.

Each helicopter is different so guidance from the manufacturer is a great starting point. Also when transitioning onto a new aircraft most maintenance engineers that are familiar with that particular helicopter will give the pilot a thorough walk-through to ensure the pilot knows what to keep an eye on, what needs touching, and what needs draining or sampling.

Most daily inspections will involve opening up each access panel and checking for fluid leaks, chafing of wires, loose nuts & bolts, missing hardware, broken or cracked components, and any items that should not be in there (ie: tools and rags left over from a sloppy maintenance mechanic or another pilot). A good inspection should take anywhere from 10-15 minutes to a couple of hours depending on the size and complexity of the helicopter and how many sets of eyeballs are looking at it.

During this inspection, most good pilots/mechanics will also be wiping the components and areas free from oil, dust, and debris to keep the machine clean and make it easy to see any cracks appearing. By looking under an access panel in a helicopter you can get a really good impression of how well the company and its employees look after their equipment! – I’ve seen some shockingly dirty aircraft!


Join My Newsletter & Get Great Tips, Information and Experiences To Help You Become a Superb Pilot!

* indicates required
Your Interest: *

What are Helicopter Hourly Inspections?

Each hour a helicopter flies it accumulates towards a maintenance inspection. Common intervals of 25, 50, 100, 300, and 500 hours give engineers the chance to inspect different parts of the helicopter to check for wear and integrity. The hourly maintenance schedule is created by the manufacturer.

The more hours a helicopter flies, the more in-depth each inspection becomes. As the hours accumulate the inspections involve different parts of the helicopter being removed and inspected more thoroughly than just a visual inspection.

For example, once a helicopter has flown for 150 hours it gets inspected and signed off for another 150 hours at which point it gets inspected again and signed off again for another 150. The next maintenance target it hits will be a 600 hour inspection which makes the engineers look at a deeper level to check for component wear etc.

Flight hours are cumulative and the different types of maintenance inspection vary by helicopter type. Each helicopter manufacturer has to create a maintenance program for its helicopter as part of its certification process. Based on test data and the history of components used on its other helicopters, the manufacturer can predict at what time a certain component needs to be inspected, adjusted, or replaced.

The Robinson R44 Raven II

The Robinson R44 is one of the worlds most popular helicopters and here is an example of its hourly inspection program:

First 25 Hours:
Change oil and filter and inspect oil suction screen and filter
Check the alternator belt tension

Every 50 Hours:
Inspect & service engine per Engine Operator’s Manual
Change oil, oil filter, and inspect oil suction screen and removed filter

First 100 Hours:
Drain and flush gearboxes
Check engine exhaust valve guide clearance

Every 100 Hours:
Inspect and service engine per Engine Operator’s Manual
As required, inspect and service ignition components

Every 300 Hours:
Lubricate C181-3 bearing
Replace hydraulic filter
Inspect valves and check engine exhaust valve guide clearance

Every 500 Hours:
Drain and flush gearboxes
Clean gearbox chip detectors
Verify magneto drive cushion pliability
Service collective spring assembly (manual controls only)
As required, inspect and service ignition components

Every 2200 Hours:
Overhaul entire helicopter
See R44 2200 Hour Inspection

Just like a vehicle, as the helicopter gets older its components begin to wear more, and seals, hoses, belts, and bearings can begin to degrade. By having a maintenance plan of what the engineer needs to inspect at hourly stages allows for simpler budgeting and planning when it comes to the maintenance service.

The more in-depth the inspection becomes, the longer it takes to be completed and when certain components need to be replaced the costs can soon begin to rise. The average cost for a 100 hour inspection on the Robinson R44 costs around $1500.

What are Helicopter Calendar Inspections?

No matter how old a helicopter is it contains components that must be replaced upon reaching their maximum age limit regardless of how many hours that helicopter has flown. Components subject to atmospheric degradation and fatigue will be given a calendar time limitation by the manufacturer.

Most calendar inspections on a helicopter fall under an Annual Inspection where the helicopter gets a thorough inspection once per year regardless of how many hours it has flown or can have a calendar maintenance schedule in addition to an hourly maintenance schedule set forth by the manufacturer.

During these calendar inspections, many pieces of the helicopter’s equipment get inspected or calibrated based on their calendar due date, just like the hourly maintenance schedule.

For example, the Robinson R44 has items that need to be inspected both hourly and per the calendar:

Every 4 Months:
Change oil, oil filter, and inspect oil suction screen and removed filter

Every 12 Months:
Inspect per Section 2.400 of the Maintenance Manual
Clean gearbox chip detectors
Inspect emergency locator transmitter (ELT)
Inspect optional pop-out floats

Every 24 Months:
Test and inspect transponder

Every 3 Years:
Lubricate C181-3 bearing
Inspect optional popout floats
Hydrostatic test pressure cylinder

Every 4 Years:
Overhaul TCM magnetos
Verify magneto drive cushion pliability

Every 12 Years:
Perform 12-year inspection and limited overhaul per Section 2.600, or overhaul per Section 2.700.

When it comes to the aircraft components, just like the hourly maintenance schedule the components and their calendar life limit change by each helicopter type and manufacturer. Some helicopters have a maximum time limit on main rotor blades for example, whereas other manufacturers place no time limit on them.

Here is an example of the Time Limited Components on the Robinson R44:

As you can see, many components have an hourly time limit that once they reach they need to be replaced, regardless of their condition. If you look at the main and tail rotor blades they also have a calendar limit of 12 years. Whichever limit is reached first is when they must be replaced: 12 years or 2200 hours.

If an owner were to purchase an R44, fly it from the factory to their hanger and leave it there. After 12 years they would need to replace both the main and tail rotor blades, even though they may only have 20 hours on them. This is because the manufacturer has stipulated that after 12 years they cannot guarantee the integrity of the blade therefore it must be replaced regardless of its condition.

The AS350 Astar that I currently fly has no calendar-limited components (that I’m aware of) so everything is replaced either when deemed out of tolerance by the maintenance engineers in consultation with the manufacturer’s recommendations, or it breaks.

Again, every manufacturer is different and the maintenance schedule and cost are something that must be researched by the purchaser to ensure they do not get caught out when the maintenance bills begin to arrive.


If you wish to see just what is involved in an annual inspection on a Robinson R44 helicopter you can view the engineer’s checklist HERE – Be sure to start at page 2.13


What are Helicopter Airworthiness Directive Inspections?

When a helicopter manufacturer has a concern about a certain component it can issue an Airworthiness Directive (AD). This directive must be complied with as per the terms set out by the manufacturer and usually involves a visual inspection and a signature in the aircraft logbook to state it has been complied with.

For example, there could have been a crack found appearing in a certain area of a component on several of its helicopters. To keep everyone safe, the AD gets issued with a checklist of what needs to be done and how often. This AD must be completed and signed off by an approved person (Pilot or Engineer) or the aircraft is deemed unairworthy thus nulling its insurance policy.

I have two AD’s on my Astar at the moment to inspect the tail rotor pitch change links for excessive wear and ensure the witness marks are legible on the main rotor pitch change links. Each has to be done as per the recommended times set forth by Airbus. As I do my daily inspection, I follow the AD’s when I’m looking at the main and tail rotors anyway, then I sign the aircraft’s logbook to say the aircraft’s daily inspection is complete as well as the AD’s.

Now it’s been inspected and signed off, I can legally go and fly the helicopter for that day.

AD’s are issued every now and then to help keep occupants safe when the manufacturer wishes to keep a close eye on a certain part of its helicopter. Most of the time there is no issue, but paying special attention to a certain component helps spot any potential problems arising before they turn into a major issue. Once a manufacturer is satisfied there is no issue they can remove the AD.

To Finish

By following the set maintenance schedule program set out by the manufacturer it ensures the helicopter is kept as safe as it possibly can. A visual inspection on a daily basis before the aircraft flies is a great way to ensure everything is as it should be, fluid levels are correct and nothing has been left behind by yourself or another person.

As helicopters begin to age the maintenance schedules are an excellent way to keep an eye on known wearing components and get them replaced before they develop into an issue that can, and has been deadly if not addressed.

Further Reading

If you found this article helpful may I suggest a few more for you to read:

Can You Survive a Helicopter Crash?


Anytime a helicopter crashes it always makes the news and most of the time this happens the outcome for the passengers is not good. But this is news, not reality. In fact, there are many, many helicopter accidents and incidents where the passengers survive or walk away unharmed, so what makes a helicopter crash survivable?

A crash in a helicopter will be survivable only when the impact forces to the body are minimal and the occupants have the means to escape safely. The majority of helicopter crashes are survivable due to helicopter cabin design, onboard safety equipment, and pilot & passenger training.

There are times when it is ‘Just Their Time‘ and I’m afraid to say I’ve lost several friends over the years to fatal helicopter accidents that were just too violent for the body to survive. But, there are many ways that a helicopter crash is survivable, and knowing a few of these tidbits of knowledge could save you if you were unfortunate enough to be in the wrong aircraft at the wrong time!

Causes of Helicopter Accident Fatalities

There are several ways that cause the occupants of a helicopter to perish when it is involved in an accident:

Blunt Force Trauma

By far the most common means of death in a helicopter crash is blunt force trauma to the body. This can be caused by a sudden impact with the ground, tree, water, or even a piece of aircraft debris. The human body is super strong, but once any part of it receives an impact of 10G or more it begins to cease functioning.

Blunt force trauma usually results in major tissue damage in the brain or severe blood loss causing the heart and brain to become starved of oxygen.

The sudden impact of a helicopter cabin with the terrain at high velocity usually means instant death. This could have been caused by a catastrophic component failure causing the helicopter to become uncontrollable, or CFIT (Controlled Flight Into Terrain) when the pilot loses visual reference with the surface due to darkness or cloud/fog and flies the aircraft into the ground/water, a mid-air collision with another aircraft, or the pilot places the helicopter into an unforgiving flight situation from which it is unrecoverable.

At any time the pilot is not able to control the helicopter all the way to the ground, then a high-impact force collision is inevitable, usually causing the death of every occupant on board.

Trapped Occupants

There have been many helicopter accidents over the decades where it was revealed that the occupants survived the impact but then succumb to other factors because they were not able to escape. An accident that comes to mind is the sightseeing helicopter that crashed into the Hudson River and everyone survived, however, because it was a ‘Doors Off’ sight-seeing flight the rear passengers were harnessed in. Because of their harness, they were not able to escape and drowned as the helicopter sank.

Other occupants of helicopter accidents have passed because they were unable to escape due to becoming pinned in the wreckage or their injuries prevented them from making their escape.

It really comes down to luck when a helicopter crashes but there are things like training that can really make a difference in the survival of each occupant. Had those passengers on the sightseeing tour had proper training on the emergency unbuckling of their harness, they may still be alive. Maybe their harnesses were never meant to be released in an emergency and thus not suitable for use in a helicopter?

Either way, if you are going to ride in a helicopter it is in YOUR best interest to ensure you get a thorough briefing from the company or the pilot on how to evacuate in the event of an emergency. For this reason, it is why I give very in-depth passenger briefings on my flights to ensure EVERY one of my passengers has the best chance of going home to their loved ones, should the worst happen!


Join My Newsletter & Get Great Tips, Information and Experiences To Help You Become a Superb Pilot!

* indicates required
Your Interest: *

Exposure Following an Accident

We all know about Search & Rescue and as pilots and passengers, we have that time period between the accident and help to arrive. Depending on where the accident happened that help could arrive in seconds or could be days to weeks. Many people are surprised how far you can get in an aircraft and even just 5 minutes into a flight could place you into a very hostile environment if you are not prepared for it.

Grand Canyon Helicopter Flights – Source: Preyitno

Taking a flight in a helicopter over the Grand Canyon? Do you think to take even a bottle of water with you? Taking a flight to see the Polar Bears in Northern Canada? Would you still wear your -30°C parka?

Just because the helicopter is warm/cold doesn’t mean that the same can be said if that helicopter crashes. Exposure to the elements just minutes from civilization can and will continue to cause fatalities after a helicopter accident.


I used to have this conversation with one of our paramedics when I flew MedEvac. They would never have their big parka when we went flying in winter. They said help would come and get us right away if we ever crashed. To which I pointed out “What if there was thick fog for days?”, then we would walk out is what they said! I would then reply, “What if we all have broken limbs?”


It may seem that help can always arrive but if that help does not arrive in time then exposure to the elements would be a terrible way to go considering you just survived one of the most traumatic events of your life!

Because of these things, there are several things we can all do to prepare ourselves for a helicopter flight, no matter if you are just doing it once as part of your bucket list, fly regularly as part of your job, or are learning to become a pilot, these things below may just make the difference – and some of them are great experiences in themselves!

How Do You Survive a Helicopter Crash?

Here are some of the best tried and tested ways to ensure you have the best chance of survival should you ever be involved in a helicopter accident:

Training

We all know training dramatically reduces the risks involved in everything we do in life and I personally am a huge advocate for personal training and development. As a pilot, I am constantly reviewing my aircraft emergency procedures along with annual training flights with training pilots, simulator flights, and software-based exams to ensure I can be the safest pilot I can be for my passengers.

As a passenger, there are several types of training you can give yourself depending on how often you get to fly in a helicopter:

Passenger Briefing – This small 5-10 minute presentation is paramount. I know we all switch off when the flight attendants begin their demonstration on an airplane, but for a helicopter, the briefing is very different and should not be skipped.

Be sure to read the safety briefing cards offered and never be afraid to ask questions or ask to have a go yourself at opening the doors before the flight begins. Helicopters are a simple vehicle when it comes to their passengers but if you don’t know how to get out, then that is a problem.

Oh, and you would be surprised how many passengers I see trying to pull the door handles the wrong way just 2 minutes after I showed them multiple times! – I have tried to change the way I deliver the briefing to solve this but people just don’t listen! This could kill them!

If you are a regular passenger in a helicopter then I highly recommend the next two courses if you can get on them.
Great fun, but a huge eye-opener!!!

Wilderness Survival Training – Being trapped in an environment can be a terrifying experience but having a small bit of knowledge behind you can really improve that time spent waiting to be rescued. No matter if the terrain is desert, jungle, arctic, woodland, or water, getting some survival training for the environment you fly around in the most is a great tool to have.

When I was in flight school I went on a wilderness survival training course and it was here that I learned how far into the wilderness a helicopter can get you in such a short space of time. Because of that course, my outlook on survival changed! Have I ever needed the knowledge, not yet, but it’s still there if I do!

Have a Google search for wilderness survival training in your area, if you can find one aviation specific then even better. But definitely go and book a course and go have some fun and learn something new!

HUET (Helicopter Underwater Escape Training) – By far the biggest eye-opener of my flying career was when I undertook the HUET training! I have done it twice now and to this day it still makes me hug shorelines when I’m flying, especially when I know the water is cold!

Yours Truly in ‘The Washing Machine’ as it’s nicknamed!

If your job involves flying over lots of water in a helicopter then I insist you get signed up on a Helicopter Underwater Escape Training course! I can safely say that without this training and if you were a passenger on a helicopter that ended up in the water, you would stand only a 10-20% chance of getting out of the aircraft! Why…

Helicopters have the engine/s and the main transmission mounted up high on top of the helicopter. This makes them top-heavy and if the helicopter is not equipped with emergency popup floats, the helicopter will roll upside down with you in it once it lands on the water. I can assure you this is so disorientating and I did this in a warm swimming pool and I knew it was coming!!!

Some facilities have incredible HUET simulators, but even just the simple courses that bring a stainless steel simulator to a pool is invaluable. Get yourself booked on one! Oh, and its fantastic fun!

Clothing

Dressing for the weather condition and location over which you are flying is very important! Exposure following an accident is a silly way to leave this world just because you were not dressed accordingly. The tough part comes when deciding what to wear to be comfortable in the helicopter as well as surviving the weather conditions outside of the helicopter.

For the majority of flights where passengers are on a tour flight, the weather conditions at the takeoff location are pretty similar to where the flight is going so the clothing they are already wearing is usually sufficient. When the flight takes place over more hostile environments, is when clothing becomes a major concern.

Offshore Passengers in Immersion Suits – Source: Flerg

When flying over water, all offshore workers and pilots will wear full immersion suits. When working in the Arctic, all crew and passengers will wear high-quality, cold-weather clothes in layers. When flying in the mountains, many crews will have layers of waterproof, breathable clothing like Gore-Tex to help protect them.

By wearing layers it allows them to decide on the right amount of clothes to be worn while flying and having the extra layers close by in case a rapid evacuation of the helicopter needs to be made.

Just as important as clothing is footwear. The wrong footwear can lead to blisters, frozen, or injured feet if it is too hot and not worn. This is why as a pilot I always ensure my passengers are dressed appropriately for the flight.

I had a ‘Kid’ adult show up in tennis shoes one day when it was snowing and -30°F outside and he was supposed to be working out in the weather all day. He was confused as to why I wouldn’t take him, but soon went home to change when he called his boss and told him why we couldn’t fly – Let’s just say he showed up in proper winter boots after that!

Survival Equipment

Most commercially operated helicopters will carry a survival kit of some form onboard the helicopter. Depending on the location, the contents of the survival kit can differ. Some kits may include just basic supplies for making fire, purifying water, signaling, and so forth, whereas other kits can include food rations, axes, saws, tents/shelters & life rafts, and other essential items.

The more passengers a helicopter carries the bigger the survival kit becomes, which also begins to add weight. As part of a passenger briefing, the location of any first aid kit, fire extinguisher, and survival equipment should be shown, and also how to open the access doors to get to it.

I’ve had a personal survival and first aid kit in my personal flying bag for years and it’s always nice to know I have a ‘few extras’ of things that may be useful if the helicopter were ever to go down and I were stranded for any length of time. They were cheap, tiny, and lightweight, and if you wish to look at equipping yourself with a similar kit you can find a great selection of survival items Here at the PilotTeacher Store.

To Finish

Helicopter crashes are survivable in the right conditions. Providing the impact is of low energy then the design of the helicopter fuselage can do tremendously well in protecting its occupants. In high-impact situations, the odds of surviving go down considerably.

Having good training, the right clothing, and equipment can then make a huge difference to helping protect the occupants after the accident. Rescue may not come for some time but at least if injuries can be treated, shelter and warmth can be maintained then the outcome is usually pretty good!

Helicopters: Why Are They So Expensive!?


When I was in my late teens and began the dream of learning to fly I can remember looking at the hourly rates for training in both helicopters and airplanes. What I could not understand was why helicopters were so much more expensive than an airplane! Now I’ve been in the industry for a few decades I completely understand why!

Helicopters contain many complex moving parts. These parts cost a lot to manufacture, inspect, and maintain. The fuel burn rate in gas turbine helicopters is also high due to the increased power required to fly. All of these items dramatically increase the cost to buy and fly a helicopter.

When I first looked into learning to fly a helicopter it blew my mind how much more expensive it was compared to learning to fly an airplane and it wasn’t until I started researching both types of aircraft that I found out why. This is what I found out many, many years ago but now with the added knowledge of working in the industry for almost two decades.

Why Are Helicopters So Expensive To Buy?

Helicopters are expensive to buy because of the high number of precision components required to make the helicopter fly. There are so many moving parts compared to an airplane and they all require complex design, testing, and manufacturing. The more components, the higher the cost.

If you are looking to buy a helicopter brand new from the manufacturer or a used model, the price is staggering. The company I work for just purchased a brand new Airbus H125 at a cost of just over $3M. This helicopter has a gas turbine engine and can carry 6 people, but yet an airplane with similar specs, the Piper Meridian M500 for example, starts at around $2M.

Even a Single Engine Helicopter Is Complex

The main reason behind the high purchase of a helicopter price falls into several categories:

  • Cost of Initial R&D (Research & Development)
  • Number of Components To Be Manufactured
  • Component Materials
  • Time To Assemble
  • Time To Inspect

Helicopters contain so many more components than an airplane of similar size and many of these components move or rotate. This alone adds to the complexity of the aircraft. The design and testing of each component takes longer, the more components there are, the longer it takes to manufacture each component, and the more parts there are, the longer it takes to assemble the aircraft and inspect it.

In aviation whenever the word ‘More’ is mentioned it increases the cost! Time and materials cost money and because of all of the categories, this is why the cost to purchase a helicopter is far more than an airplane.

Why Are Helicopters So Expensive to Fly?

Helicopters are expensive to fly because of the cost the owner needs to set aside to cover the maintenance and replacement of the life-limited components onboard. More components require more time to inspect during maintenance and be replaced as needed. The more complex the helicopter, the more it costs.

To get a helicopter into the air legally many factors have to have been completed. These factors all cost money which when divided into the estimated total running hours for the year will provide the owner/operator the hourly running cost of the helicopter.

To ensure the helicopter owner is not left with a large bill when it comes time for maintenance or a major aircraft overhaul the costs are broken down and usually based on around 500 hours flown per year.

Let’s take a look at some of these running costs:

  • Helicopter Purchase Loan Repayment/Aircraft Lease (if required)
  • Pilot Wages (if required)
  • Insurance
  • Fuel & Oil
  • Maintenance
  • Component Replacement
  • Hanger Rental/Purchase
  • Taxes
The Robinson R44

To give you an idea of what it costs to fly one of the world’s most popular helicopters, the Robinson R44, the manufacturer has put together a rough pricing guide breaking down all the items that go into creating the final operating cost per hour for that aircraft. The numbers given are a starting point and many companies & owners find the actual costs can be much higher depending on their own circumstances, location, and type of flying to be done:

By far the biggest annual expense is the insurance for the helicopter. The pilot is usually the weakest link in the chain and when they make a mistake it can become very costly for the insurance company. Not only does the aircraft need replacing but other costs could be incurred depending on where the accident happened.

Did people get hurt/killed? Was property damaged? Did the aircraft accident create a wildfire? The list is endless and it is up to the insurance company to foot the colossal bill. This is why helicopter hull and liability insurance is high, especially when the pilot is low time and inexperienced. As the pilot becomes more experienced the insurance premium will begin to reduce.


Join My Newsletter & Get Great Tips, Information and Experiences To Help You Become a Superb Pilot!

* indicates required
Your Interest: *

Why Are Helicopter Rides So Expensive?

Helicopter rides seem expensive but are broken down into the hourly operating cost of the helicopter divided by the number of passenger seats. A helicopter with 5 passenger seats and an operating cost of $1800 per hour will cost each passenger $360 per hour, $180 per 30min or, $90 per 10min.

A helicopter ride is where most people get their first experience of flying in a helicopter. It was for me! That flight I took around Manhattan when I was 22 years old changed my life forever! At the time it blew my mind at how much the helicopter ride cost but now I completely understand why my short 15 minute flight was over $100!

Oh my, I look young there!!!

The cost to run a tour helicopter is broken down into minutes per seat. A 7 seat tour helicopter that costs $1500/hour to run breaks down to $1500/6 seats (pilot not included) = $250 per seat per hour. A 15 minute tour flight costs $63 per passenger, then the company’s profit margin & tax is added.

The more a tour helicopter can fly, the cheaper it becomes to run. Helicopters only make money when they are flying so the more tours each helicopter can do in a day, the better the bottom line becomes. Large helicopter tour companies will have very slick booking-in and boarding processes to ensure the helicopters can be turned around as quickly as possible and the passenger experience is as exciting as possible.

I can still remember booking-in for my New York ride and that was over 20 years ago! – OK now I feel old!!!


If you would like to find out more about taking your first helicopter tour flight I highly recommend Maverick Helicopters. They are one of the world’s biggest tour operators and I have several friends who have flown for them and their service is first class!
Click The Banners Below For More Information:

Come Experience Hawaii The Maverick Way! - Click Here
Helicopter Tours of the Grand Canyon and Las Vegas - Click Here

Why is Helicopter Training So Expensive?

When I first began researching my flight training I was having a hard time trying to figure out how I was going to pay for it! The cost to learn to fly is astronomical for a helicopter and the majority of that cost is because of the insurance premium.

Insurance premiums placed on training helicopters are high because of the large potential for accidents or incidents. This increases the hourly rental cost that the school must pass on to the student. Experienced instructors and a clean accident history can help reduce the premium.

The Robinson R22 is the world’s most popular training helicopter and having gained over 1000 hours teaching in one I can tell you they are a great little machine.
To give you some idea of how much more the insurance premium is when a helicopter is used for training let’s look at the operating costs given by the manufacturer:

Based on 500 hours flown per year, if you were to buy and fly the helicopter for your own personal use it would work out to around $160 per hour.

For the flight school, you now have to add in an instructor at around $50 per hour and then the added insurance premium. The average hourly rental cost for a Robinson R22 in flight school is $350. This is over double the cost compared to you owning your own helicopter!

Insurance is the biggest factor here!


If you would like more information on just how much it costs to become a pilot please check out this article:

Cost To Become a Pilot: All the Certificates Compared!


Airplane Vs Helicopter Cost Comparison

The only way to really see how much more a helicopter costs is to compare it to an airplane of a similar seating capacity. Let’s start off with two of the most popular aircraft in each category:

Robinson R44 Raven II Vs Cessna 182T Skylane:

Robinson R44 Raven II – Source: Bidgee
Cessna 182T Skylane
Robinson R44Cessna 182
Cost To Buy New$500,000.00$515,000.00
Cost To Insure Per Year$12,400.00$4,500.00
Fuel Cost Per Hour$90.00$85.00
Cost To Run Per Hour$335.00$170.00
Cost To Run Per Mile$1.33$0.53
Based on flying 150 hours per year

Remember there are so many factors that can sway the exact pricing on these aircraft but for averaging, this is roughly what the price comparisons are. The prices above were taken from both the manufacturers and other aircraft marketplace websites.

As you can see insurance is a huge cost factor when it comes to helicopters. Even though the airframes are a similar cost to buy the insurance premiums are far higher on a helicopter. Maybe this is because of the higher accident rate of the smaller helicopters. Inexperienced pilots landing in a location they shouldn’t can quickly turn into an accident, whereas small airplanes are landing on large runways which are far more forgiving.

To further understand what increases the cost of a helicopter to operate we need to break it down further.

What Increases Hourly Costs on An Aircraft?

To help understand why all aircraft, helicopters in particular are so expensive, it’s easier to break it down into a few major areas and then compare aircraft of a similar size, side-by-side.

The major areas that increase an aircraft’s operating costs are:

  1. The number of components on the aircraft
  2. The number of Life-Limited components
  3. The fuel burn rate
  4. The yearly maintenance costs

Let’s take a look at each of these areas individually:

Number of Components

Small airplanes are fairly simple machines, which makes them perfect for private individuals and small companies to own and operate. When you get up into the larger aircraft, then, they can get really complex, real quick!

The fewer, and simpler the number of components there are on an aircraft, the cheaper it is to design, develop, test, and manufacture. Those same parts then require less maintenance, inspections, and replacements.

A Cessna C150 Powerplant – Source: YSSY Guy

Airplanes have propellers bolted directly to the engine, and only one gearbox is needed when it’s a gas turbine engine. The flight controls are simple, hinged components that are usually manipulated using pulleys and cables. The wings are bolted and do not move, there are no driveshafts or complex linkages which makes them a beautiful aircraft to maintain.

By comparison, the number of moving and complex components on a helicopter is dramatically more than that of an airplane. There are rotor blades, swashplates, rotor heads, gearboxes, driveshafts, and complex flight control linkages. All of these significantly add to both the initial purchase cost and the ongoing maintenance costs.

Simple = Less Cost
Complex = More Cost

This is one of the reasons why helicopters are more expensive than airplanes of a similar occupant carrying capacity.

Life-Limited Components

On an aircraft, there are certain components that have a life time limitation. That life limit time can either be an hours flown time or a calendar time. Many components can use both and whichever limit is reached first is when that part must be thrown away, or if able, be sent away to be overhauled.

The Worlds Most Popular Helicopter, Robinson R44 – Source: James

On a helicopter like the very popular Robinson R44, the manufacturer dictates a 12 year/2200 hour life limit.

If the helicopter is flown to 2200 hours within 12 years, it has reached its life limit. However, if you bought the helicopter, flew it for 100 hours then sat it in the hangar until its 12 years were up it would need an overhaul, no matter that it only has 100 hours of flight time on it.

Once it has had its 12 year overhaul it is good for another 2200 hours or 12 years, whichever is reached first.

Most of the components on a helicopter that can be life limited are:

  • Main & Tail Rotor Blades
  • Engines
  • Transmissions
  • Flight Controls
  • Landing Gear

Depending on the helicopter type, some of these items may need to be thrown away, sent for factory or approved vendor overhaul, or completely disassembled and inspected for wear & tear, cracks, corrosion, and play.

Depending on the manufacturer main rotor blades can be a throw-away item! Each rotor blade on the AW139 I flew cost $100,000ea and there is 5 of them!

For a Cessna 182, the main life-limited components are:

  • Engine
  • Propeller

By comparison, a helicopter has far more life-limited components on it than an airplane. The cost of replacing these must be accounted for in the hourly flying costs.

This is another reason why helicopters are more expensive to run than airplanes.

Aircraft Fuel Burn Rate

The type and number of engines on an aircraft will dramatically alter how much it’s going to cost to purchase, run each hour, and maintain.

2 engines are going to burn far more fuel than a single engine aircraft, and 4 engines…well you get the picture!

The other main difference is the type of engine being run. A piston engine consumes far less fuel per hour than a gas turbine engine.

For Example:

Robinson R44 Helicopter is a 4 seat, 6 cylinder piston-powered helicopter.
Fuel Burn Rate = 11-13 gallons of AvGas per hour.

By Comparison:

Robinson R66 helicopter is almost identical to the R44, but is a 5 seat, gas turbine-powered helicopter.
Fuel Burn Rate = 23 gallons of Jet Fuel per hour.

Yearly Aircraft Maintenance Costs

Depending on the aircraft and the type of flying it is doing (private vs commercial) the number of maintenance inspections and work that has to be completed every year will vary.

No matter what, every aircraft has to be inspected and worked on. some of the items can be completed by the owner, but some have to be completed by a licensed aircraft mechanic. These costs need to be accounted for.

Most owners and companies have a general idea of what the maintenance costs will be for the next few years and will factor in the total price of all the work needing to be done, and break it down into a set amount of hours flown each year. These maintenance costs will then be added to each flight hour to help spread the cost of the large maintenance bills over time, rather than paying a large lump sum in one go.

The typical cost for an annual inspection on a Robinson R44 helicopter ranges from $1,600-$1,800 before any additional parts need replacing.

The average cost for an annual inspection on Cessna 182 Skylane ranges from $900-$1,100 before any additional parts need replacing.

To Finish

Helicopters are a complex machine with many moving parts. The cost to design, test, develop, and maintain each component significantly increases both its purchase price and its hourly operating cost.

After the cost of the aircraft has been incurred the insurance is by far the next biggest cost. Due to many helicopters becoming involved in accidents with inexperienced pilots, the premiums go up. When an incident occurs in a helicopter it usually involves a lot of maintenance time to repair. A similar mishap in a fixed-wing can be far less costly due to the strength and simplicity of the airframes.

Further Reading

If you found this article helpful, may I suggest a few more for you to read:

Why Do Aircraft Cockpits Have So Many Buttons?


When you walk onto an airplane to take a flight you have probably glanced through the open cockpit door to be greeted with a room that seems to be full of screens, buttons, switches, dials, and circuit breakers. To most people, this seems like a scene from the Starship Enterprise and you may wonder how the pilots know what each bit does!

Many of the buttons and switches in aircraft cockpits are duplicated for both pilots to allow the aircraft to be flown from either seat. Buttons & switches in the middle control aircraft systems like lights, climate, fire, and other equipment that are generally not used for primary flight control.

Even as pilots, when we first transition from a basic training aircraft into the cockpit of a modern airplane or helicopter we too feel the same. It’s an overwhelming feeling of ‘I have no idea what the heck all this stuff does‘ but with training and time, it soon becomes familiar.

I still remember showing my dad the cockpit you see above of the AW139 helicopter I was flying and his eyes turned to dinner plates! This article is how I explained the cockpit to him so he understood what ‘all that stuff’ was.

What Do All the Aircraft Cockpit Buttons & Switches Do?

Aircraft are complex machines comprising of many, many systems that all need some form of input and control from the pilots to operate correctly and at the right times. The cockpit is where most of these input devices are congregated to allow pilots to access every item in one place and that is why there seem to be so many buttons, knobs, and dials.

If you look closely at a modern cockpit you may notice a lot of items are duplicated for both seats. This is to allow either pilot to control a system no matter which seat they are sitting, whether they are flying the aircraft or monitoring the aircraft. This is the main reason why there seem to be so many things – Duplication.

In front of and directly next to each pilot seat will be its own set of controls, buttons, dials, and displays so that no matter which seat a pilot is sat in the primary devices used to control and protect the aircraft are immediately to hand.


Real World Example:

In the helicopter cockpit you see above, the flying pilot sits in the right seat, while the pilot monitoring and doing all the radio and navigation work sits in the left. When coming into a hospital helipad, normally the pilot in the right seat does the landing but depending on where the wind is coming from and the approach path to be flown, the instrument panel can block the view of the flying pilot.

At this point, the pilot in the left seat takes control and completes the approach and landing with minimal effort because the cockpit layout around each seat is almost identical. If any buttons need to be pressed it is easily done from any seat.


To help explain all the ‘Stuff’ you see in the cockpit, these items can be categorized into several areas:

  • Inputs
  • Outputs
  • Data
  • Communications
  • Control
  • Circuit Protection

Let’s take a look at each of these categories:

Inputs

When a system needs to be turned on or set to a specific setting by the pilot it needs a device to allow them to control this system. Buttons, knobs, counters, dials, and levers are the most common devices used in aircraft cockpits.

Each Engine Goes Into an Automatic Start With the Turn of Each Knob

For example, buttons to turn on the aircraft landing lights and window wipers, dials to set the temperature for the cockpit, or a lever for selecting the landing gear to its down position.

Outputs

When a system is in a certain configuration the pilots may be required to know what configuration it is in to allow them to make decisions based on its operation or for checking against a step within a checklist. Most outputs are displayed as LED indicators, needles, or numerical readouts.

For example, when the landing gear is fully down and locked in position it shows 3 green indication lights on the landing gear panel. During its movement from stowed to locked, it shows 3 yellow indication lights, or if one becomes seized and is not locked, it can show a red indication for that particular leg.

Another example could be the numerical display of one of the communications frequencies. Buttons are used to input the desired frequency and the numbers show the pilot the frequency they inputted and are listening/transmitting on.


Join My Newsletter & Get Great Tips, Information and Experiences To Help You Become a Superb Pilot!

* indicates required
Your Interest: *

Data

Data is all the information pertaining to the control and position of the aircraft. In modern cockpits, all the flight data is collated onto digital glass screens in front of each pilot. In older aircraft, each parameter was shown on an individual dial that took up a lot of room. Have a look at this picture of a B-52 Stratofortress cockpit and you will see what I mean! – (Wiki Link)

Altitude, airspeed, heading, bank angle, rate of climb, course, waypoints, weather radar, other aircraft locations, and dozens of other flight parameters are easily shown. The status of aircraft systems can also be shown by scrolling through different pages to allow quick visual inspection – Engines, hydraulics, oil, electrical, climate, etc.

Communications

Being able to communicate with other aircraft and air traffic control is one of the main ways our skies remain safe. The ability to talk and hear clearly is paramount and during a flight, a pilot could talk to over a dozen different people all on different frequencies. Modern cockpits come with multiple radios to allow pilots to talk just by inputting a set frequency and pressing the microphone button. Many cockpits allow the monitoring of multiple frequencies on different radio bands.

Even in my simple Astar helicopter, I have two VHF radios for listening and communicating with pilots and ATC, then two FM radios for talking to ground crews when working on wildfires or construction jobs.

Control

Pilots need to be able to control the aircraft to get it into a safe flight configuration before handing it over to the automated systems. We are all familiar with airplane yokes, throttles, and pedals but there are also controls for trim, landing gear, brakes, and other systems which need manipulation in the cockpit.

Circuit Protection

The ceiling of most aircraft is where you find the circuit breakers that protect each system. There can be a huge amount of circuit breakers in a cockpit and most of them need to be in easy reach of the pilot/s to be able to be reset in flight if required by the emergency procedures checklist.

Boeing 777-200 Overhead Circuit Breaker Panels – Source: Bill Abbott

The circuit breakers are usually split into zones to allow for easy identification by the pilots under a high-stress emergency.

The whole array of all the items mentioned above can seem like cockpits are crammed with stuff, and in some aircraft they are, but there is logic to each part and where it is located, well in modern aircraft anyways. I’ve been in some older aircraft where an item was placed just because that was the only space available, today, there is a lot more thought behind its placement.

How Are Aircraft Cockpits Designed?

Everything in today’s world is about ergonomics and providing the operator/s with the simplest, easiest, and most intuitive way to use it. Aircraft cockpits are no different and take months, if not years of layout design to give the pilots the perfect operating environment from both seats.

Flying an aircraft is one thing when it’s all working as it should, but when the proverbial stuff hits the fan, the pilots need logical cockpit layouts to ensure emergency checklists and procedures can be carried out efficiently and accurately to ensure the safety of everyone on board and around the aircraft. This also includes being able to reach every item from either seat so that either pilot can ‘Run The Checklist’ while the other pilot handles the flying.

For this reason, cockpits are split up into panels that house a collection of systems to form a logical layout.

One of the problems that cockpit designers face is trying to fit all the items needed by the pilot/s into one area. Since the advent of touchscreens, they are starting to become more and more prevalent, especially in airplane cockpits. If you take a look at a cockpit like the Airbus A350 XWB you can see there are hardly any buttons at all as it is mainly all controlled via touch buttons on the screens.

Airbus A350 XWB – Source: Joao Carlos Medau

Do Pilots Know What Every Cockpit Button Does?

Pilots train rigorously and frequently to learn and remember every system on the aircraft and what its buttons, dials, knobs, and levers in the cockpit do. This allows for the correct use of each system and how it operates during normal and emergency procedures. Most airlines utilize training devices like full-motion simulators or stationary touchscreen simulators known as CSTs – Cockpit Systems Trainers or CPTs – Cockpit Procedures Trainers.

C-130 Hercules CPT – Source: Phil Speck

Cockpit Procedures Trainers are a great tool for running normal and emergency aircraft checklists for pilots new to the aircraft as they allow for rapid, repeat training to be completed at a fraction of the cost of a full-motion simulator. The touchscreen buttons act just like they do in the real aircraft giving the pilots time to build muscle memory of the items’ physical location in the cockpit, and what they can expect to see and hear when any button, dial, switch, or lever is activated.

Once the rookie pilots have completed the training syllabus on the CPT they progress into the full-motion simulators to begin flying the aircraft and dealing with the normal and emergency checklists while having to fly and control the aircraft just like they would in the real aircraft.

After using both of these types of training devices you soon become enveloped in the training and you forget you are in a training device and not the real aircraft, especially when in the full-motion simulators.

Yours Truly in the Leonardo AW139 Helicopter Full Motion Simulator

Each pilot must complete an intense initial training program usually over many, many weeks to learn the aircraft, then they will be subject to intense testing both on paper and in the simulator to ensure they know how to operate all the items in the cockpit both under normal flight conditions and the worse situations a pilot can find themselves in.

After initial aircraft type training, pilots will then undergo further simulator training multiple times each year depending on each company’s individual training policy to ensure they stay fluent in their procedures, checklists, and knowledge should an incident occur while in the air.

I can tell you that after a 4 hour training session in the sim with all hell breaking loose you are physically and mentally drained, but it is surprising how well you become familiar with every button, dial, needle, switch, and lever in the cockpit!

To Finish

Most of the buttons you see in an aircraft cockpit are duplicates to allow the aircraft systems to be operated and controlled from either pilot seat. The large amount of circuit breakers further adds to what seems like a room just covered floor to ceiling in stuff.

As pilots become familiar with the aircraft the items in there soon become less foreign and more just a part of their office. Think of a modern cockpit like a library, to the untrained eyes it’s just rows and rows of shelves and books, but ask a librarian to help you find a book and they will know exactly where to find it!

Further Reading

If you found this article helpful, may I suggest a few more for you to read: