Are You Wanting To Become a Pilot?
Find Out How to Save Hundreds to Thousands of Dollars When it Comes to Your Flight Training!

Recent Posts

Want to Become a Flying Instructor? – How, Cost, Time & Salary


Becoming a flying instructor can be one of the most rewarding careers in aviation. Being able to take a person with zero flying experience and tutor them through a training syllabus to help them realize their dream is an incredible feeling!

To become a flying instructor a pilot needs to have at least their Commercial Pilot Certificate & complete a Part 61 or Part 141 training program. Most students will complete the course in about 1-3 months with earnings for new instructors starting around $23-25 per hour.

There are many instructors out there and without them, most of us would not be learning to fly, but just how do you get to become a flying instructor? My time spent teaching was such a great experience and one day ill go back to it. In the meantime here is how you can step into that role and pass on your knowledge.

How Do You Become A Flying Instructor?

In the US, the FAA stipulates what flight experience and aeronautical knowledge a pilot must possess before they are even eligible to attempt a Certified Flying Instructor (CFI) Checkride or Flight Test.

To Be Eligible For The CFI Certificate a Pilot Must:-

According to: 14CFR§61.183 CFI Eligibility Requirements

  • Be at least 18 years old
  • Be the holder of a Commercial or Airline Transport Pilot Certificate with:
    • An aircraft category and class rating that is appropriate to the flight instructor rating sought, and
    • An Instrument Rating &/or appropriate privileges if they are to instruct on:
      • An airplane category and single-engine class rating
      • An airplane category and multiengine class rating
      • A powered-lift rating
      • An instrument rating

Then, there are two ways in which training for the CFI certificate can be approached:

  • A Part 61 Training Path, or
  • A Part 141 Training Program

Let’s look at both of these methods:

14CFR Part 61 CFI Training:

Under this Part of the FAA regulations, it allows for a very flexible training approach to becoming a flying instructor. It is more of a self-study route and is generally aimed at pilots who have vast amounts of experience and wish to become a CFI, or those pilots who already meet some of the requirements and just need to ‘Fill in the Gaps’ to then be ready for their written and flight examinations.

A student will only be ready to take the written and flight examinations once they have proved to, and been endorsed by a certified flight instructor.

To meet the Part 61 requirements, in addition to the above, must also:

  • Receive and log ground training from an authorized flying instructor on the ‘Fundamentals of Instructing‘ to be able to pass a Written Knowledge Test based on:
    • The Learning Process
    • Elements of Effective Teaching
    • Student Evaluation & Testing
    • Course Development
    • Lesson Planning
    • Classroom Training Techniques
  • Be able to demonstrate instructional proficiency in various areas, specific to the aircraft. This includes aircraft knowledge, maneuvers & Emergency procedures
  • Receive and log a minimum of 15 hours of flight time
  • Receive all applicable endorsements from an authorized instructor
  • Pass a Written Knowledge Test on the areas to be taught to Private & Commercial pilot applicants
  • Pass a Practical Flight Test – Known as a Checkride

14CFR Part 141 CFI Training:

This is a very structured program for becoming a CFI and will follow an FAA-approved flight and ground training syllabus. This is primarily what will be received at a flying school with an accredited program. Because the program follows the approved syllabus.

Based upon 14 CFR 141 Appendix F, the applicant for a CFI certificate must:

  • Use an FAA-Approved Training Syllabus from an accredited flying school or company
  • Complete an approved Flight Instructor ground school program of 40 hours
  • Receive and log a minimum of 25 hours of dual instruction flight time
  • Pass stage checks and an end-of-course flight test (Checkride)

This is how I and many other pilots got their CFI Certificates.

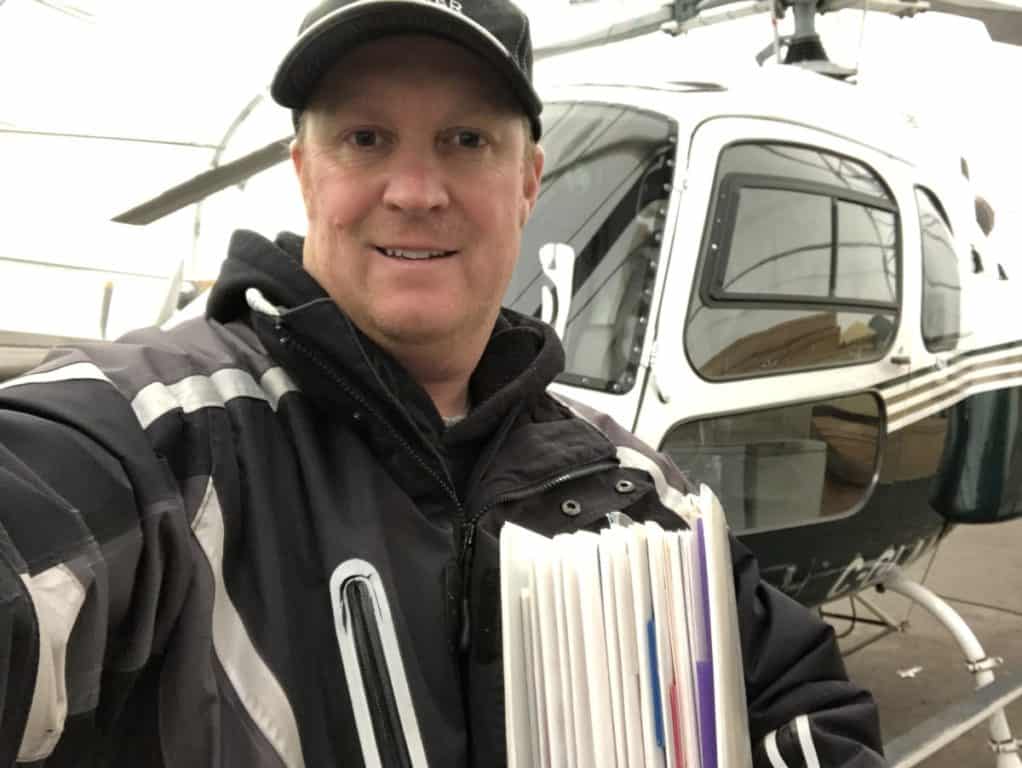
During my CFI training, I had to prepare lesson plans for teaching the entire Private & Commercial ground syllabus (I still have them now, the binder is 4″ thick and took me 3 months to write!).

My Binder of Lesson Plans!

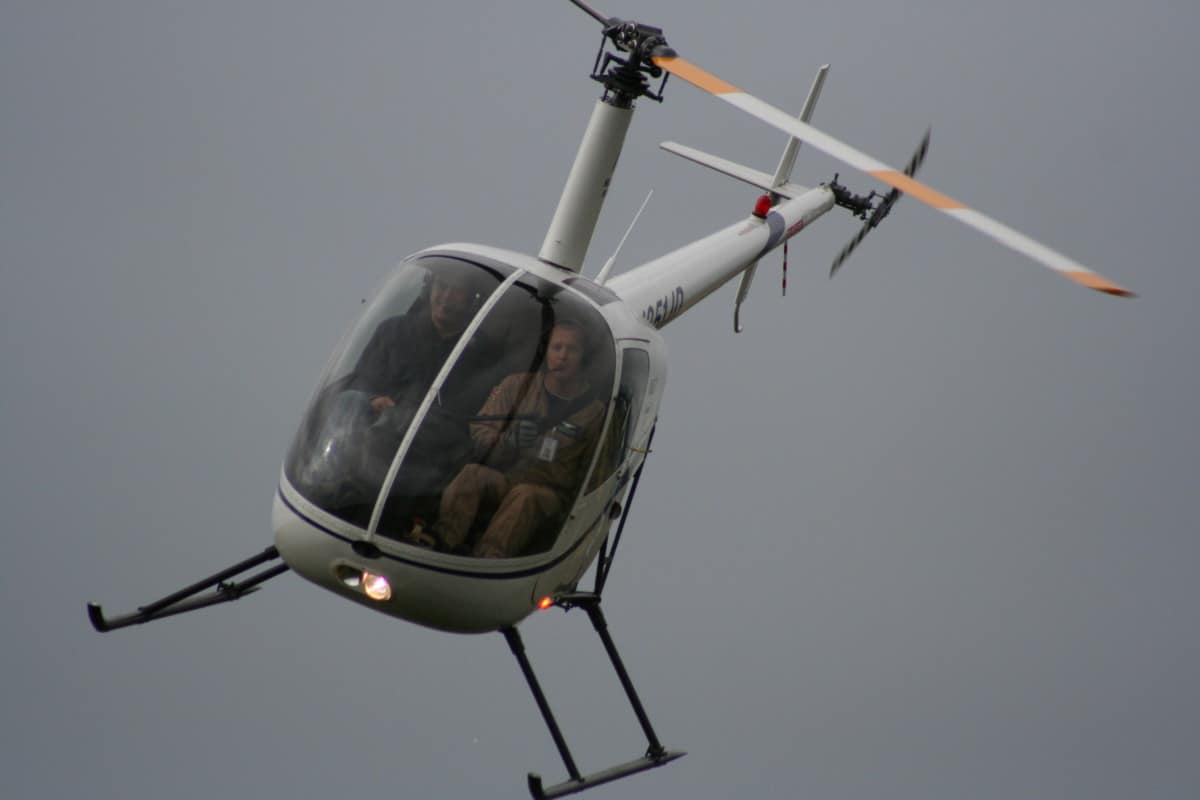
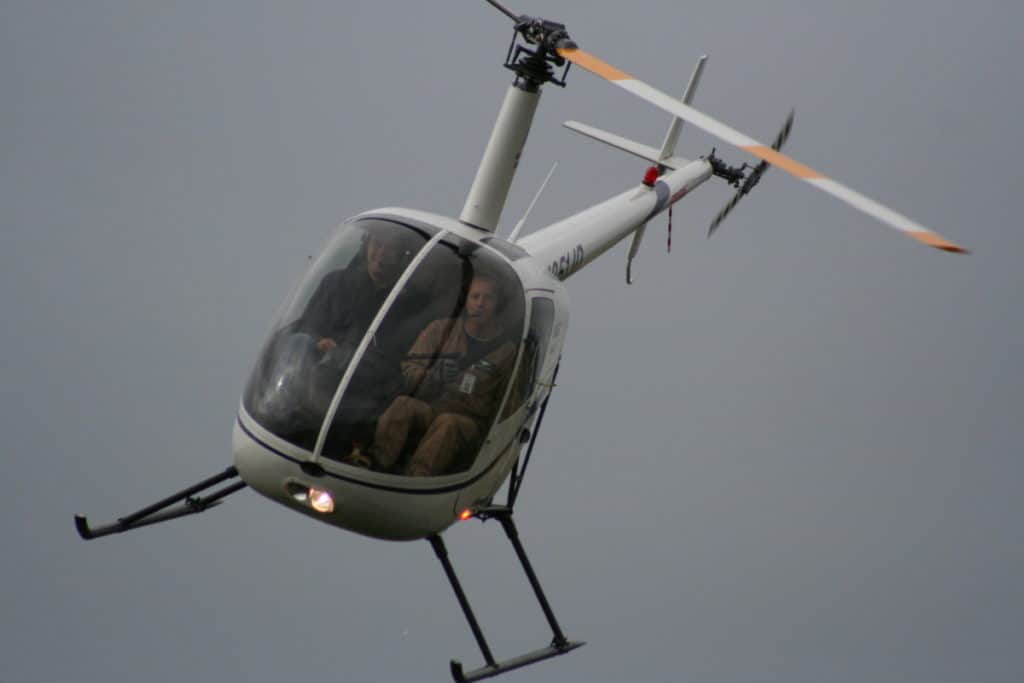
My flight training consisted of learning to fly in the left seat of the Robinson R22 helicopter which also meant learning to hold the Cyclic completely differently, because of the bent ‘T-Bar’ Cyclic in the Robinson series of helicopters.

Instead of resting your wrist on your right thigh, as you do in the right seat when holding the Cyclic, you now have to hold your wrist about mid-torso height so the student has their wrist resting on their thigh. It really takes some getting used to!

Not only that, but I also had to memorize and speak a set script for every maneuver so that I could tell the student what they should be doing on each control and at what time. Talk about reaching mental saturation!

I can tell you that this was by far the hardest part of all of my training! I hit a plateau and it took real effort and dedication to keep trying until I mastered it!


Join My Newsletter & Get Great Tips, Information and Experiences To Help You Become a Superb Pilot!

* indicates required
Your Interest: *

How Much Does It Cost To Become A Flying Instructor?

This data was researched and collected over the space of many weeks with over 30 flight schools contacted across the nation so I could bring you the most accurate and up-to-date average costs for the certificate you wish to pursue.


For a more detailed article comparing all the pilot certificate costs and the breakdowns, see the link at the end of this article!


Airplane

Minimum Age:18
Any Previous License Required:Commercial or ATP
Total Flight Hours Required:25
Dual Hours Required:25
Solo Hours Required:0
Ground Hours Required:40

Costs:

Flight Training:

The FAA requires the applicant for a Part 141 Certified Flight Instructor Certificate to have gained a Commercial FW Certificate or an Airline Transport Pilot Certificate FW before commencing CFI training.

Average Hourly Rate of Cessna 172 = $135/Hour
Average Hourly Rate of Flight Instructor = $45/Hour

FAA Minimum:
25 Total:
25 hours Dual Instruction x (135+$45) = $4,500

Total = $4,500

Student Average:
30 Total:
28 hours Dual Instruction x ($135+$45) = $5,040
2 hours Dual Flight Test Prep x ($135+$45) = $360

Total = $5,400

Ground School or Theory:

The Part 141 FW CFI training program requires 40 hours of Classroom-Based or One-On-One Ground Instruction to include:

  • Fundamentals of Instruction (FOI)
  • Aeronautical Knowledge

Average Ground Instructor Hourly Rate = $45/Hour

Examinations:

FOI Written Examination = Average $150 (Ranged from $125-$175)
CFI Written Examination = Average $150 (Ranged from $125-$175)
Flight Examination = Average $500 (Flight Examiner Ranged from $400-$600)

Extras:

Most students will require around $200 extras that can consist of:

  • Books & Manuals
  • Online Training Materials

Total Certified Flight Instructor – FW Costs:

FAA Minimum:
25 Hours Total:

  • 25 hours Dual Instruction x ($135+$45) = $4,500
  • 40 hours Dual Instructor Ground x $45 = $1,800
  • FOI Written Examination = $150
  • CFI Written Examination = $150
  • Flight Examination = $500
  • Extras = $200

Total = $5,500

Student Average:
30 hours Total:

  • 28 hours Dual Instruction x ($135+$45) = $5,040
  • 2 hours Dual Flight Test Prep x ($135+$45) = $360
  • 40 hours Dual Instructor Ground x $45 = $1,800
  • FOI Written Examination = $150
  • CFI Written Examination = $150
  • Flight Examination = $500
  • Extras = $200

Total = $8,200

So these are just the costs to do the training for the CFI certificate. Don’t forget to add to these the costs of the Private, Commercial, Instrument, and any hour building to bridge the gaps. This will breakdown roughly as follows:

Pilot CertificateMinimum CostAverage Cost
Private $7,200$11,000
Commercial &
Instrument
$25,700$31,000
CFI$5,500$8,200
TOTAL$38,400$50,200

NOTE:
Most students will add additional ratings to their Flight Instructor Certificate to achieve greater levels of employability. The most common ratings are:

  • Instrument Instructor – Certified Flight Instructor Instruments (CFII)
  • Multi-Engine Instructor – Multi-Engine Instructor (MEI)

Helicopter

Minimum Age:18
Any Previous License Required:Commercial or ATPL
Total Flight Hours Required:25
Dual Hours Required:25
Solo Hours Required:0
Ground Hours Required:40

Costs:

Flight Training:

The FAA requires the applicant for a Part 141 Certified Flight Instructor Certificate to have gained a Commercial RW Certificate or an Airline Transport Pilot Certificate RW.

Average Hourly Rate of Robinson R22 = $300/Hour
Average Hourly Rate of Flight Instructor = $45/Hour

FAA Minimum:
25 Total:
25 hours Dual Instruction x ($300+$45) = $8,625

Total = $8,625

Student Average:
30 Total:
28 hours Dual Instruction x ($300+$45) = $9,660
2 hours Dual Flight Test Prep x ($300+$45) = $690

Total = $10,350

Ground School or Theory:

The Part 141 RW CFI training program requires 40 hours of Classroom-Based or One-On-One Ground Instruction to include:

  • Fundamentals of Instruction (FOI)
  • Aeronautical Knowledge

Average Ground Instructor Hourly Rate = $45/Hour

Examinations:

FOI Written Examination = Average $150 (Ranged from $125-$175)
CFI Written Examination = Average $150 (Ranged from $125-$175)
Flight Examination = Average $950 (Flight Examiner Ranged from $400-$600)

Extras:

Most students will require around $200 extras that can consist of:

  • Books & Manuals
  • Online Training Materials

Total Certified Flight Instructor – RW Costs:

FAA Minimum:
25 Hours Total:

  • 25 hours Dual Instruction x ($300+$45) = $8,625
  • 40 hours Dual Instructor Ground x $45 = $1,800
  • FOI Written Examination = $150
  • CFI Written Examination = $150
  • Flight Examination = $500
  • Extras = $200

Total = $11,425

Student Average:
30 hours Total:

  • 28 hours Dual Instruction x ($300+$45) = $9,660
  • 2 hours Dual Flight Test Prep x ($300+$45) = $690
  • 40 hours Dual Instructor Ground x $45 = $1,800
  • FOI Written Examination = $150
  • CFI Written Examination = $150
  • Flight Examination = $500
  • Extras = $200

Total = $13,150

Just like the fixed-wing costs, these are just the costs to do the training for the CFI certificate. Don’t forget to add to these the costs of the Private, Commercial, and any hour building to bridge the gaps. This will breakdown roughly as follows:

Pilot CertificateMinimum CostAverage Cost
Private $15,300$22,600
Commercial$12,800$19,600
CFI$11,400$13,200
TOTAL$39,500$55,400

NOTE:
Most students will do their Instrument Rating during the hour-building phase of their Commercial Certificate. Then once they have received their Flight Instructor Certificate, take another exam to become a Certified Flight Instructor Instruments (CFII). This can dramatically increase a pilot’s employability.

This was also the route that I took.

How Long Does It Take To Become A Flying Instructor?

Once you reach the point to begin your CFI training, the training program you undertake can vary a lot. Some schools have a very structured approach while others are a bit more relaxed.

Large Flight Schools Have Their Pro’s & Con’s

To give you some indication, if you had a flight lesson in the morning and a ground school session in the afternoon you would be looking at around a month of full-time training if you were following a Part 141 program.

This will be a serious undertaking at that pace. I have found that most students take anywhere from 2-3 months to get all the flight training, ground training, 2 written exams, flight test, and lesson plans completed.

As I mentioned, this was by far the hardest part of my training because of the talking while flying part. Some schools may have very different programs, but I know that the school I was part of had every instructor using the same verbal maneuver script.

This made it very easy for students to swap back and forth between instructors if they wanted a really accelerated training program and needed multiple instructors. This is where consistency really helps the student develop quickly

For me, my CFI training took about 3 months from the first lesson to passing my Checkride.

How Much Do Flying Instructors Get Paid?

At the time of writing this article in 2023, most job advertisements for flight instructors were offering the following remuneration ranges:

Airplane

Most schools were looking for Instructors with CFII (Certified Flight Instructor Instrument) & MEI (Multi-Engine Instructor) ratings. I only found one advertisement for just a CFI and this was paying at the bottom end of the pay scale.

Remunerations were anywhere from:-

For new instructors with low flight hours, you will be looking at the lower end of the scales

  • $20 – $50 per flight/ground hour
    or
  • $25,000 – $75,000 per year salary

Helicopter

Most schools were also looking for Instructors with CFII (Certified Flight Instructor Instrument):

Remunerations were anywhere from:

  • $23 – $40 per flight/ground hour
    or
  • $25,000 – $150,000 per year salary

All salaries are based on many variables:

  • Experience
  • Size of school
  • Training students or company pilots
  • Large companies or government agencies

When starting out as a flight instructor be prepared to be working for very little compensation! Most training schools know that instructors are looking to get their first flying job and they take advantage of that!

Unless you are finishing your flying career with thousands of hours and then become an instructor, you will not be doing this job for the money that is for sure!

My Instructing Time Was Great Fun, But I was Poor!

Once you have some good experience and get on with a good company or school, you could then have a good salary, but until then be prepared to keep eating the same way you did as a student!

A Typical Flying Instructors Earnings:

My instructing days were split up into two-hour blocks and I did four blocks each day, Monday to Friday.

A typical day would maybe be 3 flights of around 1.5 hours each and a 2 hour block of ground school:

  • 3x 1.5 hour Flights @ $25per hour = $112.50
  • 1x 2.0 hour Ground @ $25per hour = $50.00
  • Daily Earnings = $162.50
  • 5 days per week = $812.50
  • $3250.00 Per Month or $39,000 Per Year

What Are The Job Prospects For Flying Instructors?

Job prospects for low time flying instructors are always in demand at large flight schools as they are always sending on the majority of their current instructors once they start to reach around 1000 hours. The main reason they do this is to entice students to their school by offering them job prospects when they finish training.

Of course, not all students get hired at the school at which they trained, but for those who are prepared to move to get their first flying job, there are plenty of opportunities out there!

Taking a look over the aviation job posting websites shows that there are always positions available. You may just need a bit of luck to secure a job in the town of your choice, or it may require you to gain some experience before being able to move back to your location of choice. If you are not picky, then you should have no problem finding that first flying/instructing job!

To Finish

Teaching someone how to fly is a very satisfying experience and although you can be a brand new pilot yourself, having a humbled view that you are only teaching to operate an aircraft within its limitations and the rules set forth by the FAA, will keep you and the student safe.

A low-time flying instructor still does not know how to fly, but taking things slowly, not pushing limits, and enjoying what you are teaching will ensure both you and your students will look back on this time and have great memories.

Instructing was one of my greatest life achievements and one day I will get back into helping people realize their dreams of taking flight!

Further Reading

If you found this article helpful and would like some more to read I highly recommend you take a look at my other articles listed below:

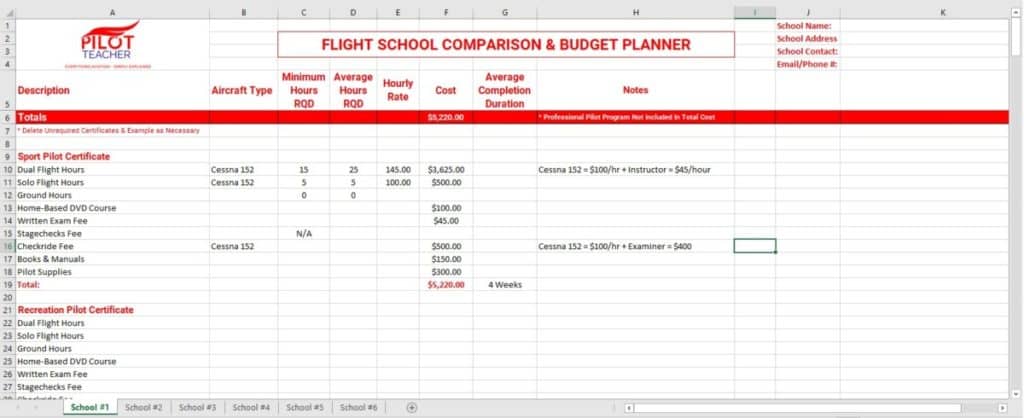
To help you keep track of all your finding on your next flight school I created the free Excel Planner. With information for up to 6 flight schools it will give you an instant side-by-side comparison as you input the data.

Can Helicopters Auto Hover?


Hovering a helicopter is what gives this machine its unique edge but why do we all see videos of students unable to keep the thing in a stable hover. I can tell you that learning to hover a helicopter is a very tough thing to do so why do helicopters not have an auto hover capability?

Helicopters with Auto Hover Capability:

  • Bell 412
  • Bell 525
  • S76D
  • S70i
  • S92
  • AW101
  • AW139
  • AW189
  • EC225
  • EC725
  • NH90

To have a helicopter that is capable of auto hovering requires a digital flight control system, hydraulic actuators to move the flight controls, and an advanced avionics package installed. However, there have been auto hover systems around in helicopters since the 1960s.

Read on to find out more…

What Helicopters Can Auto Hover?

Hovering a helicopter is a very hard task to learn and even then, to remain in a stable hover for long periods of time takes a lot of practice and skill. The main reasons why auto hover capabilities are not installed in every helicopter comes down to two main reasons:

  1. COST – For a helicopter to hover by itself it needs in essence a power steering system on all the flight controls, a complex series of sensors to attain its position in space & monitor its movements, and a digital control system to put all these systems together and operate them accordingly.

    Systems like this are not cheap and to fit them into a helicopter that costs under $1M would pretty much double the cost of the helicopter putting it out of reach for the manufacturer’s target market.
  2. WEIGHT – Adding these systems add weight and extra weight to the small, single-engine helicopters would make them unusable for anyone trying to fly them.

    The only variable the manufacturer could offload to make room for the auto hover capability is fuel and losing 50% fuel capacity would make a helicopter pointless.

For most helicopters that have an auto hover capability, they are designed for many roles and two of the most common roles are for Search & Rescue and Naval applications.

The helicopters themselves will have at least 2 engines, be large to carry lots of equipment, passengers, and or cargo, and have sophisticated digital avionic systems where an auto hover capability is just one small part of the entire helicopter.

Here are some helicopters with auto-hover capabilities:

Bell 412
Bell 525 – Source: Zane Adams
Sikorsky HH-60J Jayhawk
Sikorsky S92 – Source: Airwolfhound
Leonardo AW101 – Source: Mark Harkin
Leonardo AW139 – Source: PK-REN
Airbus EC225
Airbus EC725 – Source: Tim Felce

How Do Helicopter Auto Hover Systems Work?

For a helicopter to be able to auto hover it needs to be equipped with several different systems that work together to keep the helicopter in one position. These systems are:

  • Sensors
  • An AFCS (Automatic Flight Control System) that comprises of:
    • An Autopilot
    • Linear/Rotary Actuators

I’m going to try and break this down as easily as I can because this is some serious technology with a lot of parts that make it all work – Bear with me!

Sensors

For a helicopter to be able to hover on its own it needs data to process. The system first needs to know where the helicopter is in space in relation to the ground or the target selected (Stricken vessel etc). Then it needs to know its current state of flight – Is it in forward flight, sideways flight, descending, banking?

Once it knows its position and flight state it then needs to get feedback data from when it begins to control the helicopter. How far does it need to move a flight control? When to stop the movement? Has the movement taken it too far? How fast to make the movement?

When the helicopter gets in position it then needs to constantly evaluate its current position and compute if it needs to make a change to keep it at its desired position. Wind gusts or a moving vessel for instance will constantly change it.

The main types of sensors used in an auto-hover system are:

  • GPS – This gives the helicopter its lateral position over the ground/ocean
  • Radar Altimeter – This gives the helicopter its height over the ground/ocean
  • Gyroscopes – These give the helicopter its pitch, roll & yaw data
  • Doppler Radar – Uses Doppler Effect (Wiki Link) to measure aircraft distance from a specific object – Similar to a Police Speed Trap
  • Linear & Rotary Position Sensors – These tell the Central Processing Unit where the control actuators are in their freedom of travel
  • Accelerometers – These give the Central Processing Unit data on how fast the aircraft is moving in any axis.

Depending on the helicopter, they can use all or some of these sensors depending on the sophistication of the system installed. All of these sensors are constantly feeding data into the Central Processing Unit which then uses this data to decide how to control the helicopter.


Join My Newsletter & Get Great Tips, Information and Experiences To Help You Become a Superb Pilot!

* indicates required
Your Interest: *

Pilot Commands

Pilots also need to input data into the Central Processing Unit for it to work. The system I’ve flown on the Leonardo AW139 is very simple to operate and I imagine other helicopters follow a similar operation.

The data inputs the system needs from the pilots are the following:

  • Mode Selection – This is used to activate the Auto Hover function. It can be activated by pressing the ‘HOV’ button on the Flight Director Panel or by pressing the Thumbstick Button on either the pilot or co-pilot Cyclic.

    To be able to select Auto Hover the aircraft must be in the following flight conditions:
    • Less Than 75 Knots Indicated Airspeed
    • Less Than 60 Knots Forward Ground Speed
    • Less Than 40 Knots Sideways Ground Speed
    • Between 30ft and 2000ft Radar Altimeter Height

Once the pilot selects the Auto Hover Function the helicopter will immediately begin to transition to a Hover at 50ft above the surface with zero velocity in all directions. If a pilot wishes to change these parameters they need to give the Central Processing Unit some additional data.

The AW139 Primary Flight Display When Auto Hover Is Engaged
  • Height Required – This can be selected by the pilot to request the Auto Hover to place the helicopter at a set height above the surface. This is easily accomplished by adjusting the Radar Altimeter height using a Thumbstick on the Collective Control. It selects 1 foot increments with each up/down press and you can see the data towards the bottom right of the screen.
  • Velocity Required – Sometimes a helicopter needs to hold a hover but while moving. For Instance when winching a patient of a moving vessel. This is when a Doppler Radar system comes into play. The pilot can select the vessel and the Auto Hover system will match the helicopter speed to that of the moving vessel while trying to maintain a constant height above it.

    This can be a difficult task, especially in high sea states and depending on the wind. The sophistication of the system will dictate how well the system is able to maintain its position.
  • Direction Required – When the HOV mode is engaged a small magenta circle will appear in the Primary Flight Display’s compass Rose. This is the Target Position the pilot wishes the helicopter to be in at a stabilized hover.

    The pilot can move the position of this target marker using the Thumbstick on the Cyclic control. As the system sees there is a change from its current position, it displays a green line with a dot to show the pilots its intended flight path and velocity to get to the requested position. The longer the green line, the faster the helicopter will travel to get there.

Central Processing Unit

This is where the magic happens for the whole helicopter! This Auto Hover function is just a small function on the helicopter avionics suite. Many helicopter manufacturers use an aviation avionics supplier to build and integrate a full avionics suite for a new helicopter design.

When Agusta, now Leonardo developed the AW139 they went to Honeywell to supply them with the avionics package and it’s immense!

Honeywell Primus Epic Avionics Suite On AW139

When further capabilities are required for the helicopter, for instance when it is being fitted out at production to be a dedicated Search & Rescue helicopter then additional equipment like the Doppler Radar system for instance, will be integrated into the Primus Epic to allow communication back and forth.

Overview Of The Honeywell Primus Epic AW139 System

For the Auto System to function the MAU’s (Modular Avionics Units) will receive all the data from the sensors and pilot input stations and compute what the helicopter is required to do.

From there it will issue digital commands to electrical actuators that are connected to the flight control system. The actuators can be of a linear or rotary type and will move the control rods using internal motors and gears.

The control rods then go to the hydraulic servos which will move the helicopter’s control surfaces along with digital controls to the engine to request more/less power to accompany the flight control movements.

Electrical Actuators

The electrical actuators do the physical moving that the auto hover system requests. They turn the digital signals sent from the Central Processing Unit to operate motors and gears to move a shaft up and down or rotate it back and forth.

Flight Control Linear Actuator On Aw139

Most linear actuators used on aircraft are ‘Dual Type’ meaning that there are two actuators joined together and two independent control systems working together at the same time to ensure redundancy. Above you can see that the pilot can move the Main Rotor Servo control rods via the Cyclic, and the Dual Linear Actuators can also move the main control rods via the connecting bellcranks.

This allows either the pilot or the automatic flight control system (AFCS) to control the helicopter, but it also means the pilot can override the automatic system at any time just by grabbing the controls.

The flight control system works by having a Dual Linear Actuator connected to every control rod that goes to a flight control hydraulic servos on the AW139:

  • One for Pitch
  • One for Roll
  • One for Yaw

By issuing commands to the actuators, the helicopter can be controlled on each axis. This is a 4 axis AFCS system. The fourth axis is height. This is when the Collective control is raised and lowered and both the Pitch and Roll actuators operate to raise/lower the swashplate ‘collectively’.


If you would like more information about what each flight control does on a helicopter, please check out my article here:

How Do Helicopter Controls Work? Pilot Tells All!


Flight Control Servos

These are the muscles of the helicopter! Hydraulic servos are what connect to the swashplates of the main and tail rotors to change the pitch of the blades.

Think of it like the power steering for your car. Larger helicopters require huge amounts of force to overcome the aerodynamic loads placed on the rotor blades and the only way to control the helicopter is to use hydraulic servos.

The push/pull flight control tubes that are linked to the pilot’s Cyclic, Collective & Pedals move pilot valves in the hydraulic system that tell the high-pressure hydraulic servos how to move.

Hydraulic Servos On AS350 Astar Helicopter

Most helicopters have 3 hydraulic servos to move the main rotor swashplate and the larger helicopters usually have 6 – each servo doubled up for redundancy running of two separate hydraulic pressure systems.

The auto-hover system is connected in line with the push/pull tubes to move the pilot valves in the hydraulic servos. No matter if it’s the pilot or the actuators moving the push-pull/tube, the hydraulic servo knows no different. Whenever the tube moves the pilot valve, the hydraulic servo moves.

AW139 Tail Rotor Electric Actuator

Here you can see how the linear actuator is installed in line with the Yaw push/pull tube. The push/pull tube disappearing off into the distance connects to the hydraulic pilot valve of the Yaw Servo.

YAW Actuator & Servo Locations On AW139

To Finish

The larger, twin-engine helicopters are the helicopters that possess the technology to auto-hover. Multiple systems, both electronic and hydraulic allow the helicopter to be able to hold its position without too much difficulty.

The systems and helicopters are not cheap but the job they do to assist pilots when flying in tough weather conditions makes them an indispensable asset.

Having flown the AW139 and tested its Auto Hover performance I can say that it works well but still cannot match the handling abilities of a human pilot, but I’m sure it will not be long, if not already, before the auto hover system will outperform the human.

Further Reading

If you found this article interesting and would like to keep reading, I highly recommend the following articles from my blog:

What Are Helicopters & Planes Dropping On Wildfires?


As each year passes we are beginning to see more and more wildfires appearing across the globe with an increase in their size and severity. Many times we see on the news the planes and helicopters dropping white and red fluid on the fires, but what are they? Why do they seem to use different colored fluids?

Water, retardant, gels & foams are the main agents used by aircraft to help cool, contain, & fight wildfires. Red retardant is a salt, clay, & gum-based fluid that sticks to foliage and prevents it from burning. Dropping of water is used to cool areas to slow or suppress the fire’s progress.

When fires become large it is impossible for aircraft and firefighters to extinguish them, we have to let mother nature do that. But, when a fire first develops or is small in nature, air attack of the fire and help from the ground can get the fire out.

To help fight a wildfire there are multiple techniques and suppressing agents that are used and this article is written to hopefully provide you with some insight into what we use and how we apply them.

What Do Aircraft Drop Onto A Wildfire?

We have all seen the news footage of aircraft dive-bombing a wildfire and releasing its load onto it, but what exactly is in those loads, and what is their purpose?

Water

This is the main suppression liquid used by helicopters on a wildfire. One of the first things the helicopter pilots will do is find a water source near the area of the fire they are working. This is referred to as The Dip Site.

Water is used to help cool the edges of fires by using water dropped at speed. This is called a String Drop and it looks like a curtain of water when it is dropped. Or, if there is a particular hot spot that needs an entire drop on it, that is called a Spot Drop.

Water is also used by amphibious water bombers who fly down and essentially land on the water and allow the forward speed to push water through scoops and into the holding tanks. Once the tanks are full the aircraft climb away to dump the water onto the fire.

A Bombardier CL-415 Water Bomber

With numerous helicopters and water bombers working on a fire, a rapid rate of water suppression can be achieved, but water evaporates quickly on hot fires, and if there is no water source nearby it can allow the fire to spread without much effect being taken from each water drop.

Water is also the main agent used to help eradicate any hot spots once the fire has been extinguished. Ground crews will be walking the areas and coordinating with a helicopter pilot to drop a bucket of water onto a certain area as they dig around the ashes.

The main sources of water used by helicopters can be ponds, lakes, rivers, streams, wells, and even swimming pools. The hovering capability along with a water bucket attached to a longline allows helicopter pilots to take on water from some of the tightest locations.

Fixed-wing water bombers however, need long stretches of lake, river or ocean to be able to suck up enough water during their refill runs.

Retardants

When fires are progressing rapidly towards property, livestock or any area that needs protecting the only way to try and stop a fire is to give it a roadblock. These roadblocks can be large rivers, roads, mountain ridges, coastlines, plowed fields, or areas created by fire crews plowing dirt strips or pre-burning areas to remove the fuel.

By taking away the fuel in the path of the fire it stops spreading. This is where liquid retardant comes in. By laying down runs of retardant it can help to steer the fire to a natural fire break or help prevent the fire from jumping a fire break.

Think of retardant as a containment system that is applied by air.

A McDonnell Douglas DC10 Air Tanker Dropping Fire Retardant

Modern wildfire retardants are a salt, clay/gum-based agent with other proprietary ingredients in them. As the retardant is applied it coats the foliage, timber, and structures preventing them from being ignited. The clay/gum part of the retardant helps the liquid stick or cling and prevents the foliage from becoming exposed over time.

Today’s modern wildfire retardants have been rigorously tested to ensure they are non-toxic to wildlife, foliage, and the environment, the only risk they pose is to aquatic species if applied directly to a water body.

For that reason, retardant is never laid down near watercourses. When it rains, it is washed off the foliage and naturally breaks down in the soil. It is then designed to act as a fertilizer to help fuel natural regrowth.

Retardent comes from the manufacturers as a concentrated liquid and is mixed with water and pumped into the tanks of the air tankers. At many airports that are in wildfire-prone areas, there will be an Air Tanker Base that has purpose-built areas where the mixing and filling of the air tankers happens.

Retardant is mainly applied by the air tankers as they are very good at laying down lines of retardant in large volumes whereas the time it would take for helicopters to do the same job would make it a very inefficient way of fighting a fire.

Retardants are dyed red to help pilots and ground crews see where retardant has been applied. This is especially helpful if numerous tankers are applying retardant along a long line one after another.

In this photo you can see the lines of red retardant laid down after the road to try and prevent this grass fire from jumping the road and continuing on.


On a small fire I was working this summer, 2 air tankers formed a box around the fire while myself and 2 other helicopters with ground crews onboard flew out. Once we arrived we dropped our crews, put on our water buckets, and worked with the ground crews. Within 2 days the fire was out because it had been contained by the box of retardant.


Gels

Wildfire suppressant gels are another tool in the firefighter’s arsenal. Not typically used as much as a retardant, but a handy product when the right conditions call for it.

Gel is added to water to thicken the water and help it cling to surfaces. The main job of a gel suppression agent is to wrap a cooling blanket of water around a structure to help prevent it from getting ignited by fires burning nearby.

A Pumpkin Tank Containing Gel Suppression Agent Ready For Helicopters To Dip Into

This also comes in a concentrated form and is mixed in holding tanks that helicopters can dip their buckets/snorkels into for precise application to locations like the sides and roofs of particular structures on the edges of a fire.

The other way gel is used is to fill special tanks onboard water bombers with the concentrate mix. As the water bomber scoops up water from a lake it can be automatically mixed with the gel and at release, it is mixed to the correct formulation to allow for large areas to be covered.


Join My Newsletter & Get Great Tips, Information and Experiences To Help You Become a Superb Pilot!

* indicates required
Your Interest: *

Class A Foams

Foams are a product used to help ‘Mop-up’ after a fire has gone through an area. Just like the retardent and gel, foam comes in a concentrated liquid that is mixed and applied to the area, usually by helicopter or water bombers.

The main job of foam is that it slows the evaporation rate of the water and helps the water to soak into the foliage, timber, or grass allowing for improved resistance to ignition.

As crews and aircraft work to eradicate all the hot spots, water and foam allow the firefighters to work an area and move on knowing that the chances of a hotspot reigniting are very slim. Many wildfires can reappear days, weeks, and even months after the fire was put out because the roots of the trees have been smoldering underground.

The penetrating characteristics of the foam help prevent these smoldering roots from popping up and causing havoc!

What Type Of Aircraft Fight Wildfires?

Some of today’s aircraft that fight wildfires are incredible feats of engineering. Being a pilot of a helicopter on a wildfire can be a very rewarding but tiresome battle with mother nature, trust me, those crews you see are working long, hard, hot days!

Here are some of the common types of aerial application vehicle you may see on a wildfire near you:

Helicopters With Buckets

Belly Mounted Water Bucket – Source: Steve Slater

By far the most common wildfire fighting asset. Helicopters can be loaded up with ground crews, sent to the fire, drop the crews off and then join in using a pilot-controlled water bucket.

Helicopters will either operate by having the water bucket connected directly to the belly hook on the helicopter or via a 100-250ft longline.

Longline Mounted Water Bucket

Water buckets work by dipping them into a water source and then at the press of a button from the pilot the bucket can release the entire load or just a partial load.

Water buckets on helicopters allow for fast, accurate placement of suppression agents, but they are limited in the amount of water they can drop. Water buckets range in size from 72gal/270l up to the mighty 2,590gal/9,800l used by the Chinook!

For more information on exactly how a Bambi Bucket works check out this video I created for you:
(17 minutes long)

Helicopters With Tanks

Helicopters can be fitted with a tank that allows water to be sucked up and filled through a snorkel. The tanks allow for large volumes of water to be carried by the larger helicopters with fast turnaround times.

Sikorsky S64 Sky Crane – Source: tceng

The tank of the Sikorsky S64 is 2,650gal/10,000l and can be filled in under a minute by the hydraulically driven suction pump mounted at the end of the helicopter’s snorkel.

The tank usually consists of doors that open on the bottom to allow the suppression agent to be released and by adjusting the amount of time the doors are open or how much the doors open the pilot is able to control the amount of water dropped on a given area.

This controllability gives the ground coordinators options for long lines of suppression or spot drops to be completed.

The only downside to helicopters fitted with a tank is that they do not carry ground crews so they are not used as initial attack aircraft like the helicopters using buckets. Tanked helicopters can either be single-pilot or dual-pilot crews and will work in conjunction with crews already on the ground.

SEAT – Single Engine Air Tankers

Commonly referred to as ‘Tractors’ these fast, highly maneuverable fixed-wing aircraft allow suppressing agents to be applied to fires in terrain where larger aircraft are unable to get into.

Air Tractor AT-802 Fire Boss – Source: Bidgee

The Air Tractors can either be wheeled and filled up at an airport with water, retardant, gel, or foam or, like the one above, can be installed with amphibious floats that allow them to land on bodies of water and scoop using retractable nozzles on the underside of the floats.

Once they fill their 96gal/364l water tank they lift back into the air and head to the fire. On the belly of the aircraft is a set of doors that act the same as the tanks on helicopters. Controlled by the pilot, they release the agent as a curtain onto the selected area of the fire.

Most of the tractors that I have had the pleasure of working with seem to work in a group of 4-6 all taking turns to scoop and drop. This small team can lay down huge amounts of water onto a fire leaving minimal time in between drops to allow the fire chance to re-establish.

Water Bombers

Water bombers are an Air Tractor on steroids! With multiple engines and usually multiple crew aircraft, these amphibious firefighting aircraft are a common sight on fires all over the world.

Bombardier CL-415 Water Bomber – Source: Steven Byles

These larger water bombers are usually based at airports all over wildfire country waiting for the call. Just like the Air Tractors, they can be filled up at an airport with water, retardant, gel, or foam, but their main role is scooping water from lakes, rivers, and oceans using retractable nozzles on the underside of the aircraft belly.

Their liquid tank is around 1620gal/6130l and again, is controlled by the pilots to be released from doors also mounted on the belly with an adjustable flow rate.

In Canada, these water bombers tend to work as a pair so while once is scooping water, the other is dropping water. They are very effective!

Air Tankers

If you want to get large volumes of fire-suppressing agents onto the ground then an air tanker is the best option. These converted, ex-airline aircraft have multiple tanks inside them to deliver vast amounts of fluid.

A Boeing 747 Aerial Tanker – Source: ShacharLA

The heavy lifters come in many different forms from C-130 Hercules, L-188 Electra’s, MD DC-10’s with Boeing 747s sitting on the top of the throne! Using multiple engines with multiple crew these large aircraft are the ultimate device for laying down large volumes of suppressant, but once the tanks are empty they have to return to the airport to reload.

Suppressant tanks range in size from 3000gal/11,350l in the smaller air tankers up to a whopping 19,200gal/72,680l in the Boeing 747! All of these tankers have variable drop controllability to allow for very long or high-flow multiple drops to be made.

To Finish

Getting a suppressing agent onto a fire is very easy in today’s world but it comes at a high financial cost. No matter if the aircraft are delivering water, retardant, gels, or foams many aircraft and ground crews are required and if the fire is already large, they are not getting it out without help from mother nature.

Using the suppression agents pilots can help to control the spread or steer fires to areas where they will cause minimal amounts of danger, but unfortunately, no matter how much work the crews put in it can be a devastating experience for those who cannot be protected.

Further Reading

If you found this article interesting and would like to keep reading, I highly recommend the following articles from my blog:

What Do Pilots Check Before Taking Off?


We have all been sitting by the window waiting to board our flight at some point and see a pilot walking around the aircraft looking at stuff, but what are they actually checking for? Then, as you board the plane both pilots seem to be doing things in the cockpit, what are they doing in there?

Before taking off in any aircraft, pilots have to ensure the aircraft has been released by the maintenance engineers, complete visual inspections of the aircraft, test emergency and safety systems, configure the GPS and instrumentation, check the weather, routing, and weight & balance.

No matter if the aircraft is a small Cessna, Helicopter, Corporate/Private Jet, or a Boeing 747, every pilot has to complete a series of actions to ensure the aircraft, crew, and cargo are all fit for flight.

Once a pilot is satisfied that everything required for the flight is as it should be only then will the flight commence. Read on to find out more detail about many of the things the pilots do before takeoff…

What Paperwork Do Pilots Check Before Takeoff?

Oh yes, the lovely paperwork! No matter what your job is there always seems to be an endless amount of paperwork, but luckily, many companies have now incorporated the documentation and paperwork into digital software making the task a little simpler.

As you can imagine there can be a lot of paperwork involved in aviation and each part plays a role in the safety net used to identify hazards or problems before they occur.

Aircraft Logbook

Every aircraft has a logbook. This is a mandatory book that documents every flight, the crew names, flight times, landings made, any additional information required by the company, and any maintenance issues that have previously occurred and have either been fixed or deferred while waiting on parts.

This is the pilot’s first check. If maintenance has not released the aircraft for flight, then a replacement aircraft needs to be used. Once the pilot signs the logbook for the day’s flight they have then taken responsibility for that particular aircraft.

This only works outside of the major airline world as a paper logbook would be impossible to track with the aircraft and would become lost, I guarantee it! To cover this, each airline carrier issues the same information but in a digital format called a Flight Release. This allows the pilot to check all the relevant information regarding the aircraft and sign for taking responsibility.

Maintenance Release

I want to expand a little more on the maintenance release as it can be quite a big issue if not inspected diligently. Whenever a pilot detects a problem with something on the aircraft they will fill out a section in the logbook, or company computer system detailing the issue. This allows the maintenance department to look into the fault and hopefully fix it right away, or they can defer the fault for a set period of time.

Depending on what the problem is, maintenance can defer items for 30, 60, or 90 days, or if it cannot be deferred, the aircraft is grounded until the issue is resolved. The maintenance manuals issued by the aircraft manufacturer will give guidance on the deferrals.

Aircraft Maintenance Engineers Are True Saviors! – Source: Peter F.A. van de Noort

It is the pilot’s job to ensure the aircraft has not been grounded, the aircraft is still within the deferred time limit, and if the item has been deferred, its lack of function does not conflict with other items or systems on the aircraft.

Large, complex aircraft have an MEL (Minimum Equipment List). This lists the items which can be non-functioning for a flight, lists any conflicting items affected by the non-functioning part, and gives guidance on certain flight regimes that cannot be completed while the broken part is out of service.

This last part is of particular importance to the pilots because if they intend to use that part as part of their intended flight it could become a distraction in the cockpit wondering why its not working because they didn’t see the paperwork.

Company Memos

Many large aviation companies will issue memos throughout each month. Some of these memos can be additional inspections required by the manufacturer, changes to company operating procedures or policies, or even the results of incidents that the company may wish to bring awareness to for its pilots.

Most memos are there to help increase safety and are good to be read, however directions issued from the manufacturer that need mandatory compliance will need to be done by the pilots to ensure the aircraft is fit for flight. Flying an aircraft while not complying with a mandatory company memo could lead to disciplinary proceedings or worse!


Join My Newsletter & Get Great Tips, Information and Experiences To Help You Become a Superb Pilot!

* indicates required
Your Interest: *

Weather

Because aircraft fly in the same area as weather the pilots need to know about the weather for all phases of the intended flight. The weather at the time of takeoff, the weather en route, the weather at the destination, and the weather at any alternate landing destination must all be checked before and sometimes during the flight too.

Severe storms, reported turbulence, heavy icing, wind, cloud heights, and visibility are just some of the weather factors that need to be ascertained by the pilot before the flight commences.

Mother nature ALWAYS wins and as pilots, we have to respect her and if the weather during any part of the flight goes beyond personal and company limitations then alternate arrangements, routings or destinations may need to be changed or the flight postponed or canceled altogether.

NOTAMS

Notice To Airmen (NOTAMS) are issued by the FAA to alert pilots to information that could affect their flight. No matter how big or small the aircraft, NOTAMS applies to all pilots.

NOTAMS can be issued for things like runway closures, navigation equipment and airport lighting systems down for maintenance, a new crane on a building near an airport, blasting at a mine site, wildfire airspace closures, large firework displays, temporary airspace closures for when the President is in town etc.

Above is An FAA NOTAM for a crane installed near Portland International.

Planning to arrive at an airport with only one runway that is closed for maintenance could be a bad scenario if low on fuel. This is why pilots should be checking the NOTAMS before every flight.

Flight Plan

This is just what it sounds like – It is a plan of the flight. These are completed by the pilots of smaller aircraft or by the dispatch department of large airlines.

They consist of the details of the flight – the departure and destination locations, the routing, altitudes, and headings to be flown, fuel onboard, names of the flight crew, number of passengers on board, any dangerous cargo on board, survival equipment on board, aircraft registration and coloration, etc

They can be as detailed or sparse as pilots wish but the main reason for a flight plan is that it needs to be filed with the FAA so that the flight can be placed into the system for its requested flight time slots, as these are limited, and the plan then activates search and rescue procedures if the aircraft fails to arrive at its destination.

Most aviation companies will track their own flight’s progress using satellite tracking systems but any flight leaving the country or wanting to enter military airspace will need to have filed a flight plan before the flight to avoid Uncle Sam’s fighter jets arriving on your wing!

What Do Pilots Check On An Aircraft Before Takeoff?

Once all the paperwork is in order, both the pilots and ATC know where they are going and all the aircraft and airspace is functioning correctly it is time to now go and get the aircraft ready.

Daily Inspection – DI

This is an inspection of the entire aircraft that is required every day before the aircraft flies. It is aimed more at small, private, or commercially operated aircraft rather than airlines.

This DI requires the pilot to walk around the aircraft and lift every cover panel to look for fluid leaks, broken hoses, burn marks, broken wires, fluid levels, structural cracks, bent parts, and holes in the fuselage – essentially anything that could compromise flight safety.

This visual inspection should be a good habit that pilots have, as many DI’s have caught an issue that would have been fatal if the aircraft took off. The DI is something I do on my helicopter before each flight of the day and it only takes about 30 minutes, but the peace of mind I have is complete.

Turnaround Check

This is the inspection that you will see pilots at the airport doing while wearing their Hi-Vis jackets.

The turnaround check is done by all pilots, myself included and it comprises a walk around the aircraft visually looking for anything that happened during the last flight that may need addressing before lifting off again.

This will be things like fluid leaks, low tire pressures, chafing wires or hoses, birdstrikes, and loose or open cowls. Basically anything obvious that can be seen by the pilot while walking around.

In my case, I load the passengers, close their door, ensure the ski basket contents are secure and closed and that every cargo door is closed and locked all while I walk the full aircraft back to my door. Then I get in.

You would be surprised how many backpacks or water bottles I have found left on the ski basket!

Ski Baskets Make Great Countertops!

Aircraft & Avionics Setup

Depending on the aircraft, the amount of systems and things that need to be set up varies wildly! In a large commercial jet for instance the pilots will need to set up many items.

To do this they will run down their company checklist and complete each item before moving on to the next. This ensures no steps are missed and the aircraft gets configured correctly for the next stage of the flight.

Some of the items to prepare are:

  • FMS – Flight Management System – This includes the departure procedures, routing, altitudes, weights, fuel loads.
  • Radios – Required frequencies for Ground, Tower, and Departure controllers
  • Performance – Knowing the performance data for the given atmospheric conditions, weights, and runway length is very important
  • Electrical System
  • Hydraulic Systems
  • Fuel Systems
  • Pressurization Systems
  • HVAC Systems
  • Lighting Systems

Once all the systems have been configured, some of them will need to have some tests run on them.

Safety System Checks

There are certain systems that have to be checked before the flight to ensure they are working correctly. If they fail the preflight test they could render the aircraft ‘Out Of Service’

These systems are usually very important with redundancies built-in and testing them ensures they will be ready to do their job correctly. Some of the typical systems that get tested will either have a built-in automatic test function or will require the pilot to do a series of actions.

Some of the systems to be tested can include:

  • Screens – Making sure no color pixels are missing – Important for limitation markings on the data fields
  • Warning Lights – Ensuring no bulbs or LED elements are not working
  • Fire Systems – Ensuring the sensors, wiring, firing, and retardant systems are ready
  • GPS – Ensuring GPS coverage for all phases of flight
  • Hydraulics – Testing the valves, pumps, and pressures are working
Even a Simple Caution Panel Needs All Bulbs Working!

Just like the systems to be set up above, the number of systems to be tested will vary. As you can imagine, the number of systems on a Cessna 172 will be negligible compared to the systems on a Boeing 787 Dreamliner!

To Finish

Once all the aircraft, systems, pilots, cargo, and passengers are ready can the request to taxi be made. The bigger the aircraft, the more there is to check but in essence, the backbone of the things that need to be read, tested, and configured remains pretty much constant for every pilot.

Every pilot needs to know the aircraft, weather, airspace, and passengers are good before take off as those pilots that cut corners on pre-flight preparation are the ones you end up reading about when something goes wrong.

Pre-flight routines are one of the most important aspects of any flight and when done with diligence and routine they make flights so much safer!

Header Image:
Source: Kristoferb

Further Reading

If you found this article interesting and would like to keep reading, I highly recommend the following articles from my blog:


Aviation Weather Information: How do Pilots Get It?


Have you ever been stuck in the departure terminal because the flight has been canceled due to weather or the plane you have been flying on has had to divert to another airport because of weather? If so, then this article may be of interest to you.

Pilots access whether via websites, radio & telephone briefing services, radio broadcasts, pilot reports, satellite and weather radar imagery, and their own eyesight. Knowing the actual and forecast weather conditions allows pilots & air traffic controllers to make decisions regarding flight safety.

Cloud heights, forward visibility, thunderstorms, and severe weather phenomenon dictate how flights operate all over the world on a daily basis. Before a flight takes off, flies a route, or lands the pilots must know the weather to be able to make alternative arrangements, postpone or cancel the flight altogether.

Ways of Getting Aviation Weather Information

Over the past few decades, the methods that have become available for pilots and air traffic controllers to access the latest weather information and forecasts have really improved. Getting accurate weather at all points of a flight process allows for timely decisions to keep everyone safe.

Some of the best methods available for pilots to access weather reports purposely tailored to aviation are:

Aviation Weather Websites

The most used website is the Aviation Weather Centre from NOAA (Link).

This website uses all the weather data gathered by NOAA and puts it into dozens of formats covering all the US and at all altitudes. It is used by all kinds of pilots whether they are flying a hang glider or a Boeing 747!

The great feature of aviation weather websites is that it allows pilots to check local weather around an airport, which is great for takeoff and landing weather information, then with a click of a mouse can view the weather over the whole of the US to check the routing of the flight.

Many parts of the website have text-based and/or graphical images to show all the relevant information and as pilots go through their pilot training they are taught how to read, decode and interpret all the weather information that will be pertinent to them

Some other notable websites that are popular are:


Join My Newsletter & Get Great Tips, Information and Experiences To Help You Become a Superb Pilot!

* indicates required
Your Interest: *

Telephone Weather Briefing Services

When the internet is not available to pilots but there is cell phone or landline coverage pilots are able to access several telephone services run and maintained by the FAA.

The two main telephone services available are:

  • Telephone Information Briefing Service (TIBS)
  • In-person Briefing Service

The TIBS service is available for pilots who just wish to hear a recorded message of the current weather for a particular airport. This is especially useful for a quick weather check. TIBS can be accessed by calling 1-800-WXBRIEF or one of the local numbers listed in the FAA Chart Supplement Publications.

In-person briefings give the pilot access to a specialized aviation weather briefer who can give the pilot weather information for specific areas or routes of flight anywhere in the country. The personalized conversation allows the pilot to get the exact weather information they require.

These are by far the most used telephone services used. I use them all the time when the weather in the remote parts I operate is looking iffy for the day. Getting a second opinion from a specialist really helps solidify my weather decision.

The in-person briefing service can be accessed by the same 1-800-WXBRIEF telephone number.

Weather Radar

Most large jets, corporate jets, and IFR-equipped helicopters all come with onboard weather radar. This device sits in the nose section of the aircraft and sweeps side to side looking for precipitation in the upcoming airspace.

Aircraft Weather Radar – Source: tataquax

When the radio signal sent out from the radar reflects back off precipitation it gets shown on a screen in the cockpit. The larger the precipitation drops and the more the amount of them, will show up as patches of varying color that identify the intensity of the weather ahead.

This allows the pilots to alter the course of the aircraft to fly around the most intense storm cells. The intense rain is often conducive to turbulence associated with Thunderstorms.

XM Satellite

For pilots of smaller aircraft that do not have the luxury or bank balance to have a weather radar installed, they can use a really handy function with a Sirus XM membership.

Sirius offers an aviation weather service that can be used on a standalone device or linked to an iPad running navigation software like Foreflight or Garmin Pilot. For use with the iPads, a small antenna can be purchased, and linked to the iPad then the pilot will receive textual and graphical weather data right on their iPad screen.


If you are a pilot and are interested in finding out more about Foreflight and the Sirius XM weather interface you can go Here to the Sirius XM website.

Air Traffic Control & ATIS/AWOS

Most airports throughout North America have two ways to get the latest weather information to a pilot while in flight:

  1. An Automated Weather Information System
  2. An Air Traffic Controller

The Automated systems come in a range of types, with each one offering different levels of weather reporting detail.

ATIS – Automatic Terminal Information Service is the one used by larger, busier airports. It will consist of its own frequency that pilots can tune to and listen to the latest weather.

The ATIS is either a recorded report from an air traffic controller recorded every hour or it can be from an automated system that uses a digital voice to communicate the weather information.

AWOS – Automatic Weather Observing System is a fully automated series of sensors that read slightly fewer weather parameters and communicates them verbally on a designated AWOS frequency for that airport.

AWOS facilities are usually found at smaller, non-manned airports.

The typical information a pilot can receive from the ATIS/AWOS weather broadcasts usually consists of:

Altimeter SettingBravo
Airfield The ATIS/AWOS Broadcast Is ForFairbanks
Time (UTC) Observation Taken At14:20Z
Runway In Use20R (200º) – Righthand Runway
Wind Speed & Direction255º @ 5 kts
Visibility6 Nautical Miles or more (maximum)
Cloud CoverFew @ 3000 feet and broken @ 5500 feet
Temperature15 °C
Dew point8 °C
Altimeter Setting29.92 inHg

The other great feature about the ATIS/AWOS is that it gets automatically transcribed into text and this is the weather report that gets used by all the websites across the world that ask for the latest weather in that town.

For a sample of what an ATIS broadcast sounds like Click Here to listen to a report from London Stanstead Airport.

Pilot Reports – PIREPS

Even though digital sensors and trained weather forecasters do a great job of reporting the weather nothing can beat a pilot flying in the actual weather at that time.

A pilot can call back to an air traffic controller to give them details of the actual weather they have encountered so the weather reports can be updated to give a more accurate report.

One of the most common PIREPS that I personally report when flying out of an airport is the lowest cloud ceiling. This is especially important for VFR pilots who have to fly under the clouds.

An accurate cloud height could mean the other pilots are able to get in or out. It also helps if the weather around the airport is not consistent. Low clouds out to the west but clear out to the east. Sensors and observations are only taken directly over the airport.

Eyesight

Just like the PIREP, the pilot’s eyesight can give them lots of information about the weather around them. Storm cells, rain showers, snow squalls, and cloud banks are all easily seen from the cockpit.

Not Something I Would Like To Fly Through! — Source: Shawn

When the sky ahead of the pilot is black and there is no other way of finding out the weather it might be time for the pilot to turn around if the sky looks too menacing. This is typical for a VFR pilot flying around in a small aircraft.

The pilots flying the larger airliners will have had their routing changed by their company dispatch office before the flight to ensure the plane flies around most of the forecast junk and ensure a smooth ride for its customers. For those times when turbulence is encountered, it may not be seen or forecasted, hence the reason why you should always fly with your seat belt on.

To Finish

Because pilots are flying in the area where weather occurs they need to have an understanding of what the weather is going to be like for them. Some weather can be uncomfortable to fly in, some can break aircraft and some can stop the pilot from seeing the ground altogether.

With modern technology, pilots can fly into weather that is far worse than a pilot out in his Cessna. As a pilot, knowing your own personal limits of what you and that aircraft are capable of flying in is key and the only way to do that is by getting as much, detailed, and timely weather information as you can.

Further Reading

If you found this article interesting and would like to keep reading, I highly recommend the following articles from my blog:

How Do Aircraft Avoid Each Other?


Have you ever watched a documentary and seen an Air Traffic Controller’s radar screen? It looks like complete chaos! Dots moving all over the place surrounded by numbers and arrows, how do they keep control of all that stuff?

Aircraft avoid each other by two means: First, by visual separation from the pilots, but when in cloud, at night, or up high, air traffic control give the pilots headings, altitudes, speeds & direction to maintain separation clearances from other aircraft using their radar & radio communications.

When I was first learning to fly I was intimidated talking to air traffic control so I spent a Sunday afternoon sitting next to both a tower controller and an approach controller and learned all about how aircraft avoid each other as well as overcoming my fear of talking to them!

The way pilots fly is split up into two ruling sections:

  1. VFR – Visual Flight Rules
  2. IFR – Instrument Flight Rules

Each of these types of flying has rules governing how aircraft avoid each other

Aircraft Avoidance Under VFR Flight

VFR Flight is by far the most common type of flying done outside of the airlines. When private owners, recreational fliers, and most helicopter operators go out flying they are having to maintain visual reference to the earth’s surface, hence Visual Flight Rules.

Basically, the pilots are out there doing as they wish once outside of or under the controlled airspace surrounding the larger airports and the airway system. It is up to the pilot to keep a watch for other aircraft using their own eyes and any technology like TCAS (Traffic Collision & Avoidance System) if they have it installed in their aircraft.

Referred to as the Mark 1 Eyeball, a pilot’s sight is the main avoidance device when flying VFR. When a pilot does encounter another aircraft there are several rules that help provide a safety margin:

  • The lesser maneuverable aircraft has right of way (Balloon vs Plane, Glider vs Helicopter etc)
  • The aircraft on the right has the right of way
  • When approaching head-on, both aircraft turn to the right
  • When overtaking a slower aircraft, overtake to the right side of the slower aircraft
  • When flying over 3000 feet above the ground:
    • Aircraft being flown between headings of 0°-179° will fly at ODD thousands of feet + 500 = (3,500ft|5,500ft|7,500ft etc)
    • Aircraft being flown between headings 180°-359° will be fly at EVEN thousands of feet + 500 = (4,500ft|6,500ft|8,500ft etc)

When flying at night these rules also apply and even though it is dark all aircraft flown at night must have a mandatory lighting system installed and turned on. Aircraft lighting is arranged so pilots can determine the direction of flight of the other aircraft depending on the light colors they can see:

The last line of defense a pilot has when flying VFR is good radio calls, even if they think no one is there. Giving clear position reports at unmanned airports or common air-to-air frequencies will let other pilots know if they are in the same area together.

A good position report broadcast over the radio should contain the following:

  1. Who you are
  2. What frequency or frequencies you are monitoring
  3. Where you are
  4. What altitude you are at
  5. Where you are heading
  6. Any other pertinent information

For example, this was a VFR radio call I used just the other day:

Red Lake Area Traffic on 122.8
Astar Foxtrot Oscar Romeo Sierra
Just off of Springpole Camp
2000 feet
Eastbound towards Red Lake
With an External Load

It is surprising how many times I get up flying, give a position report of where I’ve just lifted from, and then 3-4 other pilots chirp up and inform everyone else of their position.

By doing this it helps a pilot build a mental picture of where everyone else is in relation to them – This is known as Situational Awareness.


Join My Newsletter & Get Great Tips, Information and Experiences To Help You Become a Superb Pilot!

* indicates required
Your Interest: *

Aircraft Avoidance Under IFR Flight

IFR Flight is by far the most common type of flying done by the airline and corporate jet industry. It allows aircraft to fly in all weather and at night because the pilots fly the aircraft by sole reference to the instrumentation with guidance from air traffic control, hence InstrumentFlight Rules.

Because there is nothing to see out of the window when the aircraft is in the clouds, above the clouds, at night, or in poor visibility, the pilots have to look at the instruments (mainly on glass screens now) in front of them to see what the aircraft is doing. Think of this as driving your car from home to work just by looking at the GPS and the instrument dials.

The Flight Displays on an AW139 IFR Capable Helicopter

When flying under IFR rules, air traffic controllers are responsible for keeping all aircraft separated from one another because the pilots cannot see anything out of the windows. They do this by assigning your aircraft a timeslot in that part of the sky and no other aircraft can be in it at the same time as you.

To maintain separation control they will issue commands to the pilots over the radio. These commands could include:

  • Headings to fly
  • Altitudes to climb or descend to
  • Speeds to fly at
  • Other radio frequencies to change over to
  • What number an aircraft is in sequence for landing
  • Helping the pilots deal with an emergency

This is like one of the trains you may see in a sushi restaurant that keeps driving past you with plates of food on each carriage. Two plates cannot be carried at the same time, but when the chef sees an empty slot, he drops a plate of food into there and that spot is now filled.

When an aircraft takes off under IFR flight rules it will be passed from one air traffic controller to another as it passes through the country/globe. An air traffic controller has a set area of the sky they look after and it is their job to get every aircraft through it safely without breaking any of the minimum aircraft separation laws that govern them.

The controller’s area of the sky might be small but busy, like the approach to a busy airport like Atlanta, or it could cover several US states because aircraft are en route and up high just transiting through. Each area is designed to keep the workload of all the aircraft within it at a manageable level for the air traffic controllers.

TCAS

As air traffic controllers are human, it is inevitable that mistakes have and do happen which has ultimately led to mid-air collisions, all of which are fatal. After multiple mid-air collisions in the US, the FAA pushed for a system to be designed that can be fitted to aircraft to warn pilots if it detects an aircraft within their vicinity.

The system that was developed is called TCAS – Traffic Collision & Avoidance System. It is now mandated that any US-registered aircraft with over 30 seats must have a TCAS system installed and most IFR-capable aircraft also have this fitted as it really is a great tool, even in VFR use too!

All IFR Aircraft are fitted with a device called a Transponder and this device sends out information about the aircraft when it is interrogated by an outside radio signal, like that of an air traffic control radar or a TCAS of another aircraft.

The TCAS in every aircraft is constantly sending out interrogation requests and when the transponder of another aircraft gets that request, it sends it the information.

This is like a lecturer calling out into a dark classroom “Is anyone in here?“. If there is a student, they say “Yes, I am here! I am standing at your 2 O’clock and I’m sitting on the ground below you” – This is just how TCAS works

When the TCAS on an aircraft receives information about the other aircraft it can display the position of the other aircraft on the glass screen in front of the pilot. When it detects that the other aircraft is within 1,200 feet of your altitude and within 6 nautical miles, it will display that aircraft as a diamond on the screen in the geographic area in relation to you.

A Typical TCAS Display
Arrows Indicate Climb/Descent Direction, Numbers are 100’s of Feet From Your Current Altitude

The cool feature about TCAS is that it can also tell if the other aircraft poses a danger and shout out instructions to the pilots on what to do. If another aircraft gets much closer than those parameters, it will change to an amber circle and set off an audible alert to the pilots: “Traffic, traffic”.

Depending on the sophistication of the TCAS systems installed, it can communicate with the TCAS system in the other aircraft and coordinate collision prevention directions. In one aircraft it would tell the pilots to climb while simultaneously telling the pilots of the other aircraft to descend!

I have used this system and it works great, the only downfall is when you are flying IFR and someone in a private plane is flying up high and has no transponder turned on. Even though they are unaware they are in controlled airspace it can cause some tense moments when they just suddenly appear!

To Finish

Following set rules and procedures, instructions given by air traffic controllers, and avoidance systems like TCAS are all the primary ways many aircraft remain clear of one another.

But, no matter what a system or someone on the radio is telling a pilot, the view from the pilot’s eyes is always the last line of defense in preventing near misses or worse.

Keeping a vigil eye open for aircraft at all times, even when it is pitch black will help increase the safety margin on any flight. When pilots are out flying by themselves it is always good airmanship to give out position reports over the radio because there just might be another aircraft close by they have not seen!

Further Reading

If you found this article interesting and would like to keep reading, I highly recommend the following articles from my blog: